Chef Notes
Russell Bateman
May 2013
last update:
Chef NotesRussell Bateman |

With Chef, you can manage your servers by writing code, not by running commands; integrate tightly with your applications, databases, LDAP directories; easily configure applications that require knowledge about your entire infrastructure; and create perfect clones of QA environments, pre-production (staging) and production environments, etc.
One motivation in writing this document is that searching for information, even simple getting-started information, always seems to be heavy on the Ruby side of things with stuff like Gem. Everyone assumes Ruby/Gem competence. Many of us readily accept hacking together simple recipes in Ruby, but stop short of wanting to become Ruby programmers. It's a bit like writing Perl scripts without the added competence of CPAN.
In the very recent past (May 2013), this has gotten easier. It is two downloads. It's supposed that disparate versions of Chef can be mixed.
* Note that the Chef server install is always a download.
Overview of steps.
- Set up a Chef server.
- Set up one or more Chef clients.
- Select a development host or workstation from which to "command" Chef.
These instructions assume that a Chef server is already installed and running, and that one or more Chef clients/nodes are installed in terms of having the relevant packages as noted above.
The following configuration file, knife.rb, is used in these steps. The Chef server URL below is the one you supplied during the installation of the server.
    log_level                :debug
    log_location             STDOUT
    node_name                'jack-client'
    client_key               '/home/jack/dev/chef-repos/.chef/jack-client.pem'
    chef_server_url          'http://16.86.192.111:4000/'
    cookbook_path            "/home/jack/dev/chef-repos/cookbooks"
    cookbook_email           "[email protected]"
    cache_type               'BasicFile'
    cache_options( :path => '/home/jack/dev/chef-repos/checksums' )
Please see Creating a client. Until you get this right (running knife with no errors), do not attempt to continue.
Do these steps, except as noted, on a client...
$ knife configure client ./
This will generate client.rb and validation.pem. Edit client.rb and change log-level from "info" to "debug". (Note: you may need to adapt some filenames to the version of Chef you're setting up. See Files.)
# chef-client
Unless everything is magically perfect, this will produce numerous errors that must be fixed. Frequently, these are errors in the configuration file, client.rb, such as a failure to find the server. In my observation, Chef will not make use of anything in /etc/hosts, so hard IP addresses must be used. I don't know whether it uses DNS as my set-ups have always been using ad hoc internal ESXi VMs or scrap hardware, never formal hosts noted in DNS tables.
Sometimes it's good to edit client.rb to log_level to :debug and other times the debug output is just plain confusing and alarming. Try it both ways before deciding whether there's an error or not.
http://16.86.192.111:4040
(Note that existing recipes already used on one client can be ferretted out using knife. Just find the look-up option for knife.)
Rant: I personally find muddiness in a lot of Chef terminology, particularly between cookbooks and recipes, but maybe I'll get used to this.
These steps happen on any development host, except as noted, but not on the server or any client/node.
`— cookbooks
    `— helloworld
        `— default.rb
See Retrieving an existing cookbook,
which fetches an existing recipe known to the server's repository. Or, create
new ones.
These steps happen in the web interface and on a chef client (node).
At this point in the step-by-step process, Chef should be set up and running on a server and at least one node, as administered by your development host.
What's missing from the above?
Chef is a lot more sophisticated than to be used to associate some lame, do-nothing recipe with a node. What really needs to happen is to set up roles to accomplish this, a separate role for each kind of node to be installed, perhaps multiple roles that set up individual contributions that make one or even more types of nodes. The rest of this page has the objective of explaining that, though an Opscode course would obviously be better.
If you have myriad client/nodes, you aren't going to want to visit each one physically to 1) log in, 2) get root and 3) run chef-client every time you wish to update a node after publishing a new recipe.
Instead, you probably want to set up, as root, a cron job that awakens and checks for new recipes (i.e.: runs chef-client) every so often, for example, 5 minutes.
    # Every five minutes, run chef-client:
    */5 * * * * chef-client
To launch the cron job the first time:
$ crontab /etc/chef/chef-cron.tab
For further polishing, check into Sophisticated development host for using Chef.
In Chef terminology, a bit mixed up, a client is...
We're concerned with the last type of client. In the Chef web interface, running on the development host, do the following to create a new client:
$ knife node list
1 See also
Sophisticated development host for using Chef.
2 Note: I've had much grief trying to set up and consume a
Client in the Chef web interface that is the same as my user (in this case,
'jack'). It seems to work when I use something else, like 'jack-client' here.
3 This is the knife.rb placed usually on a path like
/home/jack/dev/chef-repos/.chef. The path to the PEM file is
indicated by client_key in knife.rb as shown
here.
This is the most brittle part of using Chef. You will almost always get:
~/dev/chef-repos/.chef $ knife node list
ERROR: Failed to authenticate to http://16.86.192.111:4000/ as app02 with key /home/jack/dev/chef-repos/.chef/jack.pem
Response:  Failed to authenticate. Ensure that your client key is valid.
This is due to
The recipe is fundament in Chef; it's what Chef is all about in terms of serving up accurately built nodes.
Chef recipes are authored in Ruby and define everything needed to configure an atomic part of a system. They can be pretty complex or very simple.
Chef recipes are stored in a cookbook. They may have interdependencies (as illustrated below). They're associated with roles. They're added to run lists that ensure order-dependence.
Important note
When you're just starting off, it appears for all the world as if documentation you read is calling what's actually a cookbook by the moniker, recipe. The relationship is this: under the cookbooks subdirectory are cookbooks. A cookbook might include only one recipe, e.g.: the Apache Tomcat cookbook has exactly one recipe on the path tomcat6/recipes/default.rb and all it does is install Tomcat 6. default.rb is the recipe file and it's called so because there's only one. If you wanted to use the cookbook to install different nodes and each node has to be a little different, such as MongoDB database nodes getting different configurations because each is a replica node, or running a configuration server, mongos, etc., then you vary the files under the recipes subdirectory accordingly—each being a different recipe within the MongoDB cookbook.
You can get cookbooks with recipes that others (like the Opscode community) have written for common things on the web, such as for installing Tomcat 6, MongoDB, apt, etc. and download (the entire contents, a directory structure of) them to your local host from which you intend to manage the Chef server and nodes. A real cookbook has a rather complex subdirectory structure. (Our "Hello World" cookbook consists only of a defaut recipe in default.rb.)
    ~/dev/chef-repos $ tree -d cookbooks
    cookbooks
    |— helloworld
    `— mongodb
        |— attributes
        |— definitions
        |— files
        |   `— default
        |— libraries
        |— recipes
        `— templates
            `— default

    13 directories
Once you have your cookbooks in this structure, you can "knife-up" cookbooks at will.
    ~/dev/chef-repos $ knife cookbook upload --all
    Uploading apt            [2.0.0]
    Uploading helloworld     [0.0.0]
    Uploading mongodb        [0.11.0]
    Uploaded all cookbooks.
As it turns out, the MongoDB recipes require the advanced packaging tool for installation and, therefore, depend on a second recipe for that, shown here, but not shown in the previous directory tree listing. If the recipes of a cookbok you're trying to upload depend on another, you'll get a slightly cryptic message such as:
    ~/dev/chef-repos $ knife cookbook upload mongodb
    Uploading mongodb        [0.11.0]
    ERROR: Chef::Exceptions::CookbookNotFoundInRepo: Cannot find a cookbook named apt; did you forget to add metadata\
           to a cookbook? (http://wiki.opscode.com/display/chef/Metadata)
Here, I deleted my "Hello World" recipe because I don't need it anymore. It is not, however, deleted from my cookbook subdirectory.
    ~/dev/chef-repos $ knife cookbook delete helloworld
    Which version(s) do you want to delete?
    1. helloworld 1.0.1
    2. helloworld 0.0.1
    3. helloworld 0.0.0
    4. All versions

    4
    Deleted cookbook[helloworld][1.0.1]
    Deleted cookbook[helloworld][0.0.1]
    Deleted cookbook[helloworld][0.0.0]
So, any time I wish to restore the "Hello World" recipe, it's easy. (My copy didn't have version information and now there's only one version on the Chef server.)
    ~/dev/chef-repos $ knife cookbook upload helloworld
    Uploading helloworld     [0.0.0]
    Uploaded 1 cookbook.
Finally, after adding a cookbook for Tomcat 6, not previously shown, I list the recipes my Chef server has:
    ~/dev/chef-repos $ knife cookbook list
      apt          2.0.0
      helloworld   0.0.0
      mongodb      0.11.0
      tomcat6      0.5.4
Cookbooks are managed (or can be) from an independent development host (rather than the Chef server or a client node).
Cookbooks and recipes are written in Ruby; filenames will end in .rb.
Let's imagine that a cookbook recipe already exists and is in use for one or more nodes. You've just taken over maintenance of your group's Chef installation and you want to use that recipe for another node that's not using it. To fetch an existing recipe down to your development host, do this:
http://16.86.192.111:4040
The Chef server is not really a server at all. It doesn't do anything except publish. It stores data about nodes, roles, and user-provided data that's retrieved via essentially API calls. It provides a search API too.
The term "Chef client" does not refer to a workstation or development host from which Chef is administered, however, the terminology in use is somewhat wishy-washy between the two. That ambiguity is felt in this document, but I try to refer to refer to "node" or "client/node".
Every time a Chef client runs, typically on one of the managed nodes, the following occurs:
The Chef node is a Ruby object that represents the host (or machine) that's being configured. It has attributes and a run list. The object is rebuilt every time the Chef client is run, merging input from the local host, the Chef API and attributes and run lists from roles.
Ruby can use .yml files to build .json files, but I haven't enough Ruby experience yet to do that.
So far, in my experience, I have not created .ymp files. Instead, I have .json files that look like the one below listing a name and a run list containing recipes and roles. What's interesting in this example is how I'm able to use a node file (level 2 in terms of precedence—above attribute files, but below the Chef environment and the role file) to specify what port to use for MongoDB.
    {
        "normal": { "mongodb" : { "replicanode" : { "port" : 37017 } } },
        "name": "acme-dev-db04",
        "override": { },
        "default": { },
        "json_class": "Chef::Node",
        "automatic": { },
        "run_list":
        [
            "recipe[apt]",
            "recipe[mongodb::replica]",
            "role[install_database_node]",
            role[install_replica_node]"
        ],
        "chef_type": "node"
    }
"Normal", "default" and "override" information can be overridden in this manner as if accomplished in an attributes files, the way much information is supplied. Note that in JSON, strings are used and, when spelled identially, will be brought into Ruby as symbols. Thus, what I've done, highlighted above, is equivalent to doing this in attributes/default.rb:
default[ :mongodb ][ :replicanode ][ :port ] = 37017
This way, I only need one role file and not a role file per node:
    # =====================================================
    # This will erect the first, second, third, etc. node
    # of a replica set because the port number for MongoDB
    # to use is specified in each node.
    # =====================================================
    name "install_replica_node"
    description "Role for managing MongoDB database nodes"

    for_database_servers = %w{
	    recipe[apt]
	    recipe[mongodb]
	    recipe[mongodb::replica]
    }

    run_list for_database_servers
For completeness of the solution, here's the recipe instruction to create the configuration file...
    template "/data/mongodb/mongodb.conf" do
      source "replica-mongodb.conf.erb"
      owner mongodb
      group mongodb
      mode 00755           # -rwxr-xr-x
    end
...and the contents of the .erb file:
    # /data/mongodb/mongodb.conf
    port=<%= node[ :mongodb ][ :replicanode ][ :port ] %>
    replSet=<%= node[ :mongodb ][ :replset ][ :name ] %>
    dbpath=/data/mongodb
    logpath=/data/mongodb/mongodb.log
    fork=true
    logappend=true
Beware that Chef will not work if /etc/hosts doesn't have the name of the node spelled identically to how it appears in Chef, that is, in the server web UI. The error that occurs will lead you to believe that the node's client.pem or something else is invalid.
It's crucially important for Chef programmers to understand the anatomy of a Chef client run. This is usefully documented here: About the chef-client Run, with a superb diagram and a list of stages.
Cookbooks contain data including recipes, attributes and more. They are requested from the Chef server where they reside.
Note: There is no direct relationship or dependency between roles and cookbooks. Cookbooks are collections of recipes; those recipes may be used by any role. Multiple cookbook subdirectories (in knife.rb) is being deprecated by Chef because it requires more maintenance and is confusing.
An unnecessary, but hugely convenient way to simulate real-world of development concerns is to divide Chef use into separate environments. The _default environment can be the only one, but you can also add, as have I, separate environments for production, staging, a developer sandbox, etc. because eventually I'll problem not install my tenant spaces the same way between them.
Chef environments are most obvious in the Chef server web interface. There are many ways to create them; see Create Environments.
The Chef web interface is reached via any browser anywhere and served up by the Chef server. Most or all of what can be seen or done in it can be seen or done at the knife command line.
Don't use this interface other than to observe state (and get private keys, etc.) The disadvantage of using the management console for editing much of anything is that whatever you do will probably not be reflected in your local version control system unless you then also download them from the server.
Client nodes that are being configured (by executing chef-client) and the Chef server must be in close synchronization. A drift longer than 15 minutes will result in chef-client erroring out.
The best way to prevent this is to install NTP on the Chef server host and all client nodes.
Note that sometimes Chef will complain of drift when there isn't any or drift that you fix, but that, once fixed, does not correct the problem.
Once, I bounced a client node and, when it came back up, it was running on its hardware clock time. I waited, but it didn't correct itself. I became impatient and hand-corrected it, but that didn't clear the error: Chef still complained and refused to carry out the update. It was late Friday afternoon.
When I came back in on Monday, I was able to run chef-client. My conclusion is that patience is required. NTP probably didn't update something Chef was looking at until later.
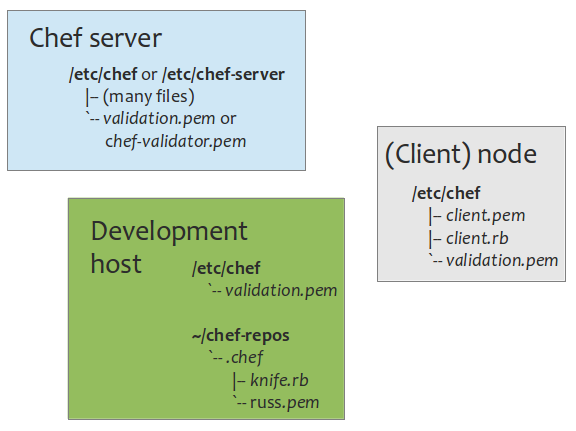
Files on the workstation or development host that will be used to administer Chef:
A Chef repository is a folder on this workstation from which the Chef infrastructure is managed (administrated). Typically, a repository is created on a path like /home/username/dev/chef-repos and configuration subdirectory, .chef, is created under there.
The development (or Chef administration) host has an open-ended list of subdirectories and files on it. Above are just the ones that are basic. All of the definitions of nodes, roles, cookbooks/recipes, etc. are in subdirectories too. These are discussed in separate sections elsewhere on this page (under nodes, roles, etc.).
Files on the chef-client node:
    /etc/chef
    |— client.pem
    |— client.rb
    `— validation.pem
Specifically, ...
    log_level        :debug
    log_location     STDOUT
    chef_server_url  'http://16.86.192.111:4000'
    validation_client_name 'chef-validator'
These files are created using knife in a step-by-step process described elsewhere in this document:
$ knife configure client ./
...on a workstation or development host, then copied to the chef-client node.
/var/chef is where the Chef client/node keeps its cache files. /opt/chef is where the Chef executables are kept.
You should keep a cron tab file on /etc/chef for use in launching a cron job to run chef-client periodically. See Polishing the installation. This file is not named or listed here because it's not part of Chef, but part of what you might do to improve your mileage.
Files on the chef-server host path /etc/chef (Chef version < 11):
Beginning in Chef version 11, these files are de rigueur:
/var/lib/chef is where the Chef server keeps its working files. There is no /opt/chef subdirectory.
* By default, this file isn't created when chef-server-ctl reconfigure is run. Docs imply that it is created, but it doesn't right off and need not as long as the default configuration is acceptable.
The data bag is a way, like attributes, to communicate data. It's more flexible than attributes in that it can be encrypted and is therefore useful for conveying passwords, keys and other senstive data to Chef during the run.
What to store in a data bag versus what to store in attributes, according to Draco Ater:
Attributes:
Data bags:
Data bags are global and must be "named". Installing a data bag can be done "from file" with the file living in the default location, i.e.: data_bags. But, this cannot be arbitrarily hierarchical—one subdirectory of depth only. Please see About Data Bags.
$ knife data bag from file [subdirectory] mydatabag.json
For example, ...
    data_bags
        admins
            charlie.json
but not
    data_bags
        admins
            another-subdirectory
                charlie.json
Chef doesn't support putting one data bag in another.
From the Chef recipe, data_bag() and data_bag_item() are methods to fetch data bags. The following follows closely something Daniel DeLeto said in an answer in the Chef forum.
The way that data_bag[_item] works in recipes can be confusing. It's a very thin wrapper over the actual server ReST API for data bags.
In general, the ReST API serves content in a way very similar to how a basic (HTML) web site works. Whenever you do a GET from a container URL (e.g., /nodes, but not /nodes/specific-node), the API returns a list of the items and their URLs. To get the actual content of an item, you need to follow that item's URL. (Note that this aspect of the Chef API design is called HATEOAS).
Assume charlie.json contains
{
    "id" : "charlie",
    "login" : "chuck",
    "password" : "Test123"
    "shell" : "bash"
    "uid" : 1003
    "gid" : "ops"
}
Data bags are just user-definable containers, so when you list them via the API, you get a list of the IDs and their URLs back. Since the data_bag() method is just a thin wrapper over the API:
    x = data_bag :admins
    # => [ "charlie" ]
you have to call data_bag_item() on each one in order to load the actual item:
    x = data_bag_item( :admin, "charlie" )
    # => data_bag_item[ "admins", "charlie", { "id" => "charlie", "shell" => "bash", etc. # (more stuff)
In practice most people use the search functionality (method) to load everything in a data bag via a single call when they want to do something with all of the items. chef-solo differs from chef-client in that it loads every item when you use data_bag() in a recipe. This is for practical reasons, because chef-solo doesn't have search,
Per DeLeto, search() is what traditional, Chef client-Chef server implementations use (mine). search() returns a Ruby hash (hashmap).
    charlies_bag = search( :admins, "id:charlie" )          # returns the whole bag as a hash
		charlies_id  = search( :admins, "id:charlie" ).first    # returns just chuck's id
		charlies_bag[ :uid ]                                    # chuck's user id
		# => 1003
The resource collection is a list of resources that must be used to configure the node. This includes the results of evaluating recipes and attributes. Once resource collections are compiled, the required actions are taken by the providers and the node is saved back to the server where it's indexed for searching.
A role is a way to define certain patterns and processes that exist across nodes as a single job function. A role consists of zero or more attributes and a run list. Each node can have zero or more roles assigned to it. Roles are unversioned.
Role Cookbooks and Wrapper Cookbooks
Roles can be as super-granular as "application-node" or "database-node" or, identifying common components between the needs of two nodes, for example, more granular like a "common-base" or "base-client" with a more modest collection of recipes associated with it that more than one type of node will need. Then, the node will have more than one role associated with it.
Remember (or note for the first time) that recipes are held in cookbooks.
In the roles subdirectory on the development (administering) host might be a file like:
    name "application-host"
    description "The cookbooks for the application-host role"

    for_application_servers = %w
    {
        recipe[chef-repos::apt]
        recipe[chef-repos::tomcat6]
    }

    run_list for_application_servers
This associates (potentially) all the recipes the role uses in performing its job creating an application server node's run list.
Roles are often the glue that makes a recipe work on a node. Please see the a discussion of the relationship between node and role files here.
Instead of setting (or, by way of polishing the process later), a sophisticated approach replaces the development host client with Git and Jenkins thus:
Obviously, the Git repository must be carefully thought out, perhaps with master being considered extremely sacred since pushing there won't just break a build, but one or more servers running live product.
Here is a tutorial on Chef Solo: http://www.youtube.com/watch?v=1G6bd4b91RU.
Chef Solo is where you don't necessarily install a server. Instead, you develop and test-deploy your recipes to your local development host. Later, you can use those recipes on any Chef server. On the Chef server, you invoke the chef-solo command and the server runs the recipes on all the nodes specified.
These are sort of pointed illustrations of the effect that knife commands can have on what's seen in the web interface.
Before a new node has anything associated with it, it appears as here. This is a node with nothing...
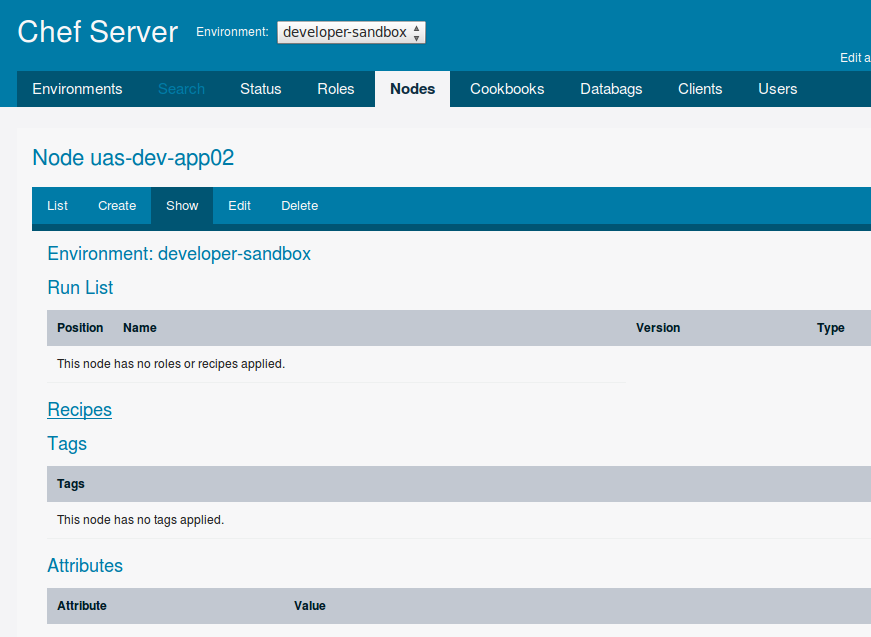
...as compared to this node which has something on it:
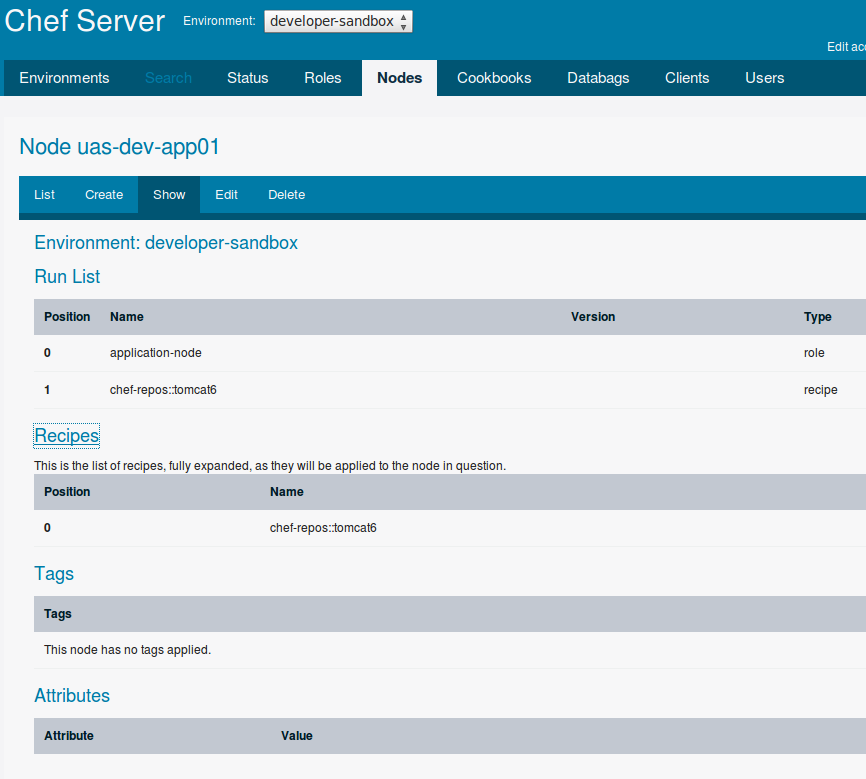
The commands issued were these. A role and a recipe were associated with this node as seen in the image above under "Run List" and "Recipes".
    ~/dev/chef-repos $ knife node run_list add acme-dev-app01 'role[application-node]'
    run_list:  [role[application-node]]
    ~/dev/chef-repos $ knife node run_list add acme-dev-app01 'recipe[chef-repos::tomcat6]'
    run_list:
        role[application-node]
        recipe[chef-repos::tomcat6]
Here's "role from file".
    ~/dev/chef-repos $ knife role from file application-node.rb
    Updated Role application-app!
    ~/dev/chef-repos $ knife role from file database-node.rb
    Updated Role database-app!
    name "application-app"
    description "Role for managing Tomcat application nodes"

    for_application_servers = %w{
	    recipe[chef-repos::tomcat6]
    }

    run_list for_application_servers
(Beware: stuff in Ruby like %w does not allow the use of a sane, Allman syntax.)
I see no effect in the web interface after doing the above.
For what they're worth, these illustrations don't match the on-going and expanding notes on this page (except maybe at one, early point). They're here just to orient and your mileage using them may vary.
(Client) nodes serviced by the Chef server...

Users...
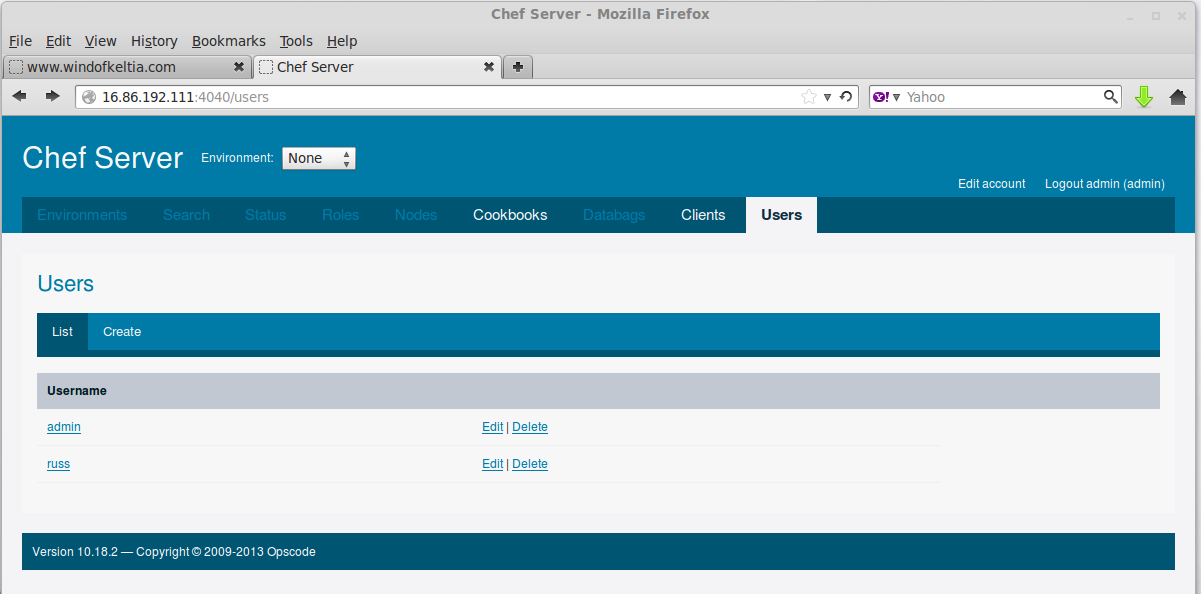
Clients...
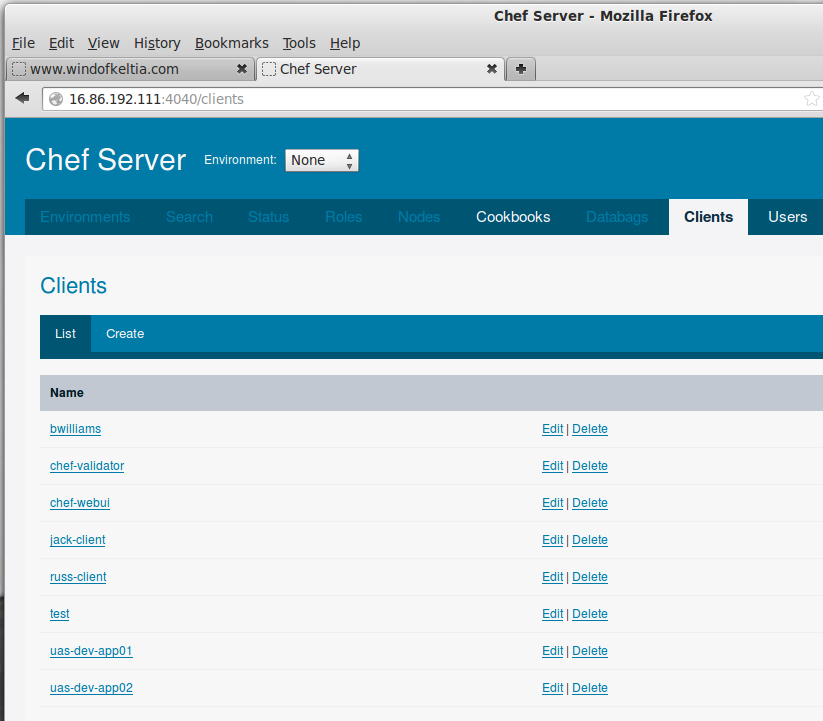
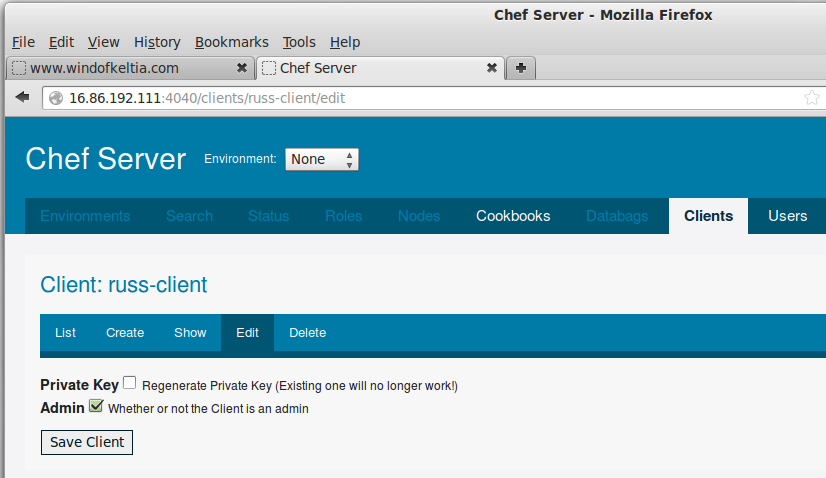
Lost client's private key? Here's how to get a new one: Just click Edit, then Regenerate Private Key.
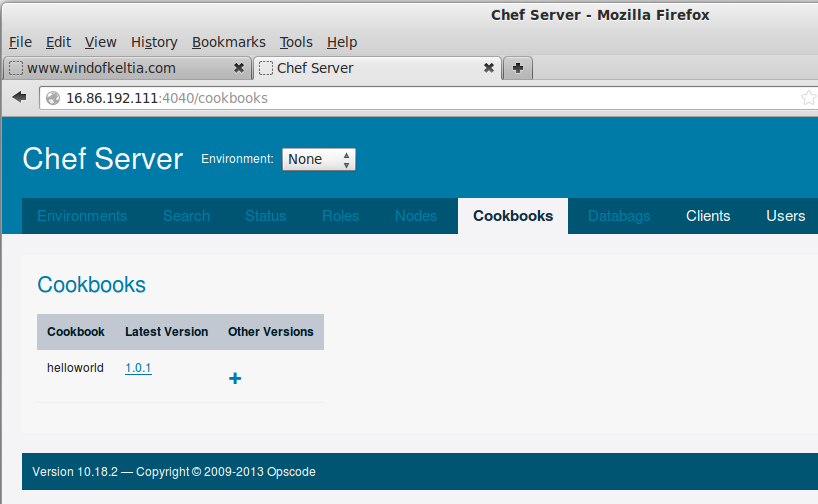
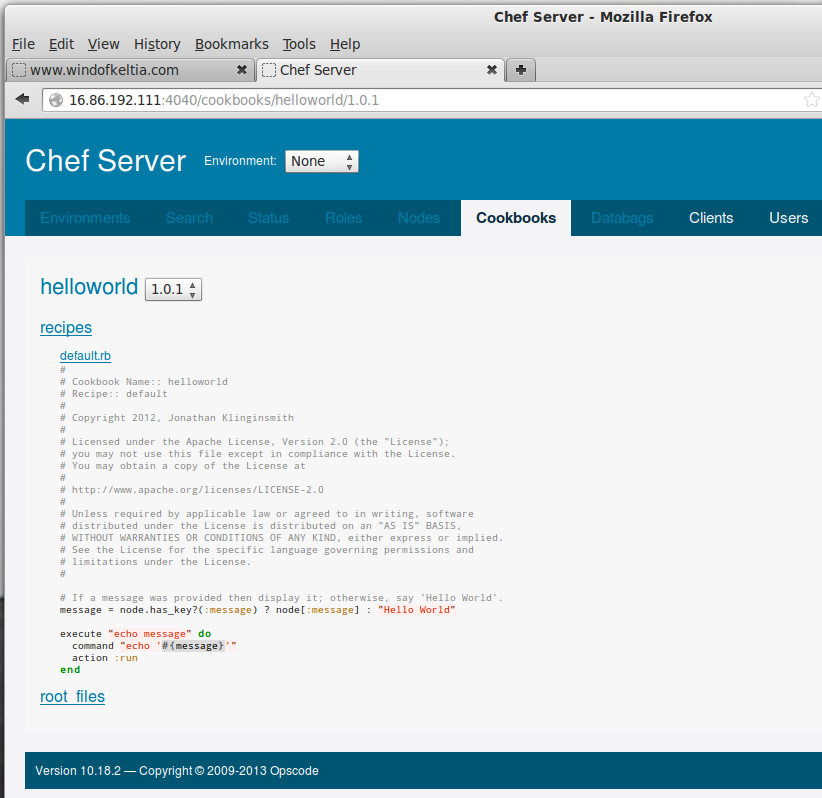
Cookbook list: there's only one here.
Clicked helloworld cookbook:
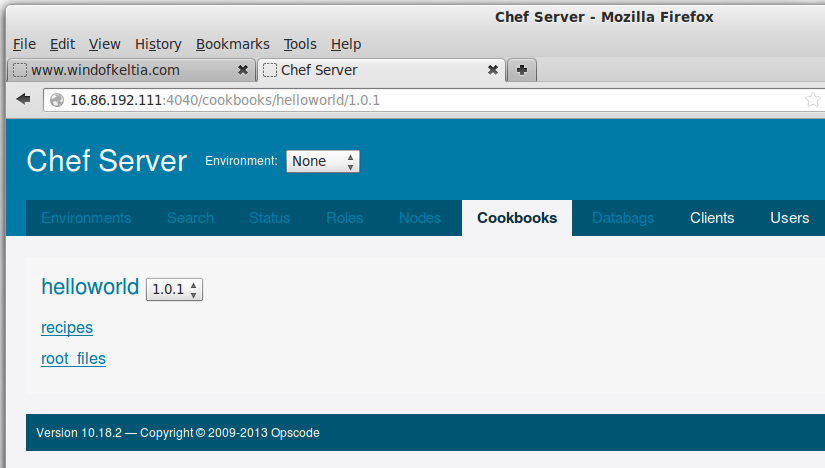
Examine recipes:
root@acme-dev-app01:/etc/chef# chef-client
[2013-06-26T16:32:17-06:00] INFO: *** Chef 10.18.1 ***
[2013-06-26T16:32:17-06:00] INFO: [inet6] no default interface, picking the first ipaddress
[2013-06-26T16:32:17-06:00] INFO: Run List is [recipe[tomcat6], role[application-node]]
[2013-06-26T16:32:17-06:00] INFO: Run List expands to [tomcat6]
[2013-06-26T16:32:17-06:00] INFO: HTTP Request Returned 404 Not Found: No routes match the request: /reports/nodes/acme-dev-app01/runs
[2013-06-26T16:32:17-06:00] INFO: Starting Chef Run for acme-dev-app01
[2013-06-26T16:32:17-06:00] INFO: Running start handlers
[2013-06-26T16:32:17-06:00] INFO: Start handlers complete.
[2013-06-26T16:32:17-06:00] INFO: Loading cookbooks [tomcat6]
[2013-06-26T16:32:17-06:00] INFO: Storing updated cookbooks/tomcat6/recipes/default.rb in the cache.
[2013-06-26T16:32:17-06:00] INFO: Processing execute[mkdir] action run (tomcat6::default line 27)
[2013-06-26T16:32:17-06:00] INFO: execute[mkdir] ran successfully
[2013-06-26T16:32:17-06:00] INFO: Processing cookbook_file[/usr/share/tomcat6//apache-tomcat-6.0.37.tar.gz] action create (tomcat6::default line 33)
[2013-06-26T16:32:18-06:00] INFO: cookbook_file[/usr/share/tomcat6//apache-tomcat-6.0.37.tar.gz] mode changed to 644
[2013-06-26T16:32:18-06:00] INFO: cookbook_file[/usr/share/tomcat6//apache-tomcat-6.0.37.tar.gz] created file /usr/share/tomcat6//apache-tomcat-6.0.37.tar.gz
[2013-06-26T16:32:18-06:00] INFO: Processing execute[tar] action run (tomcat6::default line 39)
apache-tomcat-6.0.37/bin/catalina.sh
apache-tomcat-6.0.37/bin/digest.sh
apache-tomcat-6.0.37/bin/setclasspath.sh
apache-tomcat-6.0.37/bin/shutdown.sh
.
.
.
apache-tomcat-6.0.37/webapps/manager/images/fix.gif
apache-tomcat-6.0.37/webapps/manager/images/tomcat.gif
apache-tomcat-6.0.37/webapps/manager/images/update.gif
apache-tomcat-6.0.37/webapps/manager/images/void.gif
apache-tomcat-6.0.37/webapps/manager/status.xsd
apache-tomcat-6.0.37/webapps/manager/xform.xsl
[2013-06-26T16:32:18-06:00] INFO: execute[tar] ran successfully
[2013-06-26T16:32:18-06:00] INFO: Processing execute[rm] action run (tomcat6::default line 45)
[2013-06-26T16:32:18-06:00] INFO: execute[rm] ran successfully
[2013-06-26T16:32:18-06:00] INFO: Processing template[/usr/share/tomcat6//apache-tomcat-6.0.37/conf/context.xml] action create (tomcat6::default line 51)
[2013-06-26T16:32:18-06:00] INFO: template[/usr/share/tomcat6//apache-tomcat-6.0.37/conf/context.xml] backed up to /var/chef/backup/usr/share/tomc...
[2013-06-26T16:32:18-06:00] INFO: template[/usr/share/tomcat6//apache-tomcat-6.0.37/conf/context.xml] updated content
[2013-06-26T16:32:18-06:00] INFO: template[/usr/share/tomcat6//apache-tomcat-6.0.37/conf/context.xml] owner changed to 0
[2013-06-26T16:32:18-06:00] INFO: template[/usr/share/tomcat6//apache-tomcat-6.0.37/conf/context.xml] group changed to 0
[2013-06-26T16:32:18-06:00] INFO: template[/usr/share/tomcat6//apache-tomcat-6.0.37/conf/context.xml] mode changed to 644
[2013-06-26T16:32:18-06:00] INFO: Processing template[/usr/share/tomcat6//apache-tomcat-6.0.37/conf/server.xml] action create (tomcat6::default line 57)
[2013-06-26T16:32:19-06:00] INFO: template[/usr/share/tomcat6//apache-tomcat-6.0.37/conf/server.xml] backed up to /var/chef/backup/usr/share/tomc...
[2013-06-26T16:32:19-06:00] INFO: template[/usr/share/tomcat6//apache-tomcat-6.0.37/conf/server.xml] updated content
[2013-06-26T16:32:19-06:00] INFO: template[/usr/share/tomcat6//apache-tomcat-6.0.37/conf/server.xml] owner changed to 0
[2013-06-26T16:32:19-06:00] INFO: template[/usr/share/tomcat6//apache-tomcat-6.0.37/conf/server.xml] group changed to 0
[2013-06-26T16:32:19-06:00] INFO: template[/usr/share/tomcat6//apache-tomcat-6.0.37/conf/server.xml] mode changed to 644
[2013-06-26T16:32:19-06:00] INFO: Chef Run complete in 1.392388888 seconds
[2013-06-26T16:32:19-06:00] INFO: Removing cookbooks/tomcat6/libraries/tomcat_manager.rb from the cache; it is no longer needed by chef-client.
[2013-06-26T16:32:19-06:00] INFO: Removing cookbooks/tomcat6/libraries/tomcat.rb from the cache; it is no longer needed by chef-client.
[2013-06-26T16:32:19-06:00] INFO: Removing cookbooks/tomcat6/metadata.json from the cache; it is no longer needed by chef-client.
[2013-06-26T16:32:19-06:00] INFO: Removing cookbooks/tomcat6/definitions/tomcat_app.rb from the cache; it is no longer needed by chef-client.
[2013-06-26T16:32:19-06:00] INFO: Running report handlers
[2013-06-26T16:32:19-06:00] INFO: Report handlers complete
This appeared to work. What did it do? It disembowled the Tomcat tarball in files/default/apache-tomcat-6.0.37.tar.gz over the top of what was there already. This is a bit messy, but we're behind a firewall. I need to investigate how better to do this. The recipe is, however, very simple and easy to understand.
Here's how to create a configuration or other file from Chef. This is basically coping a file.
    # Template to edit the memcached.conf file...
    template "/etc/memcached.conf" do
      source "memcached.conf.erb"
      mode   "0644"
      owner  "root"
      group  "root"
    end
Under the templates subdirectory, there's memcached.conf.erb that's the contents (or subcontents?) of the file to be created (or edited?) on path /etc/memcached.conf. It uses this file to create the target one. Down inside this file might be something like:
-l <%= node[:ipaddress] %>
This is a variable that's filled in by Chef at deployment. When you issue chef-client from any node, it's going to talk to the Chef server, cough up its IP address, and Chef will use this value in there. That is, in this case. Obviously other variables could exist.
Insert <%= :gobbledeegoop %> here!
Other variables may be specified in data bags.
    chef-repos
    |— cookbooks
    |— databags
    |  `—application-node-bags.json (contains: { “gobbledeegoop” : “Bouger all” } )
    |— nodes
    `— roles
Here's how to use the advanced packaging tool (apt-get) to install something.
    # Installing fun-software...
    package "fun-software" do
      action :install
    end
Here's how to copy a file from the recipe's files subdirectory to its final resting place and install it using the Debian package manager:
    # Copy the Debian package to /tmp...
    cookbook_file "/tmp/xyz.deb" do
        source "xyz.deb"                  # xyz.deb must be at files/default
        mode   "0644"
        owner  "root"
        group  "root"
    end

    # Install the Debian package...
    dpkg_package "xyz" do
        source "/tmp/xyz.deb"
        action :install
    end
The commands I used as I edited, updated and ran (lather, rinse, repeat) through this were as follows. The delete step is probably unnecessary, but I was making sure.
On my development host...
    ~/dev/chef-repos $ knife cookbook delete xyz
    Do you really want to delete xyz version 1.0.0? (Y/N) y
    Deleted cookbook[xyz version 1.0.0]
    ~/dev/chef-repos $ knife cookbook upload xyz
    Uploading xyz     [1.0.0]
    Uploaded 1 cookbook.
    ~/dev/chef-repos $ knife node from file acme-dev-app01.json
    Updated Node acme-dev-app01!
On the node running the Chef client...
    root@acme-dev-app01:/etc/chef# chef-client
    (lots of output...)
    root@acme-dev-app01:/etc/chef# ll /tmp
    total 7396
    drwxrwxrwt  7 root    root       4096 Jun 27 17:14 ./
    drwxr-xr-x 23 root    root       4096 Jun 14 06:48 ../
    -rw-r--r--  1 root    root    7544562 Jun 27 17:14 xyz.deb
    drwxr-xr-x  2 root    root       4096 Jun 27 17:14 hsperfdata_root/
    drwxr-xr-x  2 tomcat6 tomcat6    4096 Jun 17 04:30 hsperfdata_tomcat6/
    drwxr-xr-x  2 tomcat6 root       4096 Jun 17 04:30 tomcat6-tomcat6-tmp/
    drwx------  2 root    root       4096 Jun 17 09:46 vmware-root/
    root@acme-dev-app01:/etc/chef# dpkg --list | grep xyz
    ii  xyz                       1.00.141                        XYZ is fun
    root@acme-dev-app01:/etc/chef# ll /var/lib/tomcat6/webapps
    total 11808
    drwxrwxr-x 5 tomcat6 tomcat6    4096 Jun 27 17:14 ./
    drwxr-xr-x 6 root    root       4096 Mar 27 10:31 ../
    drwxr-xr-x 5 tomcat6 tomcat6    4096 Jun 27 17:14 xyz/
    -rw-r--r-- 1 russ    russ    7572973 Jun 27 16:37 xyz.war
    drwxr-xr-x 3 tomcat6 tomcat6    4096 Mar 27 10:31 ROOT/
Here's a scape of a question-and-answer thread in the Chef forum. There were two responders.
I've installed a Chef server by downloading/curling a package from opscode.com. I've installed Chef clients by downloading a Debian package from the same page, copying and installing it on a number of VMs. I'm pleased by the relative success I'm achieving in using Chef.
I'm pretty sure that what I'm doing is not what's called Chef Solo, which as I understand it, is using opscode somehow in place of managing my own Chef server.
Chef-solo is a mix of chef-client and chef-server, and allows you to run Chef recipes without needing to connect to a chef-server. It gives you a fully and completely self-contained implementation of a simplified system.
In About the chef-client Run, I see something called Ohai, and I've heard it referenced in this group forum, read about it in references in documentation here and there. I don't have /etc/chef/ohai_plugins yet. Etc.
Ohai is used to discover what is installed on a machine and how it is configured. Puppet has a similar tool called "facter". These kinds of tools can be useful in their own right, although they are a critical component of systems like Chef and Puppet.
See http://docs.opscode.com/ohai.html for more information.
It is there, but I wouldn't use the word "just" in connection with Ohai. It is a vital component of Chef.
If I recall correctly, it is maintained separate from the rest of the Chef codebase, in part so that upgrades and changes can be made to Ohai that do not require you to update the entire chef-client system.
Running Ohai is the first thing done as part of a chef-client or chef-solo run, so there is no escaping it. Like it or not, if you're using chef-client or chef-solo, then you're using Ohai. Consider yourself lucky, because Ohai ends up having to do some pretty whacky and wild things in order to get all the information it does.
Ohai is a thing that profiles your system—what OS/distro are you on, are you on a cloud, what does your networking look like, etc. Chef uses it as a library, but it can also be used as a standalone application. And it can be used outside of Chef in any situation where you need to know those kinds of things about a system.
You can run Ohai directly by (I believe this is the right path) /opt/chef/embedded/bin/ohai and see the data it finds about your system.
—actually, the path on my Chef client nodes is /usr/bin/ohai. This produces tremendous quantities of data, some 3000 lines of it.
|
|
||||||||||||||||||||||||||||||||||||||||||||||||||||||||||||||||||||||||||||||||||||||||||||||||||||||||||||||||||||||||||||||||||||||||||||||||||||||||||||||||||||