
Linux and Other Notes
Russell Bateman
December 2005
last update:
 |
Linux and Other NotesRussell Bateman |
|
See notes for Debian, Ubuntu and Unity here.
|
$ uname -a $ cat /etc/issue $ cat /etc/os-release $ cat /etc/lsb-release $ cat /etc/upstream-release/lsb-release |
This is unlikely, but it happens. I was writing a utility to ascertain certain aspects of sshd then give advice about its findings. In the process of deleting temporary files, I accidentally deleted /usr/sbin/sshd itself which gave me no end to trouble as I casually attempted to get along without it (used Quest’s ssh, etc.).
I broke down and tried to impose my original RPM installation, but by a stroke of mind-shattering bizarreness, the one from my original, read-only DVD was bad. So, I found another copy (at rpm.pbone.net) and down-loaded it. Then, I used the following command to reinstall it:
taliesin:/> rpm -Uvh /tmp/openssh-4.4p1-24.i586.rpm
Along the lines of Linux rpm is the Solaris package manager. I have had to use this in writing a super-duper installation script that covers all platforms.
For example, a site-license installation on a Sun box...
	russ@taliesin:~> pkginfo | grep vasclnt
	application vasclnts             VAS Client (site)
And the others...
1. Search for desired software on Google or directly at sourceforge.net, go to the link on source forge and download the tarball into /tmp. The example we’ll use here is vifm.
2. Go to /tmp and decompress the tarball into a simple archive:
	russ@taliesin:~> cd /tmp
	russ@taliesin:/tmp> gunzip -d vifm-0.3a.tar.gz
3. Extract the archive:
russ@taliesin:/tmp> tar -xf vifm-0.3a.tar
4. Go down into the directory and build it:
	russ@taliesin:/tmp> cd vifm-0.3a
	russ@taliesin:/tmp/vifm-0.3a> ./configure
	russ@taliesin:/tmp/vifm-0.3a> make
5. Go down into the src directory and run it to ensure that it works.
6. If good, go back up one level and do a make install:
russ@taliesin:/tmp/vifm-0.3a> sudo make install
The configuration file is on the path /etc/syslog-ng/syslog-ng.conf. The path to syslog’s output, on SuSE 10 at least, is /var/log/messages. Use the following command to be able to watch it grow at the end:
russ@taliesin:~> tail -f /var/log/messages
Sample entry lines in the SuSE 10, new-generation syslog, as used by VAS:
	source s_vas { unix_stream("dev/log"); internal(); }
	destination d_russvas { file("/home/russ/vas.$WEEKDAY.$HOUR.$MIN"); }
	filter f_vasauth { facility(auth, authpriv); }
	log { source(s_sys); filter(f_vasauth); destination(d_russvas); }
I don’t know if the above would work. Here is what I really have in my /etc/syslog-ng/syslog-ng.conf file:
	...
	filter f_daemon         { level(debug) and facility(daemon); };
	...
	destination daemondebug { file("/var/log/daemon.debug"); };
	log                     { source(src); filter(f_daemon); destination(daemondebug); };
The system log, /var/log/messages, can grow quite large. Delete it, and touch it to start over.
	rm /var/log/messages
	touch /var/log/messages
	rm /var/log/daemon.debug
	touch /var/log/daemon.debug
	/etc/init.d/syslog restart
Once any change to any of this is made, syslog must be restarted:
libroken.a means “broken” and contains all the pseudo-standard stuff missing from the build on any given platform. For example, if GNU stuff getargs and arg_printusage aren’t on the platform, this library supplies them.
Find and stop the ssh dæmon or restart it...
	russ@taliesin:~> ps -ef | grep sshd
	russ@taliesin:~> /etc/init.d/sshd stop
	russ@taliesin:~> /etc/init.d/syslog restart
On HP-UX and AIX, this works differently...
	russ@taliesin:~> /sbin/init.d/sshd stop          # (HP=UX)
	russ@taliesin:~> /etc/rc.d/init.d/ssh restart    # (AIX)
ps options are’t exactly uniform from Linux to UNIX to other Unix. Here’s how it can be solved:
	int is_daemon_running( const char *daemon_name )
	{
	   char ps_command[ 128 ], buffer[ 256 ];

	   /* create ps command for the host platform in 'ps_command'... */
	   cnt = asprintf( &ps_command,

	#if defined( SOLARIS )
	                  "ps -e -o comm | grep [%c]%s"
	#elif defined( DARWIN )
	                  "ps -ax | grep [%c]%s\\\\\\>"
	#else
	                  "ps -e | grep [%c]%s"
	#endif

	                , daemon_name, daemon_name + 1 );

	   if( ( fp = popen( command, "r" ) ) )
	      return errno;

	   while( fgets( buffer, sizeof( buffer ), fp ) )
	   {
	      if( strstr( daemon_name, buffer ) == 0 )
	         return TRUE;
	   }
	   ...
	}
Which libraries does binary sshd link?
russ@taliesin:~> ldd `which sshd`
If you get...
russ@taliesin:~> ldd: missing file arguments
It’s certain that there is no sshd on any of your search paths.
Using the tail of a long, dynamic file (like /var/log/messages):
russ@taliesin:~> tail -f file
...to put yourself into a state in which every directory or file you create will have, by default, certain privileges although the privileges are slightly different depending on whether a file or a directory for the same umask setting. For the bits, 0 gives you the most rights, rwx for a directory and rw- for a file; 1 gives you rwx for a directory and rw- for a file; 2 gives you r-x and r-- for a file; last, 3 gives you r-- only. For example, ...
	russ@taliesin:~> umask 0
	russ@taliesin:~> touch poop
	russ@taliesin:~> mkdir poop.d
	russ@taliesin:~> ls -l
	-rw-rw-rw-  1 russ users   0 2006-11-01 09:35 poop
	drwxrwxrwx  2 russ users  48 2006-11-01 09:35 poop.d
	russ@taliesin:~> rm poop ; rmdir poop.d

	russ@taliesin:~> umask 0011
	russ@taliesin:~> touch poop
	russ@taliesin:~> mkdir poop.d
	russ@taliesin:~> ls -l
	-rw-rw-rw-  1 russ users   0 2006-11-01 09:35 poop
	drwxrw-rw-  2 russ users  48 2006-11-01 09:35 poop.d
	russ@taliesin:~> rm poop ; rmdir poop.d

	russ@taliesin:~> umask 0022
	russ@taliesin:~> touch poop
	russ@taliesin:~> mkdir poop.d
	russ@taliesin:~> ls -l
	-rw-r--r--  1 russ users   0 2006-11-01 09:29 poop
	drwxr-xr-x  2 russ users  48 2006-11-01 09:29 poop.d
	russ@taliesin:~> rm poop ; rmdir poop.d

	russ@taliesin:~> umask 0033
	russ@taliesin:~> touch poop
	russ@taliesin:~> mkdir poop.d
	russ@taliesin:~> ls -l
	-rw-r--r--  1 russ users   0 2006-11-01 09:35 poop
	drwxr--r--  2 russ users  48 2006-11-01 09:35 poop.d
	russ@taliesin:~> rm poop ; rmdir poop.d

	russ@taliesin:~> umask 0133
	russ@taliesin:~> touch poop
	russ@taliesin:~> mkdir poop.d
	russ@taliesin:~> ls -l
	-rw-r--r--  1 russ users   0 2006-11-01 09:35 poop
	drw-r--r--  2 russ users  48 2006-11-01 09:35 poop.d
	russ@taliesin:~> rm poop ; rmdir poop.d
The usual umask when creating massive numbers of directories (such as for a package installation) is 0022.
Use sudo to get root for while to do useful stuff. This is very useful now that contemporary wisdom has emasculated the root user in order to protect Unix/Linux hosts. In order to function as root, one must be a member of the sudoers club.
$ sudo bash
This runs bash as the root user until you kill the session. If you only wish to issue one command, do that instead of bash.
russ@taliesin:~> sudo make
The password asked for is your own and it won't work unless you're a member of the club.
It's possible to screw sudo up so that no one can use it. This is very bad as there's no longer anyway to administer the host. The solution to this is varied and often platform-specific. Here's how to fix it on Ubuntu and Ubuntu server.
Command sux is a wrapper around su that transfers X credentials. This is useful for running GUI apps as root.
russ@taliesin:~> sux /usr/ConsoleOne/bin/ConsoleOne
The find command, an example:
	russ@taliesin:~> find . -name '*.c' -print
	russ@taliesin:~> find / -name 'gcc*' -print
	russ@taliesin:~> find starting at root
	russ@taliesin:~> find . -name '*.c' -exec fgrep -H Usage: {} \;
	russ@taliesin:~> find . -name "*.[ch]" -exec fgrep -H Usage: {} \;	# both .c and .h files
Find some files matching a template; then, finding them, delete them:
	russ@taliesin:~> find . -name '*.tmp' -print
	russ@taliesin:~> find . -name '*.tmp' -exec rm {} \;
find foo -name * -newermt "Jun 23, 2016 12:00" -ls
find foo -name * -not -newermt "Jun 23, 2016 12:00" -ls
find foo -name * -not -newermt "Jun 23, 2016 14:00" -newermt "Jun 23, 2016 12:00" -ls
find foo -name * -mtime -1d5h -ls
find foo -name * -mtime +1d5h -ls
newgrp creates a new shell running as if with the gid of the specified group, requires a password created using gpasswd.
Linux (Unix) commands affected or interesting in this context:
	russ@taliesin:~> newgrp new-group-name
	russ@taliesin:~> gpasswd
	russ@taliesin:~> sg                        # (cf. sudo)
	russ@taliesin:~> groups                    # (lists groups from /etc/group)
Documentation for exuberant ctags can be found at http://ctags.sourceforge.net/ctags.html.
How to build the whole project:
	russ@taliesin:~> cd project-root
	russ@taliesin:~> rm -rf tags
	russ@taliesin:~> ctags -R         (from project root)
Pass -I on command line to ctags to help it know that ARGDECL4 (for example) in the following C code isn’t to be interpreted as a function.
int foo ARGDECL4( void *ptr, long number, size_t nbytes )
In order to facilitate lots of the above, create $HOME.ctags to contain the list—will be picked up by ctags when it runs.
In vim, type...
| * | go to nearest caller of identifier under/near cursor (SHIFT-8) | ||
| ^] | go to identifier under/near cursor | ||
| ^t | return to previous position from symbol gone to (undo ^]) | ||
| [^I | go to prototype of function under/near cursor (same thing as [ TAB) | ||
| ^O | return from prototype gone to (previous cursor position and/or file) |
Other movement stuff (I don’t grok yet, but it was in the Vim thread)—some is done in Vim and some in ex. <tag>, here, denotes typing the actual identifier name (a necessity in ex). The first three prompt with a list of possibilities; the rest actually jump to the first in that list. #3 and #6 apparently split off a new window (we’ll have to try this).
| g ^] | |||||||
| :ts <tag> (for tselect) | |||||||
| :sts <tag> | |||||||
^]
|
| :ta <tag> (for tag)
|
| :sta
|
| <tag> ^t
| |
First, why? If you have a header that, during compilation, renames a bunch of functions to something else in order to stave off namespace collisions for whatever reason in your code base, you will find it devilishly frustrating to jump to definitions because of that. It is possible to make ctags ignore any header or source so that its symbol table isn't (similarly) corrupt and ^] will take you to the code just as you’d expect. This can be just a filename or a file listing filenames to be excluded:
	ctags -R --exclude=krb5_sym.h
	ctags -R --exclude=@ctags-exclude    # (see this file below)

	+-- ctags-exclude ----------+
	|   asn1_sym.h              |
	|   ber_sym.h               |
	|   com_err_sym.h           |
	|   des_sym.h               |
	|   gssapi_sym.h            |
	|   krb5_sym.h              |
	|   ldap_sym.h              |
	|   sqlite3_sym.h           |
	|   vers_sym.h              |
	|   ...                     |
	+---------------------------+
How to set up the whole project. Obviously, this could be done at the same time as ctags.
	russ@taliesin:~> cd project-root
	russ@taliesin:~> cscope -R        (from project root)
Now, this actually launches cscope on a sort of text file in vi with fields into which you type function or other identifier names, press return, and get listings. You can tab between input sections and arrow-key between fields.
See http://docs.sun.com/source/819-0494/cscope.html for a tutorial.
Find out the name of the OS on the host (Linux, SunOS, HP-UX, AIX, etc.):
russ@taliesin:~> uname -a | awk '{ print $1 }'
Hostname...
russ@taliesin:~> uname -a | awk '{ print $2 }'
The following files exist on some Linux distros...
	/etc/SuSE-release
	/etc/redhat-release
Try pressing...
	Control Alt F1            or
	Control Alt Backspace
It’s because someone is screwing around and what’s in /etc/resolv.conf no longer holds.
Warning: Most *nicies have changed how /etc/resolv.conf works! Please see here.
First, attempt to see if your adapters are configured:
	russ@taliesin:~> ifconfig
	eth0      Link encap:Ethernet  HWaddr 00:10:C6:A2:0A:68
	          inet addr:10.5.35.165  Bcast:10.5.47.255  Mask:255.255.240.0
	          inet6 addr: 3ffe:302:11:2:210:c6ff:fea2:a68/64 Scope:Global
	          inet6 addr: fe80::210:c6ff:fea2:a68/64 Scope:Link
	          UP BROADCAST RUNNING MULTICAST  MTU:1500  Metric:1
	          RX packets:21040 errors:0 dropped:0 overruns:0 frame:0
	          TX packets:4662 errors:0 dropped:0 overruns:0 carrier:0
	          collisions:0 txqueuelen:1000
	          RX bytes:2192482 (2.0 Mb)  TX bytes:406559 (397.0 Kb)
	          Interrupt:169

	lo        Link encap:Local Loopback
	          inet addr:127.0.0.1  Mask:255.0.0.0
	          inet6 addr: ::1/128 Scope:Host
	          UP LOOPBACK RUNNING  MTU:16436  Metric:1
	          RX packets:195 errors:0 dropped:0 overruns:0 frame:0
	          TX packets:195 errors:0 dropped:0 overruns:0 carrier:0
	          collisions:0 txqueuelen:0
	          RX bytes:14728 (14.3 Kb)  TX bytes:14728 (14.3 Kb)

	vmnet1    Link encap:Ethernet  HWaddr 00:50:56:C0:00:01
	          inet addr:192.168.143.1  Bcast:192.168.143.255  Mask:255.255.255.0
	          inet6 addr: fe80::250:56ff:fec0:1/64 Scope:Link
	          UP BROADCAST RUNNING MULTICAST  MTU:1500  Metric:1
	          RX packets:0 errors:0 dropped:0 overruns:0 frame:0
	          TX packets:16 errors:0 dropped:0 overruns:0 carrier:0
	          collisions:0 txqueuelen:1000
	          RX bytes:0 (0.0 b)  TX bytes:0 (0.0 b)

	vmnet8    Link encap:Ethernet  HWaddr 00:50:56:C0:00:08
	          inet addr:172.16.104.1  Bcast:172.16.104.255  Mask:255.255.255.0
	          inet6 addr: fe80::250:56ff:fec0:8/64 Scope:Link
	          UP BROADCAST RUNNING MULTICAST  MTU:1500  Metric:1
	          RX packets:0 errors:0 dropped:0 overruns:0 frame:0
	          TX packets:21 errors:0 dropped:0 overruns:0 carrier:0
	          collisions:0 txqueuelen:1000
	          RX bytes:0 (0.0 b)  TX bytes:0 (0.0 b)
That succeeding, ping something like Google:
russ@taliesin:~> ping Google
If that doesn’t work, then see if the cable is connected (good hardware connections) by pinging our gateway:
russ@taliesin:~> ping 10.5.32.1
It’s also possible to view the route taken using (option -n means show the routing table, but don’ try to resolve anything)...
russ@taliesin:~> route -n
Depending on what is learned from these commans, it’s looking like a bad /etc/resolv.conf. See discussion of /etc/resolv.conf and my resolv.sh script for what this looks like.
Just do this:
$ dnclient eth0
...and you should get an address the next time you invoke ifconfig.
Create a new subdirectory to be used as a mount point first.
	russ@taliesin:~> mkdir /home/russ/vasapi
	russ@taliesin:~> sudo mount -o loop VAS-site-3.0.0-25.iso /home/russ/vasapi
To undo this...
russ@taliesin:~> sudo umount VAS-site-3.0.0-25.iso
Renae uses this method to test builds as if ISOs.
	russ@taliesin:~> mkdir /mnt/jerry
	russ@taliesin:~> sudo mount -o ro slcflsl01.prod.quest.corp:/data/vas /mnt/jerry
To undo this...
russ@taliesin:~> sudo umount /mnt/jerry
Then just switch to the directory and run...
	russ@taliesin:/mnt/jerry/dev-builds/junk> cd /mnt/jerry/dev-builds/junk
	russ@taliesin:/mnt/jerry/dev-builds/junk> ./install.sh -d 1 -n -a (etc.)
russ@taliesin:~> mount [-t type] /dev/hde /cdromOr, if /etc/fstab contains...
/dev/cdrom/cd iso9660 ro,user,noauto, unhidethen do one of these (must be root)...
	russ@taliesin:~> mount /dev/cdrom
	russ@taliesin:~> mount /cd
Follow this if you can...
   /dev $ sudo bash
    Password:
    /dev # fdisk -l
       Device Boot      Start         End      Blocks   Id  System
    /dev/sda1   *           1        1946    15624192   82  Linux swap / Solaris
    /dev/sda2            1946      121602   961135617    5  Extended
    /dev/sda5            1946       11672    78124032   83  Linux
    /dev/sda6           11672      121602   883010560   83  Linux

    Disk /dev/sdb: 1000.2 GB, 1000204886016 bytes
    255 heads, 63 sectors/track, 121601 cylinders
    Units = cylinders of 16065 * 512 = 8225280 bytes
    Sector size (logical/physical): 512 bytes / 512 bytes
    I/O size (minimum/optimal): 512 bytes / 512 bytes
    Disk identifier: 0x0005f43e

       Device Boot      Start         End      Blocks   Id  System
    /dev/sdb1               1      121602   976760832   83  Linux

    Disk /dev/sdg: 4009 MB, 4009754624 bytes
    128 heads, 22 sectors/track, 2781 cylinders
    Units = cylinders of 2816 * 512 = 1441792 bytes
    Sector size (logical/physical): 512 bytes / 512 bytes
    I/O size (minimum/optimal): 512 bytes / 512 bytes
    Disk identifier: 0xc3072e18

       Device Boot      Start         End      Blocks   Id  System
    /dev/sdg1   *           1        2782     3915204    c  W95 FAT32 (LBA)
The thumb drive is "obviously" mounted on sdg1. We mount it at a place we're calling media/flash:
    /dev # mkdir /media/flash
    /dev # mount /dev/sdg1 /media/flash
    /dev # cd /media/flash/
    /dev # ll
    total 8
    drwx------ 3 russ russ 4096 1969-12-31 17:00 .
    drwxr-xr-x 4 root root  128 2013-04-04 19:25 ..
    drwx------ 4 russ russ 4096 2013-04-04 19:22 PSM PAY$ - REDD Engineering
Local printer, no auto-detect of Plug’n’Play, new port, TCP/IP at address 10.5.34.1.
To get interesting information on your host hardware (like opening the System details in the Windows control panel), the following is helpful:
	russ@taliesin:~> uname -a
	russ@taliesin:~> cat /proc/cpuinfo
	russ@taliesin:~> ps ax
	russ@taliesin:~> top                  # (gets a screenful of the most active processes)
Paper by engineer at SuSE discussing file system access control lists (ACLs) as implemented in several UNIX-like operating systems, see http://www.suse.de/~agruen/acl/linux-acls/online/
Multihomed means that you have one network interface card (NIC), but two different IP addresses assigned to it. The other option is to have two NICs, each with its own address.
| 0 | Not used. | |
| 1 | Commands that all users can enter. | |
| 1m | Commands related to system maintenance and operation. | |
| 2 | System calls, or program interfaces to the operating system kernel. | |
| 3 | Programming interfaces found in various libraries. | |
| 4 | Include files, program output files, and some system files. | |
| 5 | Miscellaneous topics, such as text-processing macro packages. | |
| 6 | Games. | |
| 7 | Device special files, related driver functions, and networking support. | |
| 8 | Commands related to system maintenance and operation. | |
| 9 | Writing device drivers. |
Links to curses information...
http://www.windofkeltia.com/opensoftware/hyundai.html
...and other fun like updating my NVIDIA driver so I could hook up my new 20" Samsung monitors: http://www.windofkeltia.com/opensoftware/nvidia-update.html
I tried VSE a little bit in an attempt to over-come the paucity of tagging from Vim, but in frustration with its broken Vi emulation, discovered Exuberant ctags and found I didn’t need VSE. Nevertheless, here are random notes on using it...
.slickedit/vunxdefs.e
Steps to remap:
Can also remap ^C, ^V, ^X, etc. as copy-region, paste and cut-region.
The ctag keys in VSe are ^., ^, and ^/ (list reference).
Following are several methods of finding the total memory installed on a Linux host. One, lshw, is something I’ve not seen work nor taken the time to make work, but I put it in here for completeness. top is an executable that takes over your console window until you press 'q' for quit. These examples are taken from my own host which has 1 gigabyte.
	russ@taliesin:~> free -m
	             total       used       free     shared    buffers     cached
	Mem:          1010        901        108          0         45        157
	-/+ buffers/cache:        698        311
	Swap:         1027        649        378

	russ@taliesin:~> cat /proc/meminfo
	MemTotal:      1034944 kB
	MemFree:        103644 kB
	Buffers:         46312 kB
	Cached:         166836 kB
	SwapCached:     121404 kB
	Active:         831056 kB
	Inactive:        47484 kB
	HighTotal:      129984 kB
	HighFree:          248 kB
	LowTotal:       904960 kB
	LowFree:        103396 kB
	SwapTotal:     1052216 kB
	SwapFree:       388576 kB
	Dirty:             836 kB
	Writeback:           0 kB
	AnonPages:      626988 kB
	Mapped:          42512 kB
	Slab:            35000 kB
	PageTables:       3760 kB
	NFS_Unstable:        0 kB
	Bounce:              0 kB
	CommitLimit:   1569688 kB
	Committed_AS:  1798404 kB
	VmallocTotal:   114680 kB
	VmallocUsed:     54132 kB
	VmallocChunk:    55284 kB
	HugePages_Total:     0
	HugePages_Free:      0
	HugePages_Rsvd:      0
	Hugepagesize:     4096 kB

	russ@taliesin:~/HEAD/VAS/src/libs/vaslicense> top

	top - 07:09:07 up 100 days, 13:36,  5 users,  load average: 0.00, 0.02, 0.00
	Tasks: 121 total,   1 running, 118 sleeping,   0 stopped,   2 zombie
	Cpu(s):  0.2%us,  0.2%sy,  0.0%ni, 98.0%id,  0.8%wa,  0.3%hi,  0.5%si,  0.0%st
	Mem:   1034944k total,   932256k used,   102688k free,    46316k buffers
	Swap:  1052216k total,   663624k used,   388592k free,   166948k cached

	  PID USER      PR  NI  VIRT  RES  SHR S %CPU %MEM    TIME+  COMMAND
	 3685 root      15   0  551m 274m 6792 S    0 27.2 236:31.38 X
	    1 root      15   0   744   72   44 S    0  0.0   0:04.49 init
	    2 root      RT   0     0    0    0 S    0  0.0   0:00.00 migration/0
	    3 root      34  19     0    0    0 S    0  0.0   0:00.18 ksoftirqd/0
	    4 root      RT   0     0    0    0 S    0  0.0   0:00.02 migration/1
	    5 root      34  19     0    0    0 S    0  0.0   0:00.57 ksoftirqd/1
	    6 root      10  -5     0    0    0 S    0  0.0   0:15.08 events/0
	    7 root      10  -5     0    0    0 S    0  0.0   0:00.00 events/1
	    8 root      11  -5     0    0    0 S    0  0.0   0:00.00 khelper
	    9 root      11  -5     0    0    0 S    0  0.0   0:00.00 kthread
	   13 root      10  -5     0    0    0 S    0  0.0   0:02.45 kblockd/0
	   14 root      14  -5     0    0    0 S    0  0.0   0:00.33 kblockd/1
	   15 root      10  -5     0    0    0 S    0  0.0   0:00.37 kacpid
	   16 root      16  -5     0    0    0 S    0  0.0   0:00.00 kacpi_notify
	  110 root      16  -5     0    0    0 S    0  0.0   0:00.00 cqueue/0
	  111 root      16  -5     0    0    0 S    0  0.0   0:00.00 cqueue/1
	  112 root      10  -5     0    0    0 S    0  0.0   0:00.01 kseriod
	  158 root      10  -5     0    0    0 S    0  0.0   3:35.98 kswapd0
	  159 root      19  -5     0    0    0 S    0  0.0   0:00.00 aio/0
	  160 root      18  -5     0    0    0 S    0  0.0   0:00.00 aio/1
	  406 root      12  -5     0    0    0 S    0  0.0   0:00.00 kpsmoused
	  774 root      10  -5     0    0    0 S    0  0.0   0:00.45 ata/0
	  775 root      10  -5     0    0    0 S    0  0.0   0:00.37 ata/1
	  776 root      16  -5     0    0    0 S    0  0.0   0:00.00 ata_aux
	  788 root      13  -5     0    0    0 S    0  0.0   0:00.01 scsi_eh_0
	  789 root      10  -5     0    0    0 S    0  0.0   0:00.02 scsi_eh_1
	  872 root      10  -5     0    0    0 S    0  0.0   0:07.68 reiserfs/0
	  873 root      10  -5     0    0    0 S    0  0.0   0:06.80 reiserfs/1
	  906 root      15   0 10024  292  288 S    0  0.0   0:00.69 blogd
	  921 root      12  -4  1796  252  248 S    0  0.0   0:00.27 udevd
	 1656 root      10  -5     0    0    0 S    0  0.0   0:00.03 khubd
	 2511 root      15   0  1668  316  312 S    0  0.0   0:00.00 resmgrd
	 2557 root      15   0  2036  616  484 S    0  0.1   1:07.70 syslog-ng
	 2564 root      15   0  1724  460  280 S    0  0.0   0:49.12 klogd
	 2571 root      15   0  1584  328  324 S    0  0.0   0:00.00 acpid
	 2573 messageb  15   0 15484 2316  548 S    0  0.2   5:45.20 dbus-daemon
	 2636 haldaemo  15   0  5668 1496 1112 S    0  0.1   3:44.58 hald
	 2637 root      17   0  2952  616  612 S    0  0.1   0:00.01 hald-runner
	 2638 root      15   0  3180 1116 1008 S    0  0.1   0:02.56 polkitd
	 3061 mdnsd     15   0  1888  564  476 S    0  0.1   0:02.68 mdnsd
	 3106 nobody    15   0  1632  308  248 S    0  0.0   0:00.02 portmap
	 3232 root      16  -3  9948  380  364 S    0  0.0   0:00.22 auditd
locate is a great tool—much faster and easier to use than
find. To get it, use YaST->Software->Software
Management, type in “locate” as the filter/search string,
and click findutils-locate if that package has not been installed
already. This is the GNU Findutils Subpackage. Install it if need be.
Once installed, it’s probably on your PATH, so first update its index (database). It searches all your filesystem indexing the files thereon. Later, you’ll want to chron this action to run late at night while you’re asleep.
Then, use man locate to learn how to use it, however, here are a
couple of examples:
	russ@taliesin:~/GWAVA> which updatedb
	/usr/bin/updatedb
	russ@taliesin:~> updatedb

	russ@taliesin:~/GWAVA> locate vicheat.gif
	/home/russ/GWAVA/vicheat.gif
	/home/russ/Quest/documents/vintela/vicheat.gif
	/home/russ/Quest/notes/vicheat.gif

	russ@taliesin:~/GWAVA> locate /web/WEB-INF/cfg | grep ASConfig.cfg
	/home/russ/dev/svn/retain/RetainServer/web/WEB-INF/cfg/ASConfig.cfg

	russ@taliesin:~/GWAVA> locate /web/WEB-INF/cfg/.svn/tmp
	/home/russ/dev/svn/retain/RetainServer/web/WEB-INF/cfg/.svn/tmp
	/home/russ/dev/svn/retain/RetainServer/web/WEB-INF/cfg/.svn/tmp/prop-base
	/home/russ/dev/svn/retain/RetainServer/web/WEB-INF/cfg/.svn/tmp/props
	/home/russ/dev/svn/retain/RetainServer/web/WEB-INF/cfg/.svn/tmp/text-base
	/home/russ/dev/svn/retain/RetainWorker/web/WEB-INF/cfg/.svn/tmp
	/home/russ/dev/svn/retain/RetainWorker/web/WEB-INF/cfg/.svn/tmp/prop-base
	/home/russ/dev/svn/retain/RetainWorker/web/WEB-INF/cfg/.svn/tmp/props
	/home/russ/dev/svn/retain/RetainWorker/web/WEB-INF/cfg/.svn/tmp/text-base
eth0 must be assigned to a zone in order for VNC to work. Go to
Firewall Configurations->Interfaces.
To examine what repositories are used by Yast, you can launch Yast and choose Software->Software Repositories or you can do this:
    taliesin:/ # zypper sl
    # | Enabled | Refresh | Type   | Alias                                                             | Name
    --+---------+---------+--------+-------------------------------------------------------------------+-----------------------------
    1 | Yes     | Yes     | yast2  | http://download.opensuse.org/repositories/openSUSE:10.3/standard/ | Main Repository (OSS)
    2 | Yes     | No      | yast2  | openSUSE-10.3-OSS-Gnome 10.3                                      | openSUSE-10.3-OSS-Gnome 10.3
    3 | Yes     | Yes     | yast2  | http://download.opensuse.org/distribution/10.3/repo/debug/        | Main Repository (DEBUG)
    4 | Yes     | Yes     | rpm-md | Mozilla                                                           | Mozilla
    5 | Yes     | Yes     | rpm-md | NVIDIA Repository                                                 | NVIDIA Repository
    6 | Yes     | Yes     | rpm-md | openSUSE-10.3-Updates                                             | openSUSE-10.3-Updates
This is much faster than the Yast GUI.
This command prints out network connections, routing tables and other network-related information. In particuler, below we are looking to make certain port 5900 is assigned to TCP. In fact, it's going to be used by Tomcat which, for some reason, appears as vino-server. We don't see other programs identified because Tomcat belongs to us, but not the other processes.
	russ@taliesin:~> netstat -nltp
	(Not all processes could be identified, non-owned process info
	 will not be shown, you would have to be root to see it all.)
	Active Internet connections (only servers)
	Proto Recv-Q Send-Q Local Address     Foreign Address   State     PID/Program name
	tcp        0      0 127.0.0.1:48005   0.0.0.0:*         LISTEN    -
	tcp        0      0 0.0.0.0:904       0.0.0.0:*         LISTEN    -
	tcp        0      0 0.0.0.0:48009     0.0.0.0:*         LISTEN    -
	tcp       0     0 0.0.0.0:5900   0.0.0.0:*       LISTEN   4574/vino-server
	tcp        0      0 0.0.0.0:111       0.0.0.0:*         LISTEN    -
	tcp        0      0 0.0.0.0:48080     0.0.0.0:*         LISTEN    -
	tcp        0      0 0.0.0.0:22        0.0.0.0:*         LISTEN    -
	tcp        0      0 127.0.0.1:25      0.0.0.0:*         LISTEN    -
As root, we see:
	taliesin:/home/russ # netstat -nltp
	Active Internet connections (only servers)
	Proto Recv-Q Send-Q Local Address     Foreign Address   State     PID/Program name
	tcp        0      0 127.0.0.1:48005   0.0.0.0:*         LISTEN    6915/java
	tcp        0      0 0.0.0.0:904       0.0.0.0:*         LISTEN    3851/xinetd
	tcp        0      0 0.0.0.0:48009     0.0.0.0:*         LISTEN    6915/java
	tcp       0     0 0.0.0.0:5900   0.0.0.0:*       LISTEN   4574/vino-server
	tcp        0      0 0.0.0.0:111       0.0.0.0:*         LISTEN    3370/portmap
	tcp        0      0 0.0.0.0:48080     0.0.0.0:*         LISTEN    6915/java
	tcp        0      0 0.0.0.0:22        0.0.0.0:*         LISTEN    3541/sshd
	tcp        0      0 127.0.0.1:25      0.0.0.0:*         LISTEN    3976/master
Elsewhere, on host windofkeltia, we see yet different names for Tomcat (jsvc.exec):
	windofkeltia:/home/rbateman # netstat -nltp
	Active Internet connections (only servers)
	Proto Recv-Q Send-Q Local Address     Foreign Address   State     PID/Program name
	tcp        0      0 0.0.0.0:111       0.0.0.0:*         LISTEN    2826/portmap
	tcp        0      0 127.0.0.1:2544    0.0.0.0:*         LISTEN    3184/zmd
	tcp        0      0 127.0.0.1:631     0.0.0.0:*         LISTEN    2898/cupsd
	tcp        0      0 127.0.0.1:25      0.0.0.0:*         LISTEN    3352/master
	tcp        0      0 :::80             :::*              LISTEN    6337/httpd2-prefork
	tcp        0      0 :::22             :::*              LISTEN    3394/sshd
	tcp        0      0 ::1:631           :::*              LISTEN    2898/cupsd
	tcp        0      0 ::1:25            :::*              LISTEN    3352/master
	windofkeltia:/home/rbateman # /etc/init.d/tomcat start
	Starting Apache Tomcat Server...                                      done
	windofkeltia:/home/rbateman # netstat -nltp
	Active Internet connections (only servers)
	Proto Recv-Q Send-Q Local Address     Foreign Address   State     PID/Program name
	tcp        0      0 0.0.0.0:111       0.0.0.0:*         LISTEN    2826/portmap
	tcp        0      0 127.0.0.1:2544    0.0.0.0:*         LISTEN    3184/zmd
	tcp        0      0 127.0.0.1:631     0.0.0.0:*         LISTEN    2898/cupsd
	tcp        0      0 127.0.0.1:25      0.0.0.0:*         LISTEN    3352/master
	tcp       0     0 :::8009        :::*            LISTEN   601/jsvc.exec
	tcp       0     0 :::8080        :::*            LISTEN   601/jsvc.exec
	tcp        0      0 :::80             :::*              LISTEN    6337/httpd2-prefork
	tcp        0      0 :::22             :::*              LISTEN    3394/sshd
	tcp        0      0 ::1:631           :::*              LISTEN    2898/cupsd
	tcp        0      0 ::1:25            :::*              LISTEN    3352/master
Files that you download and end in .bin are simply self-extracting archives. To extract, change the permissions to add executable and invoke.
    russ@taliesin:~/download> chmod a+x jdk-6u12-linux-i586.bin
    russ@taliesin:~/download> ./jdk-6u12-linux-i586.bin
    russ@taliesin:~/download> ll
    total 78324
    drwxr-xr-x 10 russ users     4096 2009-02-11 15:11 jdk1.6.0_12
    -rwxr-xr-x  1 russ users 80105323 2009-02-11 15:03 jdk-6u12-linux-i586.bin
Obtain any version of GNU tools from ftp://mirrors.kernel.org/gnu or, likewise, gcc from ftp://mirrors.kernel.org/gnu/gcc.
Here's how to conduct an anonymous ftp session to upload a couple of files. What you type is in bold.
	russ@taliesin:~/build/1.7> ftp
	ftp> open ftp.funtime.com
	Connected to provo.funtime.com.
	220 FTP Server ready.
	Name (ftp.funtime.com:russ): anonymous
	331 Anonymous login ok, send your complete email address as your password
	Password: [email protected]
	230 User anonymous logged in.
	Remote system type is UNIX.
	Using binary mode to transfer files.
	ftp> cd incoming
	250 CWD command successful
	ftp> binary
	200 Type set to I
	ftp> put rs-2009-06-05.zip
	local: rs-2009-06-05.zip remote: rs-2009-06-05.zip
	229 Entering Extended Passive Mode (|||43813|)
	150 Opening BINARY mode data connection for rs-2009-06-05.zip
	100% |*************************************| 35224 KB    1.00 MB/s    00:00 ETA
	226 Transfer complete
	36069479 bytes sent in 00:34 (1.00 MB/s)
	ftp> put rw-2009-06-05.zip
	local: rw-2009-06-05.zip remote: rw-2009-06-05.zip
	229 Entering Extended Passive Mode (|||19475|)
	150 Opening BINARY mode data connection for rw-2009-06-05.zip
	100% |*************************************|  8836 KB    1.02 MB/s    00:00 ETA
	226 Transfer complete
	9048118 bytes sent in 00:08 (1.02 MB/s)
	ftp> quit
	221 Goodbye.
	russ@taliesin:~/build/1.7>
Only on Ubuntu and openSuSE will Firefox make good on installing the missing Flash plug-in. On other Linuces, you have to:
	# gunzip -d install_flash_player_10_linux.tar.gz
	# tar -xvf install_flash_player_10_linux.tar
	# rm install_flash_player_10_linux.tar
This will leave you with libflashplayer.so in the plug-in subdirectory.
DON'T DO IT THIS WAY! (see this way)
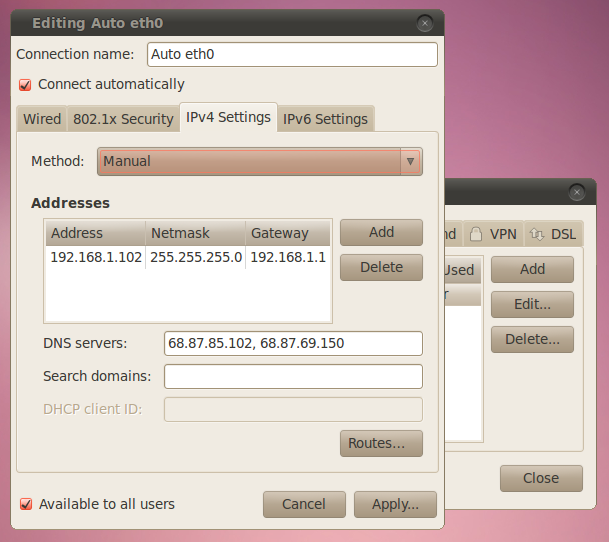
How to make Lucid use a static IP address instead of one assigned via DHCP. This wasn't covered on-line anywhere I could find.
root@tuonela:~> ifconfig eth0 down
root@tuonela:~> ifconfig eth0 up
root@tuonela:~> ifconfig
Here's how to get rid of that annoying /usr/games that has no business being on my PATH variable. Put this in .profile or .bashrc.
x=$( echo $PATH | tr ':' '\n' | awk '$0 !~ "/usr/games"' | paste -sd: )
PATH=$x
How it works ('cause I like explaining stuff like this to people who are currently as clueless as I once was):
Here's the tail-end of my usual ~/.profile:
.
.
.
# Get rid of those damn games...
PATH=$( echo $PATH | tr ':' '\n' | awk '$0 !~ "/usr/games"' | paste -sd: )
PATH=$( echo $PATH | tr ':' '\n' | awk '$0 !~ "/usr/local/games"' | paste -sd: )

# set PATH so it includes user's private bin directories...
PATH="$HOME/bin:$HOME/.local/bin:$PATH:$JAVA_HOME/bin"
However, if you make a mistake in .profile, you'll be lucky to get back into your user. This is why it's probably better seated in ~/.bashrc.
Here's a handy table and a link to a live calculator that works pretty well.
| 0 | --- | No access |
| 1 | --x | Execute access |
| 2 | -w- | Write access |
| 3 | -wx | Write and execute access |
| 4 | r-- | Read access |
| 5 | r-x | Read and execute access |
| 6 | rw- | Read and write access |
| 7 | rwx | Read, write and execute access |
The value for the file below is 755 which gives the file owner read, write and execute privileges while the user's group and all others get to read or execute it.
-rwxr-xr-x 2 russ users 48 2006-11-01 09:29 fun-file.sh
This could have been set one of two ways. Obviously, the first one is more mneumonic, but you'll very often deal in these permissions using octal digits so you must be conversant with that method.
	russ@tuonela:~/bin> chmod u+rwx,g+rw,a+rx fun-file.sh
	russ@tuonela:~/bin> chmod 755 fun-file.sh
As a sort of anti-Microsoft kind of guy, you'd not expect me to record this tip, however, far be it from me to fail to acknowledge when Microsoft gets something right. (Actually, they get a lot of stuff right.)
Microsoft's new fonts, that coincided with the release of Vista and Office 2008 (I think), are dynamite and I've adopted Candara as my font of choice for everything technical I write (like what you're reading right now).
Here's how to get Calibri, Cambria, Candara, Consolas, Constantia and Corbel. You can either visit this page, if it's still there, or follow the instructions below.
russ@tuonela:~> sudo apt-get install cabextract
russ@tuonela:~> cabextract -F ppviewer.cab PowerPointViewer.exe
russ@tuonela:~> mkdir .fonts
russ@tuonela:~> cabextract -F '*.TT?' -d ~/.fonts ppviewer.cab
russ@tuonela:~> fc-cache -fv
There's plenty of legal mumbo-jumbo surrounding this, however, having these fonts is legitimate when you read content from a device running a Microsoft Windows operating system.
Linux is not a Microsoft Windows operating system, however, in most cases when you're reading a document that calls for any of these fonts, it is content that's produced on and delivered from Windows somewhere along the line. I don't think Microsoft is going to be stomping on Linux users who consume data from Windows origins "requiring" these fonts.
I tend to write code on my Linux box and compose articles and (I used to write long ago) other texts on my Windows 7 box. My pages are set up such that you get Trebuchet MS if you're looking at them from an older Windows box or Arial if you're looking at them from Linux. I guess I'm stretching what I think is the spirit of the license, but I do not mean to profit by it. I'm not commercial.
There's an absolute cool way to get a full low-down on your computer hardware running Ubuntu or another Linux. If you add the -html option and redirect the output to a file such as system-info.html, you have a pretty decent and readable web page of this information.
russ@tuonela:~> sudo lshw -html > system-info.html
Let's say I wish to open an ssh session on my local host on a certain port to a server to which I have access (that can reach a more remote server to which I do NOT have access). Whatever traffic I then perform over that port (ssh or scp) uses this specially opened session to handle it. Therefore (happily), I can exchange traffic between my work host and that remote server to which I heretofore had no access.
ssh [email protected] -L 9022:pohjolasdaughter.site:9922This makes me type in a password.
ssh -p 9022 rbateman@localhostThis works fine.
scp -P 9022 rbateman@localhost:/home/rbateman/xfer/myfileAnd this works fine as well. In fact, as I wrote this small section, I used it over and over again to update my notes on pohjolasdaughter.site (which is really windofkeltia.com).
This shows how I gain access to my own Subversion server. First, I set up port forwarding, then I get into the browser. Server tuonela cannot be seen from my host at work because of the firewall. I can get through to another host at home, keltia, via port 22, so I use that to forward any 443 (Subversion ) traffic.
1. Note the rather weird use of rbateman@localhost! rbateman is the user on pohjolasdaughter not on localhost. I haven't found exact words to explain this yet. Just do it: localhost has the instance of ssh/port 9022 that stands in for pohjolasdaughter.
2. Because ports inferior to 1024 are reserved to the system, I avoid having to get root by choosing port 9022 to do this work locally. I can use nmap to ensure that this port is not already in use on my local host.
nmap localhost 9022
3. The divergence in the option to designate port numbers between ssh and scp is predictably idiotic, but should be noted in order to avoid having this example fail inexplicably. Squint hard.
4. There is a way to create ssh keys between the local host and vainamoinen.site to avoid having to type the password each time.
5. No, unfortunately, I do not own these cool domain names; more's the pity, but I can't purchase the entire Kalevala namespace.
[vainamoinen/keltia.site/pohjolasdaughter/windofkeltia.com]
Okay, admit it: Even though you're a dyed-in-the-wool Linux guy and an old Unix guy back in the 80s, you've used WinSCP and think it's a dang site more convenient than command-line scp. How to do stuff like that on the "real" operating system?
While I haven't figured out how to integrate the port-forwarding thing above into it (should be easy, though), it's possible to do a straight shot. I'm in GNOME here—don't use KDE—so your experience may be a little different.
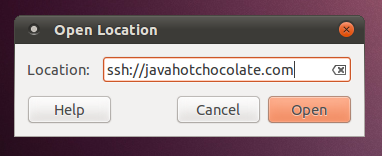
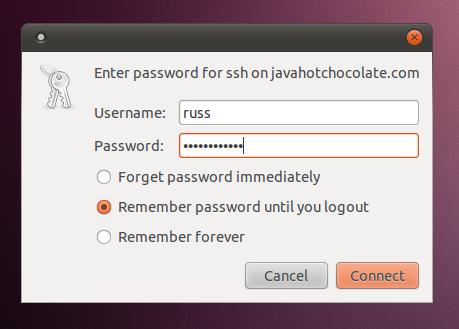
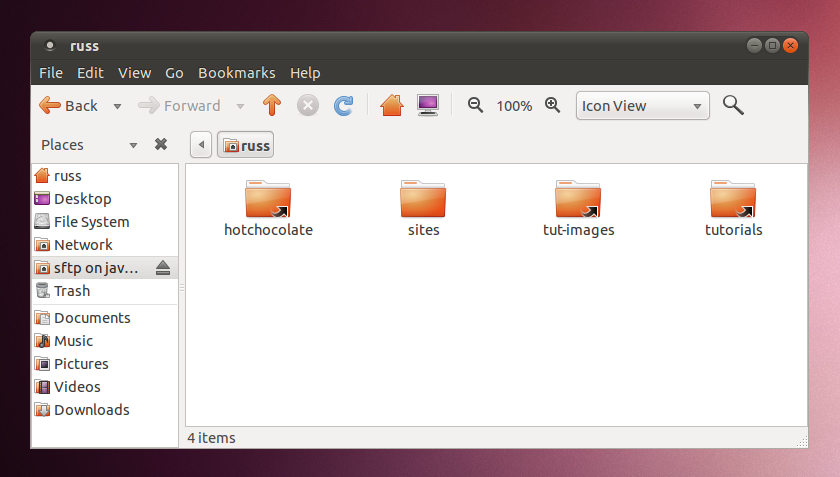
Beware! You likely can't edit files directly across this link. I find I have to copy them (we're only using this for scp activities, right?) to my local filesystem, edit them, then copy them back. And, when I copy them back, I find that the permissions have been set to -rw------- and are therefore unsuitable (I mostly use this to maintain web site fodder).
The solution is, once a file is copied back to its remote location, to fix its permissions. You can do this via right-clicking on the file, choosing Properties, then the Permissions tab where you'll soon see how to solve the problem. This is getting old. I need to find a better solution which I'll report here if there is one.
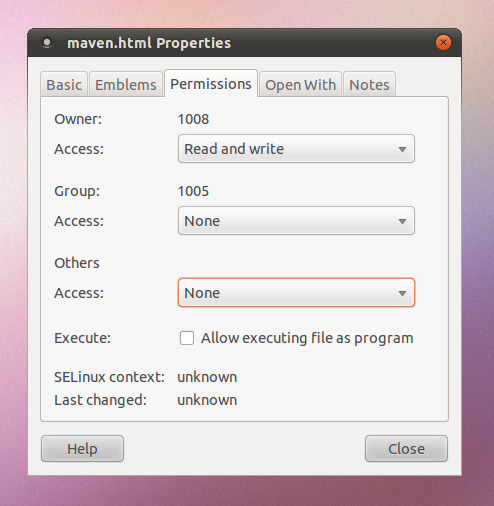
Since coming to Ubuntu, I find my .bash_history file owned by root which is frustrating because then, none of my bash history is remembered between shell window closes and opens.
Common wisdom out there seems to believe that this is a result of running a user's very first command with sudo in front of it may be responsible. (Sounds reasonable; I may have done that; I'll pay attention the next time I set up a new Linux host.)
The solution is fix the ownership.
russ@tuonela:~> ls -al .bash_history
-rw------- 1 root root 7412 2011-03-02 09:27 .bash_history
russ@tuonela:~> sudo chown russ .bash_history
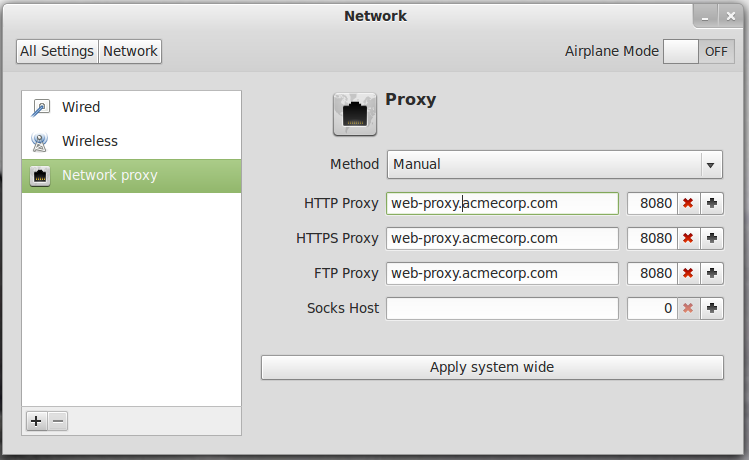
This is relevant when you're setting up a server and don't have access to GNOME or other X Window access to fancy tools. Proxy settings for any process are simply a matter of environment variables. Add these (sample-only) to your .bashrc or other.
export http_proxy="http://web-proxy.acmecorp.com:8080"
export https_proxy="https://web-proxy.acmecorp.com:8080"
Caution: Do not include the protocol in the edit fields below, i.e.: do not establish HTTP Proxy as "http://web-proxy.acmecorp.com". If you make this mistake, you'll see that the environment variable(s) (see preceding topic on setting up network proxy via command line) are over-done in the set-up as:
    $ env | grep http_proxy
    http_proxy=http://http://web-proxy.acmecorp.com:8080
I guess this is more for Ubuntu, but it may be relevant to other Linuces.
Alt + F<{2,3,4}*gt;tt> gets a command line during installation. For example, you can't get rid of exiting disk partitions and you want to run fdisk from the command line.
Alt+F2 returns to installation (although, if you've just deleted all the partitions, you probably will have to reboot and restart the installation).
Alt+F5 returns to the X Window system (not super relevant to what motivated this discussion, but tangentially related).
Some users like Tomcat defy the use of su tomcat6 to gain access. Here's how to do that.
sudo -s -H -u tomcat6
I decided one day that, having set up Jenkins over Tomcat (8080), and wishing to set up a different Tomcat-resident service without imposing an explicit port number on my consumers, I could just add a second NIC ('cause my server box already had one in it that I just wasn't using) and advertise the service over that address to make it all easier.
To add a second network interface card (NIC) to a Linux box, you can just clone the existing entry in /etc/network/interfaces, in my case, eth1:
	# This file describes the network interfaces available on your system
	# and how to activate them. For more information, see interfaces(5).

	# The loopback network interface
	auto lo
	iface lo inet loopback

	# The primary network interface
	auto eth0
	# iface eth0 inet dhcp          (originally DHCP; we want static IP now...)
	iface eth0 inet static
	  address   16.86.192.111
	  netmask   255.255.255.0
	  network   16.86.192.0
	  broadcast 16.86.192.255
	  gateway   16.86.192.1

	# The secondary network interface over which we're doing Tomcat on port 8080...
	auto eth1
	iface eth1 inet static
	  address   16.86.192.119
	  netmask   255.255.255.0
	  network   16.86.192.0
	  broadcast 16.86.192.255
	# gateway   16.86.192.1
However, this didn't "work out of the box". I couldn't get to my server any more. If you simply clone the entry and leave "gateway" uncommented (as you se it it just above), you'll time out when you attempt to connect via ssh (and, presumably, other protocols):
$ ssh [email protected]
Commenting "gateway" out did the trick. However, (!)...
The assumption in adding a separate NIC is that you're going to use your host to route traffic between two subnets. This was not my case, so...
Of course, there's always the right way to do something like this. And it still involves /etc/network/interfaces. This is how to accomplish the same thing without a second hardware NIC, i.e.: use one NIC to host two, separate IP addresses (I've simply shortened the same file from above):
	auto lo
	iface lo inet loopback

	auto eth0
	iface eth0 inet static
	  address   16.86.192.111
	  netmask   255.255.255.0
	  network   16.86.192.0
	  broadcast 16.86.192.255
	  gateway   16.86.192.1

	# Use this address for our Tomcat ReST URIs!
	auto eth0:0
	iface eth0:0 inet static
	  address   16.86.192.119
	  netmask   255.255.255.0
You can also (on GNOME) use System -> Administration -> Network Tools to do this stuff, but I don't know how to work them. (I'm more of a command-line/configuration-file guy.)
This Ubuntu forums thread put me on to this solution and a network guru that one of my colleagues knows told him separately that a better solution existed which I then researched and found at Linux Home Networking:Creating Interface Aliases.
In the PS1 variable, the following are the meanings of the variables in the syntactic elements.
	\u —username
	\h —hostname
	\w —current working directory path
Here's a script to show you color values for bash (so you can mess around with your prompt's peacock effect):
	#!/bin/bash
	#
	#   This file echoes a bunch of color codes to the
	#   terminal to demonstrate what's available.  Each
	#   line is the color code of one forground color,
	#   out of 17 (default + 16 escapes), followed by a
	#   test use of that color on all nine background
	#   colors (default + 8 escapes).
	#

	T='gYw'   # The test text

	echo -e "\n                 40m     41m     42m     43m\
	     44m     45m     46m     47m";

	for FGs in '    m' '   1m' '  30m' '1;30m' '  31m' '1;31m' '  32m' \
	           '1;32m' '  33m' '1;33m' '  34m' '1;34m' '  35m' '1;35m' \
	           '  36m' '1;36m' '  37m' '1;37m';
	  do FG=${FGs// /}
	  echo -en " $FGs \033[$FG  $T  "
	  for BG in 40m 41m 42m 43m 44m 45m 46m 47m;
	    do echo -en "$EINS \033[$FG\033[$BG  $T  \033[0m";
	  done
	  echo;
	done
	echo
This is from http://wiki.services.openoffice.org/wiki/Documentation/OOoAuthors_User_Manual/Getting_Started/Starting_from_the_command_line.
	$ sopen -writer
	$ sopen -draw architecture.odg
	$ etc. (-calc, -impress, -math, -web)
This is done using rar. Here are some relevant command lines to investigate:
	$ sudo apt-get install rar unrar
	$ rar a -v100M hugefile.rar hugefile.txt
	$ unrar x hugefile.rar
Note: To get and install rar, you need the Multiverse repository enabled.
Here's a good link: http://www.cyberciti.biz/faq/open-rar-file-or-extract-rar-files-under-linux-or-unix/.
When using Ubuntu Server or just when being a command-line sort of guy like me, you'll want these commands:
This also ensures the user's home directory is created and linked to him in /etc/passwd. Option -m means "create home subdirectory". Option -s path specifies what shell he'll be using (default is often Bourne /bin/sh and not bash).
$ useradd username -m -d /home/username -s /bin/bash
$ passwd username
$ groups username
$ usermod -a -G group1[,group2] username
Yeah, give supreme rings of power to your best friend!
$ usermod -a -G admin username
To remove a user:
$ userdel [-r] username # (removes home directory)
One day, I was installing Ubuntu Precise (an LTS release) on a bunch of ancient, craptastic server hardware and I succeeded on one piece of hardware that then didn't appeciate the monitor I was using, even after switching between a couple of working monitors. Unable to get to this server via ssh because I didn't know its address (I had used DHCP), I wondered how I could find it.
Problem solved!
I wrote a script to go fishing via ssh for servers I could get into with my username and password. It lists all the IP addresses that worked.
#!/bin/sh
# This was created to go fishing for a server I have rights to, but
# could not get the IP address of because the hardware disallows tying a
# monitor to it.

PASSWORD=Test123
  SUBNET=16.86.193
   START=100
    STOP=254

for NUMBER in `seq $START $STOP`; do
  ip_address=${SUBNET}.${NUMBER}
  echo "sshpass -p${PASSWORD} ssh -o StrictHostKeyChecking=no russ@${ip_address} exit"
  sshpass -p${PASSWORD} ssh -o StrictHostKeyChecking=no russ@${SUBNET}.${NUMBER} exit
  err=$?

  if [ $err -eq 0 ]; then
    echo ${ip_address} >> russ-servers.txt
  fi
done
# vim: set tabstop=2 shiftwidth=2 noexpandtab:
Here's how it works...
sshpass is a method by which you can supply a password to ssh.
I'm using the command line, obviously. Then, I pass my ssh command line
including the option to tell ssh to shut up about asking me to confirm
adding the host key to my known_hosts file. Finally, I pass a command,
exit, since I am only looking for servers that will let me in. I could
have passed a command such as uptime and other, more useful commands.
This can take a very long time to run, but in lieu of finding a smart answer, I'm off to lunch—it's already found two servers I knew about, so I know it's working.
DON'T DO IT THIS WAY! (see this way)
Nota bene (2018): There may be a more modern way to do this. Look for "netplan".
See the following in /etc/network/interfaces:
    # This file describes the network interfaces available on your system
    # and how to activate them. For more information, see interfaces(5).

    # The loopback network interface
    auto lo
    iface lo inet loopback

    # The primary network interface
    auto eth0
    iface eth0 inet dhcp
Change it to use a static IP address, hypothetically, 16.86.192.112.
    # This file describes the network interfaces available on your system
    # and how to activate them. For more information, see interfaces(5).

    # The loopback network interface
    auto lo
    iface lo inet loopback

    # The primary network interface
    auto eth0
    #iface eth0 inet dhcp
    iface eth0 inet static
	    address   16.86.192.112
	    netmask   255.255.255.0
	    network   16.86.192.0
	    broadcast 16.86.192.255
	    gateway   16.86.192.1
It's not possible to uninstall DHCP anymore, nor is it really necessary anyway:
    root@pr-acme-1:~# apt-get remove dhcp-client
    Reading package lists... Done
    Building dependency tree
    Reading state information... Done
    Virtual packages like 'dhcp-client' can't be removed
    The following packages were automatically installed and are no longer required:
      linux-headers-3.2.0-29 linux-headers-3.2.0-29-generic
    Use 'apt-get autoremove' to remove them.
    0 upgraded, 0 newly installed, 0 to remove and 38 not upgraded.
Ensure the following in /etc/resolv.conf:
name server xxx.xxx.xxx.xxx
...replace with the IP address of your name server:
    domain americas.acmecorp.net
    search americas.acmecorp.net
    nameserver 16.110.135.52
    nameserver 16.110.135.51
Warning: Most *nicies have changed how /etc/resolv.conf works! Please see here.
Note: the next step may very well wipe out what you've just put into resolv.conf. Put it back after bouncing the network. Also, if you're behind a firewall, you'll want to make sure your proxy stuff is set up before you attempt getting packages from apt and other such operations (set up environment variables http_proxy, https_proxy and maybe ftp_proxy).
Then, restart the networking components:
    root@pr-acmecorp-1:~# /etc/init.d/networking restart
     * Running /etc/init.d/networking restart is deprecated because it may not enable again some interfaces
     * Reconfiguring network interfaces...
Because you're probably doing this remotely, you'll lose your connection! You'll also need to solve a problem making ssh believe you're not screwing around:
    ~ $ ssh [email protected]
    @@@@@@@@@@@@@@@@@@@@@@@@@@@@@@@@@@@@@@@@@@@@@@@@@@@@@@@@@@@
    @    WARNING: REMOTE HOST IDENTIFICATION HAS CHANGED!     @
    @@@@@@@@@@@@@@@@@@@@@@@@@@@@@@@@@@@@@@@@@@@@@@@@@@@@@@@@@@@
    IT IS POSSIBLE THAT SOMEONE IS DOING SOMETHING NASTY!
    Someone could be eavesdropping on you right now (man-in-the-middle attack)!
    It is also possible that the RSA host key has just been changed.
    The fingerprint for the RSA key sent by the remote host is
    80:06:bb:b3:51:51:4b:4d:99:dc:15:fd:7a:04:2b:aa.
    Please contact your system administrator.
    Add correct host key in /home/russ/.ssh/known_hosts to get rid of this message.
    Offending key in /home/russ/.ssh/known_hosts:60
    RSA host key for 16.86.192.112 has changed and you have requested strict checking.
    Host key verification failed.
Edit ~/.ssh/known_hosts and go to the key number above (here, 60) and delete it. In vim, just type: 59jdd. Then, start over:
    ~ $ ssh [email protected]
    The authenticity of host '16.86.192.112 (16.86.192.112)' can't be established.
    RSA key fingerprint is 80:06:bb:b3:51:51:4b:4d:99:dc:15:fd:7a:04:2b:aa.
    Are you sure you want to continue connecting (yes/no)? yes
    Warning: Permanently added '16.86.192.112' (RSA) to the list of known hosts.
    [email protected]'s password:
    ...
    Last login: Mon Nov 26 01:59:21 2012 from russ-elite-book.americas.acmecorp.net
...or, use sed:
$ sed -i 59d ~/.ssh/known_hosts
If you're behind a firewall, completing a command such as:
sudo apt-key adv --keyserver keyserver.ubuntu.com --recv 7F0CEB10
...preparatory to installing MongoDB, for instance, can be challenging.
What you need to do is painful, but simple enough.
    ~/Downloads $ wget http://docs.mongodb.org/10gen-gpg-key.asc
    ~/Downloads $ ll 10gen*
    total 59569
    -rw-r--r--  1 russ russ     1721 2012-10-15 14:51 10gen-gpg-key.asc
    root@pr-acme-1:~# cat 10gen-gpg-key.asc -O- | apt-key add -
    OK
Or, if the -O- option isn't recognized, just do this:
~/Downloads # apt-key add 10gen-gpg-key.asc
If you're writing a post-installation configuration script, say for a Debian package, and you want to use adduser to create a user if it's not there already, you might be tempted to check for the user first by grep'ing /etc/passwd.
This isn't such a good idea because the user might very well not be there while in some environments it is an LDAP user that does already exist. grep'ing won't find it. Below, user mongodb isn't found via the grep while backup is found.
    russ@uasapp01:~$ cat /etc/passwd | grep mongodb
    russ@uasapp01:~$ cat /etc/passwd | grep backup
    backup:x:34:34:backup:/var/backups:/bin/sh
And yet, if you use getent, mongodb is found—as is user backup, the one being there and the other being an LDAP user.
    russ@uasapp01:~$ getent passwd mongodb
    mongodb:*:1010:5103:mongodb:/var/home/mongodb:/bin/bash
    russ@uasapp01:~$ getent passwd backup
    backup:x:34:34:backup:/var/backups:/bin/sh
The point is, using adduser to add mongodb after failing to find it via grep will give an error and if your post-install script depends on this, it will fail needlessly. So, there are two solutions.
The first one is obvious here: don't use grep.
The second is to pass a flag (--system) to adduser so that it doesn't fail. The solution is slightly different in that it does add mongodb to /etc/password regardless of whether it exists as an LDAP user or not. Here's the script content:
    adduser --sysem --no-create-home mongodb
    addgroup --system mongodb
    adduser mongodb mongodb
Which solution to use really depends on the final effect you want. In the first, you're not going to add a user, but only depend on the existence of the LDAP user. This is okay if you don't need one in /etc/passwd.
Use an SSL tunnel to get around the problems created that inhibit reaching your application or other resources. The need for this could be, for example, that you want to reach a MongoDB server inside a tenant space running on a VM to which you have access only through a gateway.
You'll also need a tunnel sometimes in order to reach an application from another that's not written to tip-toe through a web proxy. For instance, I use a tunnel to access my personal e-mail using Thunderbird though I sit behind a firewall at work.
After creating the tunnel, you access the resource using http://localhost:9443/resource/. This is because the tunnel is on your local host. You are going to the mouth of the tunnel; it's the tunnel's other end that connects to the remote resource you're really trying to do business with. Here's our example:
$ ssh -v -N -L 9443:<resource-ip>:443 username@resource
$ ssh -vN -L 9443:uas.staging.tnt3-zone1.sfo1:443 [email protected]
If you are using the gSTM tunnel manager, here is a sample screenshot of the properties page:
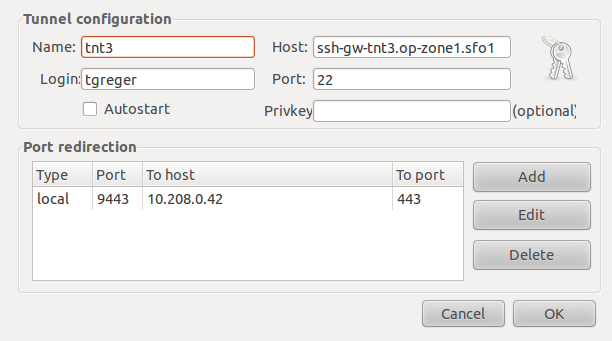
If you're trying to reach a destination requiring HTTPS, ...
See also http://java.dzone.com/articles/how-use-ssh-tunneling-get-your
Imagine that I'm sitting behind a firewall at work and I want to gain HTTP access to a server I've got running Chef at home. Here are the particulars:
    $ ssh -vN -L 9443:taliesin.site:443           [email protected]
                 ^    ^             ^             ^    ^
                 |    |             |             |    |
                 |    |             |             |    provider
                 |    |             |             username on provider
                 |    |             port used on provider
                 |    host providing tunnel
                 port to use on localhost
We continue to set up a tunnel on taliesin.site to reach chef.site. This command is set up on taliesin.site.
    $ ssh -vN -L 9443:taliesin.site:443           [email protected]
                 ^    ^             ^             ^    ^
                 |    |             |             |    |
                 |    |             |             |    provider
                 |    |             |             username on provider
                 |    |             port used on provider
                 |    host providing tunnel
                 port to use on localhost
Yeah, this is still stupid and unhelpful. Let's try again...
There are three types of tunnels or port-forwarding.
In the command below, option -L is for "local."
For example, say you wanted to connect from your host (computer) to http://www.ubuntuforums.org using an ssh tunnel. You would use source port number 8888 (an arbitrarily chosen alternate HTTP port for this example), the destination port 80 (the usual HTTP port because that's what ubuntuforums will be listening on), and the destination server itself www.ubuntuforums.org:
ssh -L 8888:www.ubuntuforums.org:80 host
Where host should be replaced by the name of your host (computer). You could use localhost for host, or 127.0.0.1 or your computer's hostname (if DNS is working). The -L option specifies local port forwarding. Visually, I think of this part of the command as "the tunnel" with ports (openings) on either end with the server in the middle.
For the duration of the ssh session, pointing your browser at http://localhost:8888/ would send you to http://www.ubuntuforums.org/.
In other words, with the tunnel set up, just think of there being a wormhole in the wall of your home and if you step through it, you'll magically end up at that server you indicated and able to go through its right port even though the label (port number) over the entrance to the wormhole in your house has a different port number over it.
Because, for example, at work they've locked you down behind a firewall and the only ports you can get out on are not the ones you need on the remote host. In this case, pretend they've locked down port 80, but you desperately need to use your browser to get to ubuntuforums.org and it's listening on port 80. But, in their infinite wisdom, IS&T have left you able to get out over port 8888. So you create a tunnel from your port 8888 to ubuntuforum's port 80.
(This example is a little bogus because typically port 80 is the only port left open to you in your firewall. But the illustration was easier to illustrate.)
I haven't really finished this from here on...
In the above example, we used port 8888 for the source port. Port numbers less than 1024 or greater than 49151 are reserved for the system, and some programs will only work with specific source ports, but otherwise you can use any source port number. For example, you could do:
ssh -L 8888:www.ubuntuforums.org:80 -L 12345:ubuntu.com:80 host
...to forward two connections, one to www.ubuntuforums.org, the other to www.ubuntu.com. Pointing your browser at http://localhost:8888/ would download pages from www.ubuntuforums.org, and pointing your browser to http://localhost:12345/ would download pages from www.ubuntu.com.
The destination server can even be the same as the ssh server. For example, you could do:
ssh -L 5900:localhost:5900 host
This would forward connections to the shared desktop on your ssh server (if one had been set up). Connecting an ssh client to localhost port 5900 would show the desktop for that computer.
In the command below, option -R is for "remote."
ssh -R 5900:localhost:5900 russ@jacks-computer
# netstat -tulpn | grep port-number
tcp        0      0 0.0.0.0:port-number       0.0.0.0:*          LISTEN      52840/docker-proxy
tcp6       0      0 :::port-number            :::*               LISTEN      52846/docker-proxy
Basically, if you want to see whether Tomcat (our sample process) is running on a specific port, do this:
    root@app-1:# lsof -i :8080
    COMMAND PID    USER   FD   TYPE DEVICE SIZE/OFF NODE NAME
    java    916 tomcat6   33u  IPv6   7764      0t0  TCP *:http-alt (LISTEN)
Here are some less specific commands that are useful in determining which ports are open by which processes:
    sudo lsof -i
    sudo netstat -lptu
    sudo netstat -tulpn
Here's a handy little script to do that:
    #!/bin/sh
    # Test to see if a specified port is open/listening on that host.
    hostname=${1:-}
    portnumber=${2:-}

    if [ -z "$hostname" -o -z "$portnumber" ]; then
      echo "Usage: $0 <hostname> <portnumber>"
      echo "    Don't be surprised by the output! The responding process has its"
      echo "    own idea about how to reply, so think about what you get back."
      exit -1
    fi

    exec 6<>/dev/tcp/${hostname}/${portnumber}
    echo -e "GET / HTTP/1.0\n" >&6
    cat <&6
Example:
    ~ $ test-port.sh app-1 22
    SSH-2.0-OpenSSH_5.9p1 Debian-5ubuntu1
    cat: -: Connection reset by peer
This assumes you created a sudo user more or less like this:
    $ useradd -m username -G sudo -m -s /bin/bash
    $ passwd username
Only if your host is or has been running LDAP, you need merely go into /etc/security/access.conf and add a line to the bottom of the file to ensure the user is recognized as one that as access to the system.
    $ vi /etc/security/access.conf

    +:username:ALL
In /etc/sudoers, add the following line. I'm showing context for grins; it can be placed elsewhere.
    .
    .
    .
    # User privilege specification
    root	ALL=(ALL:ALL) ALL

    # Members of the admin group may gain root privileges
    %admin ALL=(ALL) NOPASSWD:ALL

    # Allow members of group sudo to execute any command
    %sudo	ALL=(ALL:ALL) ALL
    username    ALL=(ALL) NOPASSWD: ALL

    # See sudoers(5) for more information on "#include" directives:
Install traceroute, then invoke:
    $ sudo apt-get install traceroute
    $ traceroute www.gnugp.net
    traceroute to www.gnupg.net (217.69.87.21), 30 hops max, 60 byte packets
     1  log02gwn04-vlan351.usa.acmecorp.com (16.86.192.3)  0.511 ms  1.022 ms  1.293 ms
     2  log01gwn02-g0-0.americas.acmecorp.net (16.96.140.221)  0.438 ms  0.445 ms  0.440 ms
     3  log02gwn21-att-51.americas.acmecorp.net (15.180.128.238)  2.354 ms  2.331 ms  2.337 ms
     4  txn06gwb33-att-51.americas.acmecorp.net (15.180.134.45)  40.736 ms  40.743 ms  40.730 ms
     5  16.97.47.165 (16.97.47.165)  41.356 ms  41.816 ms  41.799 ms^C
    ...
Go to System -> Preferences -> Startup Applications and add a new entry containing nautilus direct.javahotchocolate.com/home/russ/sites/javahotchocolate to get this.
Much of this is only because of being behind a firewall.
So far, employing at least one of the following solutions hasn't failed to get me out of seeing stuff like the following (messages are disparate excerpts):
    $ ping web-proxy.americas.acmecorp.com
    ping: unknown host web-proxy.americas.acmecorp.com

    Err http://us.archive.ubuntu.com precise InRelease

    Err http://us.archive.ubuntu.com/ubuntu/ precise-updates/main libxcb1 amd64 1.8.1-1ubuntu0.2
      Temporary failure resolving 'web-proxy.americas.acmecorp.com'

    W: Failed to fetch http://us.archive.ubuntu.com/ubuntu/dists/precise-backports/Release.gpg  Temporary failure resolving
    'web-proxy.americas.acmecorp.com'

    Failed to fetch http://us.archive.ubuntu.com/ubuntu/pool/universe
You set up a new server, it's using DHCP, so you change /etc/network/interfaces to make its address static, then you can't see anything on the network, update apt, etc.
    # The loopback network interface
    auto lo
    iface lo inet loopback

    # The primary network interface
    auto eth0
    #iface eth0 inet dhcp
    iface eth0 inet static
        address   16.86.192.110
        netmask   255.255.255.0
        gateway   16.86.192.1
You have to, despite the warning, change /etc/resolv.conf to enable ping, apt-get, etc. to work. In theory, given the warning, you should be prepared to restore what you put after it's clobbered. This happens with particular frequency under the new, "/etc/resolveconf as a subdirectory" way of implementing /etc/resolv.conf.
    # Dynamic resolv.conf(5) file for glibc resolver(3) generated by resolvconf(8)
    #     DO NOT EDIT THIS FILE BY HAND -- YOUR CHANGES WILL BE OVERWRITTEN
    search americas.hpqcorp.net
    nameserver 16.110.135.52
    nameserver 16.110.135.51
Warning: This will get clobbered. Most *nicies have changed how the whole /etc/resolv.conf mechanism works! Please see How do I include lines in resolv.conf that won't get lost on reboot? or read on for my solution.
# resolveconf -u
And, because we're behind a firewall, you'll need to add your proxy reference to /etc/apt/apt.conf. It holds only as long as the shell remains current.
Acquire::http::Proxy "http://web-proxy.americas.acmecorp.net:8080/";
...or, you could put this in a more, modern-canonical place:
    Acquire::http::proxy  "http://web-proxy.americas.acmecorp.com:8080";
    Acquire::https::proxy "https://web-proxy.americas.acmecorp.com:8080";
    Acquire::ftp::proxy   "ftp://web-proxy.americas.acmecorp.com:8080";
If you're getting grief from apt-get over what you've put into /etc/apt/apt.conf.d/95proxy, you can always resort to this one-shot solution:
    $ export http_proxy="http://web-proxy.acmecorp.com:8080"
    $ export https_proxy="https://web-proxy.acmecorp.com:8080"
    $ export ftp_proxy="ftp://web-proxy.acmecorp.com:8080"
If you need to put this into a script for executing frequently (because you keep destroying the shell and need to renew these settings), copy lines above into a file that you source:
$ source ./fixup-proxy.sh
Here's a pretty inspiring (if you have the patience for it) presentation on upstart. I learned a lot: Learning CentOS Linux Lesson 2 Upstart service configuration
Now, another helpful discussion is had at Getting Started With and Understanding Upstart Scripts on Ubuntu.
In particular, --chuid, an option to start-stop-daemon, is how you avoid running whatever program as a service from root. This strikes me as a really interesting feature.
You've installed a new server, like Chef, and you're trying to determine or verify what port it's listening on. Here's how (see line below in bold):
    russ@chef:~$ sudo netstat -lntp
    Active Internet connections (only servers)
    Proto Recv-Q Send-Q Local Address           Foreign Address         State       PID/Program name
    tcp        0      0 0.0.0.0:4000            0.0.0.0:*               LISTEN      1460/merb : chef-se
    tcp        0      0 127.0.0.1:5984          0.0.0.0:*               LISTEN      1206/beam.smp
    tcp        0      0 0.0.0.0:4040            0.0.0.0:*               LISTEN      1046/merb : chef-se
    tcp        0      0 0.0.0.0:4369            0.0.0.0:*               LISTEN      1252/epmd
    tcp        0      0 0.0.0.0:22              0.0.0.0:*               LISTEN      863/sshd
    tcp        0      0 0.0.0.0:58140           0.0.0.0:*               LISTEN      1274/beam.smp
    tcp6       0      0 :::5672                 :::*                    LISTEN      1274/beam.smp
    tcp6       0      0 :::22                   :::*                    LISTEN      863/sshd
    tcp6       0      0 127.0.0.1:8983          :::*                    LISTEN      1103/java
    $ cat /etc/hosts | grep chef
    16.86.192.111 uas-chef                         chef
The conclusion to draw from this specific example is that "the Chef web UI is accessible in a browser by typing http://16.86.192.111:4040/".
This is a mere outline of my experience adding a new Seagate 1Tb disk to Ubuntu Precise Server 12.04 LTS which already had a few drives in it.
Not all of these links are useful, not all in the ones that are useful is useful. I wandered around examining them, following their links, etc. before deciding what to do. I think the ones marked "xxxx" were a bit more useful than the others.
# lshw -C disk
And it showed me (pre-existing/irrelevant devices abbreviated here):
    sda Seagate 1Tb partitioned by DOS*
    cdrom
    *-disk
    description: ATA Disk
    product: ST310000520AS
    vendor: Seagate
    physical id: 0.0.0
    bus info: [email protected]
    logical name: /dev/sdb
    version: CC32
    serial: 5VX105A3
    size: 931GiB (1TB)
    configuration: ansiversion=5
    sdc Western Digital 500Gb partitioned by DOS*
    sdd Western Digital 500Gb partitioned by DOS*
* this was originally a Windows 7 machine. /dev/sdc and /dev/sdd are/were mirrored.
    # fdisk /dev/sdb
    Device contains neither a valid DOS partition table, nor Sun, SGI or OSF disklabel
    Building a new DOS disklabel with disk identifier 0x824ad627.
    Changes will remain in memory only, until you decide to write them.
    After that, of course, the previous content won't be recoverable.

    Warning: invalid flag 0x0000 of partition table 4 will be corrected by w(rite)

    Command (m for help): m
        etc.

    Command (m for help): n
    Partition type:
        p   primary (0 primary, 0 extended, 4 free)
        e   extended
    Select (default p):
    Partition number (1-4, default 1): 1
    First sector (2048-1953525167, default 2048):
    Using default value 2048
    Last sector, *sectors or *size{K,M,G} (2048-1953525167, default 1953525167):
    Using default value 1953525167

    Command (m for help): w
    The partition table has been altered!

    Calling ioctl() to re-read partition table.
    Syncing disks.
    # mkfs -t ext3 /dev/sdb1
    mke2fs: 1.42 (29-Nov-2011)
    Filesystem label=
    OS type: Linux
    Block size=4096 (log=2)
    Stride=0 blocks, Stripe width=0 blocks
    61054976 inodes, 244190390 blocks
    12209519 blocks (5.00%) reserved for the super user
    First data block=0
    Maximum filesystem blocks=4294967296
    7453 block groups
    32768 blocks per group, 32768 fragments per group
    8192 inodes per group
    Superblock backups stored on blocks:
    xxx, xxxx, xxxx, xxxx, xxxx, xxxx, xxxx, xxxx,
    etc.

    Allocating group tables: done
    Writing inode tables: done
    Creating journal (32768 blocks): done
    Writing superblocks and filesystem account information: done
    # tune2fs -m 1 /dev/sdb1
    tune2fs 1.42 (29-Nov-2011)
    Setting reserved blocks percentage to 1% (2441903)
# mkdir /media/Seagate-2-1Tb
# e2label /dev/sdb1 Seagate-2
    # blkid
    /dev/sda1: LABEL="taliesin-2" UUID="7C00..." TYPE="ntfs"
    /dev/sdb1: UUID="02d0c976-1136-415e-a079-d92f722de9b0" SEC_TYPE="ext2" TYPE="ext3"
    /dev/sdc: TYPE="isw_raid_member"
    /dev/sdd: TYPE="isw_raid_member"
    /dev/mapper/isw_hfecjiijj_taliesin1: UUID="9266...
    /dev/mapper/isw_hfecjiijj_taliesin5: UUID="oWVwT...
    /dev/mapper/taliesin-root: UUID="a6da2...
    /dev/mapper/taliesin-swap_1: UUID="b2de4...

    # cat /etc/fstab
    ...
    proc                                /proc  proc  nodev,noexec,nosuid   0 0
    /dev/mapper/taliesin-root           /      ext4  errors=remount-ro     0
    /dev/mapper/isw_hfecjiijj_taliesin1 /boot  ext2  defaults              0 2
    /dev/mapper/taliesin-swap_1         none   swap  sw                    0 0
I added to this file:
/dev/sdb1 /plex-server ext3 defaults 0 0
I rebooted and did this:
    $ df -h
    Filesystem                           Size   Used   Avail   Use%  Mounted on
    /dev/mapper/taliesin-root           451G    18G    411G     4%   /
    udev                                3.9G    4.0K   3.9G     1%   /dev
    tmpfs                               1.6G    356K   1.6G     1%   /run
    none                                5.0M       0   5.0M     0%   /run/lock
    none                                3.9G       0   3.9G     0%   /run/shm
    /dev/mapper/isw_hfecjiijj_taliesin1 228M     76M   141M    35%   /boot
    /dev/sdb1                           917G    200M   908G     1%   /plex-server
Sorry, monitors were black when I was young and text white, green, etc. I hated that. And I hate it now. Here's how to change it.
$ setterm -background white -foreground black -store
What can go where white or black are above are called "8-bit" colors, which are: black, red, green, yellow, blue, magenta, cyan and white.
white works fine and the bash color settings for directory listings are much better visible, except for executables which, by default, are a color of green that's washed out by white.
I once ordered Macintosh software as a CD. Then I discovered there was no CD drive in the MacBook Air. (Forgive me, I'm not a Macintosh guy and didn't realize that until I went to install the software.) So I created an ISO, which the Macintosh OS is apparently happy to load.
~/Downloads $ mkdir MacQuicken
~/Downloads $ cd MacQuicken/
~/Downloads/MacQuicken $ dd if=/dev/cdrom1 of=~/Downloads/MacQuicken/Quicken_Essentials.iso
307780+0 records in
307780+0 records out
157583360 bytes (158 MB) copied, 48.7764 s, 3.2 MB/s
~/Downloads/MacQuicken $ ll
total 153900
drwxr-xr-x 2 russ russ      4096 Jan 30 08:50 .
drwxr-xr-x 6 russ russ      4096 Jan 30 08:42 ..
-rw-r--r-- 1 russ russ 157583360 Jan 30 08:51 Quicken_Essentials.iso
To see what happens on the Macintosh side of things, look here.
Note: /dev/cdrom1 is not necessarily the device name of the CD drive on your system. This name varies by Linux distro, how many drives you've got, etc. Whatever looks reasonable to you when you go there is likely good.
As mneumonics, think of dd as "disk dump", if as "input file" and of as "output file".
Finding open ports through a firewall is tedious work. Here's my latest attempt to automate the process.
#!/bin/sh
      TRUE=1
     FALSE=0
    script=`basename $0`
 stop_port=9999
   timeout=3
     debug=$FALSE
   verbose=0
  hostname="unknown"
start_port=0
 stop_port=9999
        ip="unknown"
      port=0

DoHelp()
{
  echo "\
$script
   Go fishing for valid ports using ssh, finds open ports, for ssh or not,
   through your firewall. Fishing will try beginning with starting port and
   stop at 9999 or, if given, at stop-port.

   Usage:
     $script [ -hd ] [ --timeout=N ] <hostname> <start-port> [ <stop-port> ] ]

   Arguments
     hostname       name or IP address of target ssh server (required)
     start-port     proposed starting port number on target server (required)
     stop-port      last port number to try target server (9999 if missing)

   Options
     -h             this help blurb
     --help         this help blurb
     -d             dump script variables
     --debug        dump script variables
     --timeout=N    wait only N seconds before giving up on any one port

   Examples (the IP address is bogus)
     $script acme.com 80 80
     Trying acme.com (166.70.173.154) for port 80
     Connection timed out during banner exchange

     $script acme.com 9922 9922
     Trying acme.com (166.70.173.154) for port 9922.
     ssh: connect to host 166.70.173.154 port 9922: Connection refused
  "
  exit 0
}

DoDebug()
{
  echo "Script variables at this point:
    script = ${script}
 stop_port = ${stop_port}
   timeout = ${timeout}
     debug = ${debug}
   verbose = ${verbose}
  hostname = ${hostname}
start_port = ${start_port}
 stop_port = ${stop_port}
        ip = ${ip}
  "
}


while :
do
  case "$1" in
    -h | --help)    DoHelp                 ; exit 0 ;;
    -d | --debug)   debug=$TRUE            ; shift  ;;
    -v | --verbose) verbose=$((verbose+1)) ; shift  ;;  # bump verbosity
    --timeout=*)    timeout=${1#*=}        ; shift  ;;  # discards up to =
    *)              break                           ;;
  esac
done

# Now get the arguments...
  hostname=${1:-}
start_port=${2:-}
 stop_port=${3:-}

if [ -z "$stop_port" ]; then
  stop_port=9999
fi

if [ -z "$hostname" ]; then
  echo "No hostname or IP address specified"
  if [ $debug -eq $TRUE ]; then
    DoDebug
  fi
  exit 0
fi

if [ -z "$start_port" ]; then
  echo "No starting port specified"
  if [ $debug -eq $TRUE ]; then
    DoDebug
  fi
  exit 0
fi

ip=`host ${hostname} | awk '{print $4}'`

if [ "$ip" = "pointer" ]; then
  ip=$hostname
fi

if [ $debug -eq $TRUE ]; then
  DoDebug
fi

if [ "$start_port" = "$stop_port" ]; then
  echo "Trying $hostname ($ip) for port $start_port"
else
  echo "Trying $hostname ($ip) for ports $start_port to $stop_port."
fi

port=$start_port

while [ $port -le $stop_port ]; do
  ssh -o ConnectTimeout=3 -p $port $ip
  port=`expr $port + 1`
done
# vim: set tabstop=2 shiftwidth=2 noexpandtab:
$ chmod -R a+rX *
This makes all files readable down through subdirectories. It also makes subdirectories readable. It also makes subdirectories and executable files executable, but no other files executable. For example:
here
+-- there
      +-- abc.txt
      `-- everywhere
starts out:
~/here $ ls -al there
drwxr-xr-x 3 russ russ 4096 Feb 28 10:27 .
drwxr-xr-x 3 russ russ 4096 Feb 28 10:24 ..
-rw------- 1 russ russ    0 Feb 28 10:27 abc.txt
drwx------ 2 russ russ 4096 Feb 28 10:24 everywhere
~/here $ chmod -R a+rX
but is made to be:
~/here $ ls -al there
drwxr-xr-x 3 russ russ 4096 Feb 28 10:27 .
drwxr-xr-x 3 russ russ 4096 Feb 28 10:24 ..
-rw-r--r-- 1 russ russ    0 Feb 28 10:27 abc.txt
drwxr-xr-x 2 russ russ 4096 Feb 28 10:24 everywhere
Grab the Debian package from Adobe's website. There's some 32-bit ineptness going on with it, so do this:
dpkg --install --force-architecture AdbeRdr9.5.5-1_i386linux_enu.deb
apt-get -f install
apt-get install libxml2:i386 lib32stdc++6
If no -exec, -ok or -print are passed to find, then -print is assumed. Here, find all properties files in an Eclipse project:
~/dev/fun $ find . -name '*.properties' -print
Here, find all properties files in an Eclipse project that contain a username:
~/dev/fun $ find . -name '*.properties' -exec fgrep -Hn username= {} \;
This example insists on the filesystem type found to be "file" and is looking for two file extensions in which to look for search string "JackNJill".
find . -type f \( -name "*.java" -o -name "*.xml" \) -exec fgrep -Hn JackNJill {} \;
Lose the filetype—that might be overkill and it won't change the search time greatly:
find . \( -name "*.java" -o -name "*.xml" \) -exec fgrep -Hn JackNJill {} \;
This is just from bash shell, right? Here's how to do three file extensions:
find . \( -name "*.java" -o -name "*.xml" -o -name "*.properties" \) -exec fgrep -Hn JackNJill {} \;
# nmap -sP 192.168.0.*
I wanted to give Handbrake a better shake in the hours while I'm gone from my host.
I used top to see how processes were being treated. I found ghb at the top sometimes (8819), but I decided to experiment with crippling Thunderbird (2275) and Chrome, especially Facebook, (1932). (You have to play around with Chrome, creating new open tabs and killing them in order to identify which tabs are going to be left open, like Facebook, so you can cripple them. Any new tab, and some Chrome processes themselves, will continue to have neutral (0) priority.
So, observing the process id in the top list, I issued these commands to cripple Thunderbird and Chrome respectively:
~ $ renice 5 -p 2275
2275 (process ID) old priority 0, new priority 5
~ $ renice 5 -p 1932
1932 (process ID) old priority 0, new priority 5
...and this command, using root, to give Handbrake an advantage:
~ $ sudo renice -10 -p 8819
8819 (process ID) old priority -5, new priority -10
I observe that Thunderbird and Chrome aren't appreciably crippled (they're still very usable) in this state. Of course, I can always kill and restart them or hand-promote their niceness if I want them given equal-treatment at any point.
The result comes when I observe Handbrake working, leaving my keyboard and mouse alone for a bit, I see frames-per-second move up into the 1.0+ range instead of less than one frame per second.
Link: http://www.nixtutor.com/linux/changing-priority-on-linux-processes/
$ ifconfig -a | grep HWaddr
eth0      Link encap:Ethernet  HWaddr 00:27:0e:25:3f:c9
# cd /tmp
# wget http://ardownload.adobe.com/pub/adobe/reader/unix/9.x/9.5.5/enu/AdbeRdr9.5.5-1_i486linux_enu.rpm
# yum localinstall AdbeRdr9.5.5-1_i486linux_enu.rpm
# yum install nspluginwrapper.i686 libcanberra-gtk2.i686 adwaita-gtk2-theme.i686 PackageKit-gtk3-module.i686
# cp /opt/Adobe/Reader9/Browser/intellinux/nppdf.so /usr/lib64/mozilla/plugins/
# yum search package
Here's how to get HTML mark-up from tree:
tree -d -I "bin" -C -T Feeder -H file:///home/russ/sandboxes/feeder.v56_release.dev/code/feeder > poop.html

-d subdirectories only
-C use native color for listings (won't be obvious if -d switch used)
-H root generate HTML and anchor links to root
-I exclude don't include certain subdirectories (in list like "bin|lib")
-T name the HTML file title and H1 header
~ $ xsensors &
~ $ disown
~ $ exit
—leaves xsensors running though you've closed the console/terminal from which you started it.
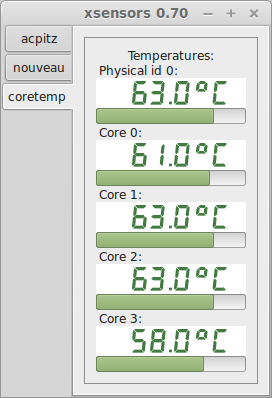
Use sudo sensors-detect to get more sensors.
~ $ sensors
acpitz-virtual-0
Adapter: Virtual device
temp1:        +27.8°C  (crit = +105.0°C)
temp2:        +29.8°C  (crit = +105.0°C)

nouveau-pci-0100
Adapter: PCI adapter
temp1:        +38.0°C  (high = +95.0°C, hyst =  +3.0°C)
                       (crit = +105.0°C, hyst =  +5.0°C)
                       (emerg = +135.0°C, hyst =  +5.0°C)

coretemp-isa-0000
Adapter: ISA adapter
Physical id 0:  +60.0°C  (high = +80.0°C, crit = +100.0°C)
Core 0:         +57.0°C  (high = +80.0°C, crit = +100.0°C)
Core 1:         +60.0°C  (high = +80.0°C, crit = +100.0°C)
Core 2:         +58.0°C  (high = +80.0°C, crit = +100.0°C)
Core 3:         +56.0°C  (high = +80.0°C, crit = +100.0°C)
~ $ xsensors &
~ $ disown

(see illustration to the right...)
Install thus:
# sudo apt-get install youtube-dl
Run thus:
$ youtube-dl URL from step 2
This Unsupported URL is because of the ampersand in the URL. Just quote it.
~/Videos $ youtube-dl https://www.youtube.com/watch?t=94&v=_L_TjXXx7eQ
[1] 5332
~/Videos $ [generic] watch?t=94: Requesting header
[redirect] Following redirect to https://www.youtube.com/
[generic] : Requesting header
WARNING: Falling back on generic information extractor.
[generic] : Downloading webpage
[generic] : Extracting information
ERROR: Unsupported URL: https://www.youtube.com/; please report this issue on https://yt-dl.org/bug. \
Be sure to call youtube-dl with the --verbose flag and include its complete output. Make sure you \
are using the latest version; type  youtube-dl -U  to update.
youtube-dl -U
It looks like you installed youtube-dl with a package manager, pip, setup.py or a tarball. Please \
use that to update.
[1]+  Exit 1                  youtube-dl https://www.youtube.com/watch?t=94
~/Videos $ youtube-dl "https://www.youtube.com/watch?t=94&v=_L_TjXXx7eQ"
youtube-dl may be upgraded at the command line unless installed via Python, in which case, it will tell you:
russ@nargothrond ~ $ sudo youtube-dl -U
It looks like you installed youtube-dl with a package manager, pip, setup.py or a tarball. Please use that to update.
russ@nargothrond ~ $ pip install --upgrade youtube-dl
Collecting youtube-dl
  Downloading
	https://files.pythonhosted.org/packages/05/d4/64dfe51be0fae772e86be3c83d82ec22d59aa8521d8834e10355bf60f9f5/youtube_dl-2020.1.24-py2.py3-none-any.whl
	(1.8MB)
	    100% |                               █| 1.8MB 859kB/s
			Installing collected packages: youtube-dl
			Successfully installed youtube-dl-2020.1.24
I have a 2Tb USB 3 volume with movies my parents like to watch. Only, it's NTFS because my father created it under Windows. As it won't stay mounted, I'm creating a script that will be called periodically via cron to ensure it's always there.
Unctously commented...
#!/bin/sh
# Determine whether the plex-vintage USB drive is mounted and, if not, mount it.
# This is needed because this drive is formatted NTFS, which will not remain
# permanently mounted.
VOLUME_LABEL="Provo movie"

# Find our volume among those known to be mounted...
found_plex_vintage=`cat /proc/mounts | grep /media/plex-vintage`

if [ -n "$found_plex_vintage" ]; then
        echo "/media/plex-vintage is mounted"
        exit 0
fi

# The volume is no longer mounted....

# Determine what device the OS has assigned...
block_id=`blkid | grep '$VOLUME_LABEL'`
device=`echo $block_id | awk '{ print $1 }'`

if [ -z "$device" ]; then
        echo "The volume is unknown"
        exit 2
fi

# Isolate the exact device name...
device=`echo $device | sed 's/://'`

echo "plex-vintage is mounted on device $device"

# Mount the volume again on the new device...
echo "Mounting the volume on the new device..."
echo "# mount $device /media/plex-vintage"

exit 0
mount $device /media/plex-vintage

# vim: set tabstop=2 shiftwidth=2 noexpandtab:
And, here's a cron job that will check every 5 minutes and re-mount it if unmounted, do_mycronjob.sh.
# Every 5 minutes, run this script:
*/5 * * * * /home/russ/bin/mount-if-needed.sh
Here's what to do to launch the cron job:
$ sudo crontab do_mycronjob.sh
$ crontab -l
# Every minute, run this script:
* * * * * /home/russ/bin/mount-if-needed.sh
I use gparted here. Click any of the illustrations to see normal size.
$ sudo bash
# apt-get install gparted
.
.
.
# gparted &
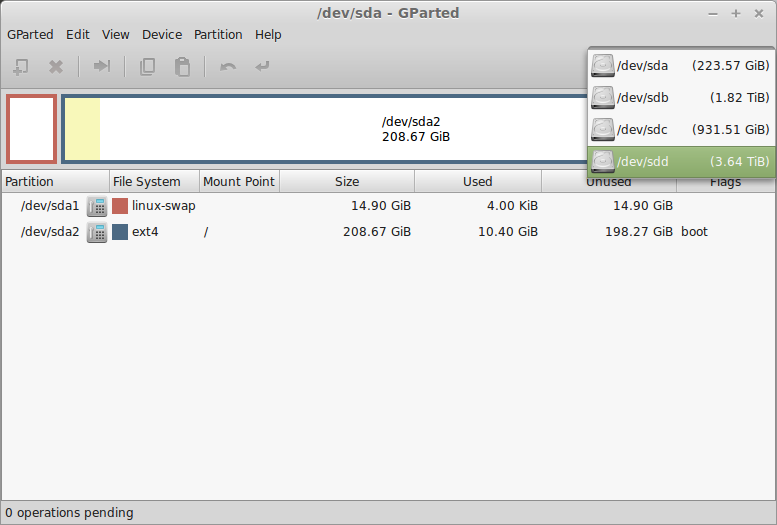
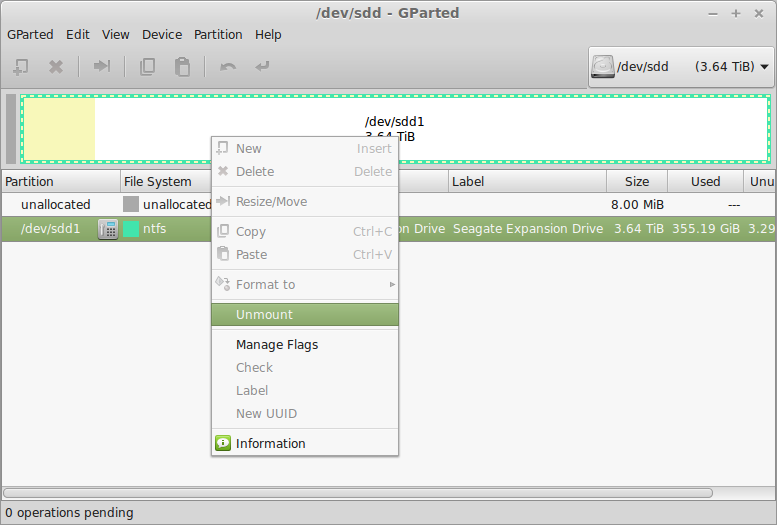
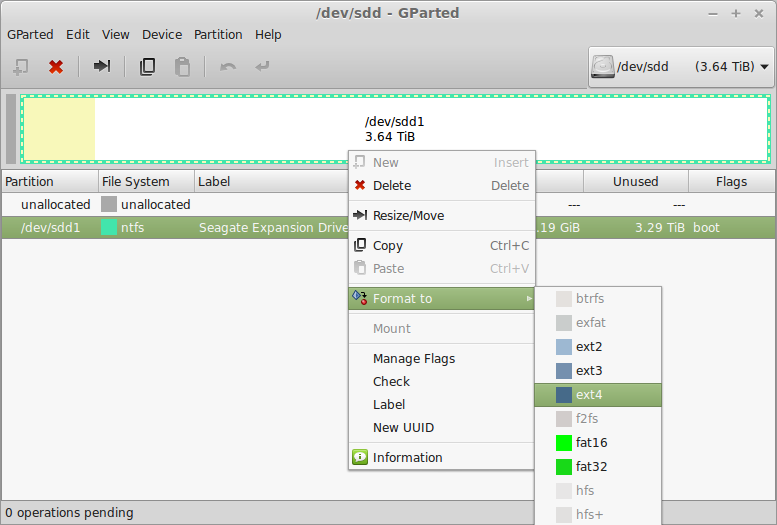
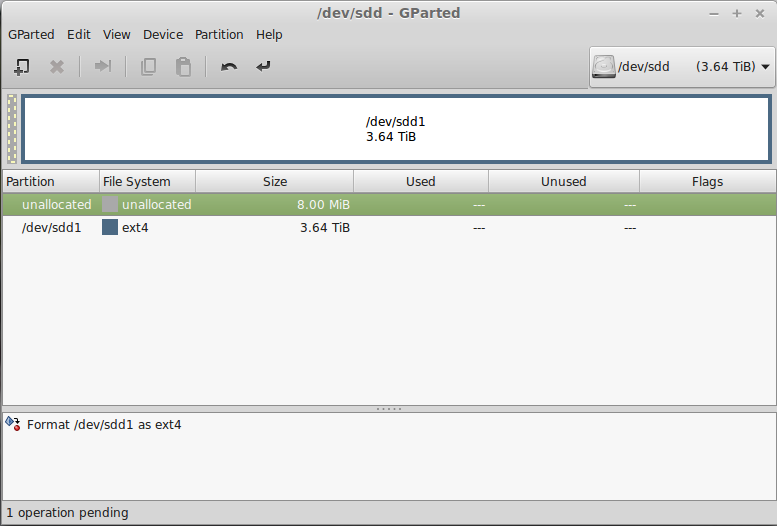
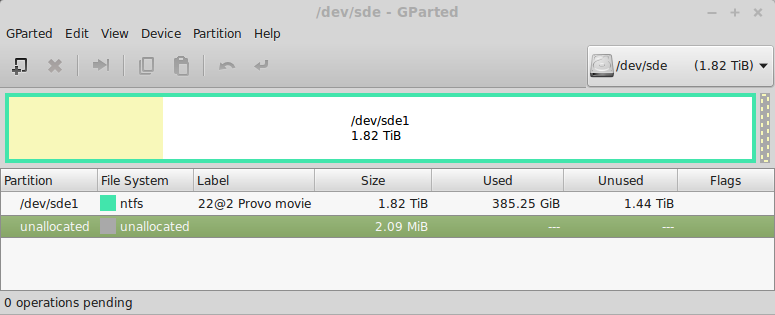
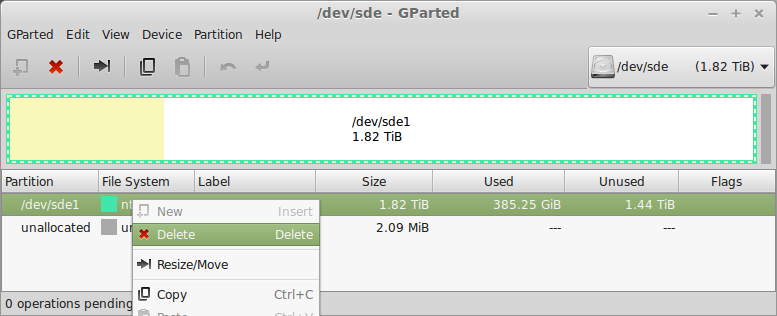
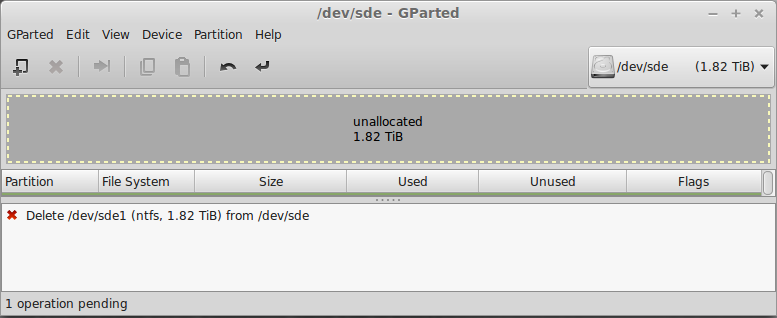
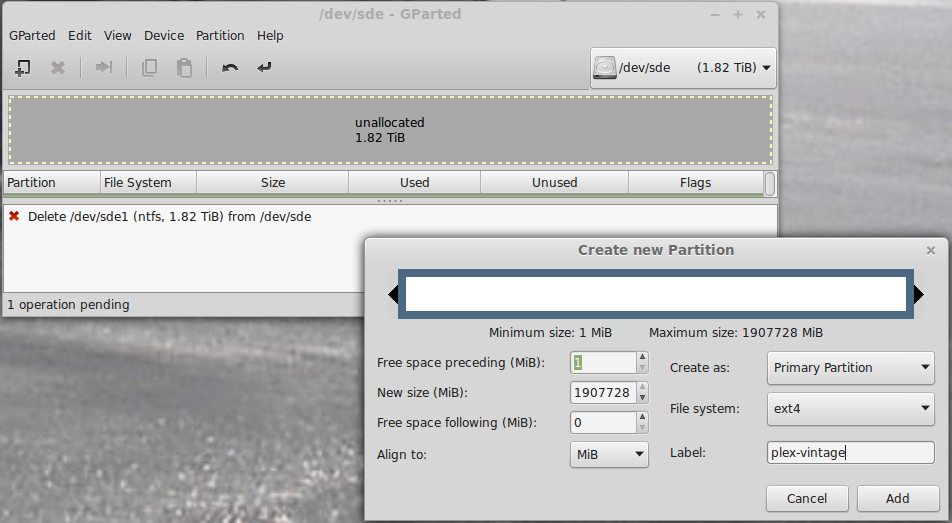
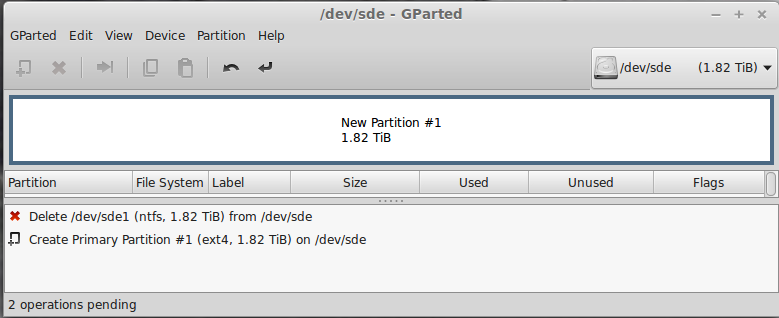
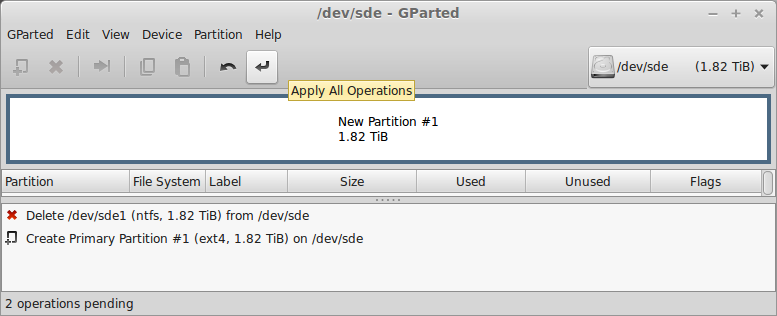
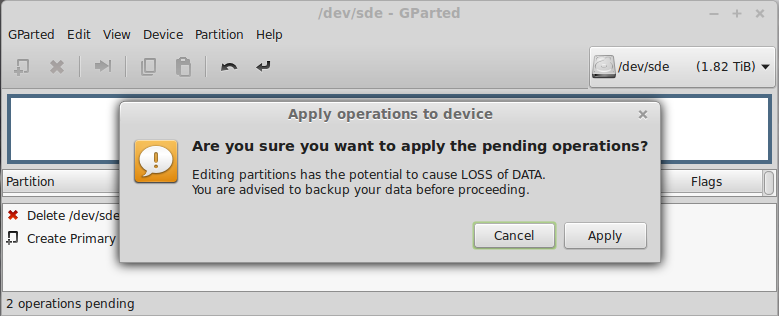
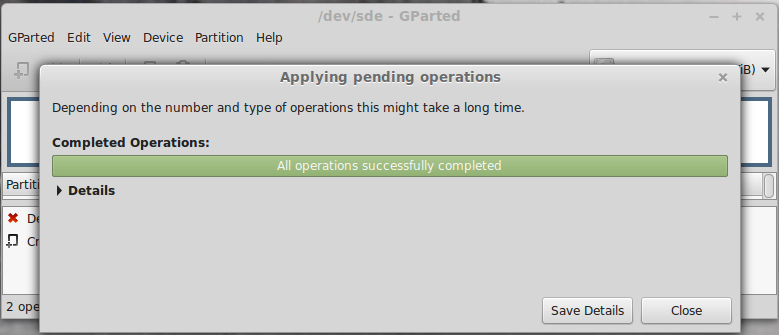
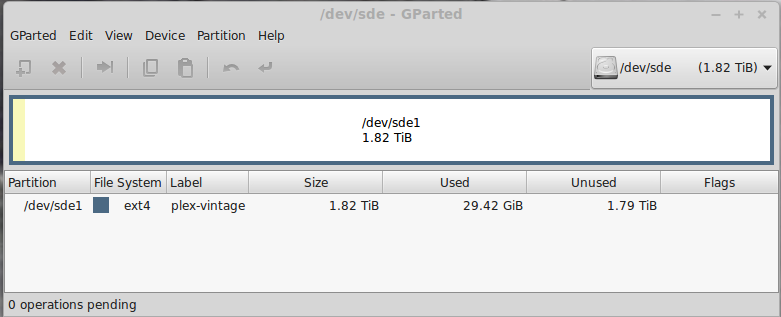
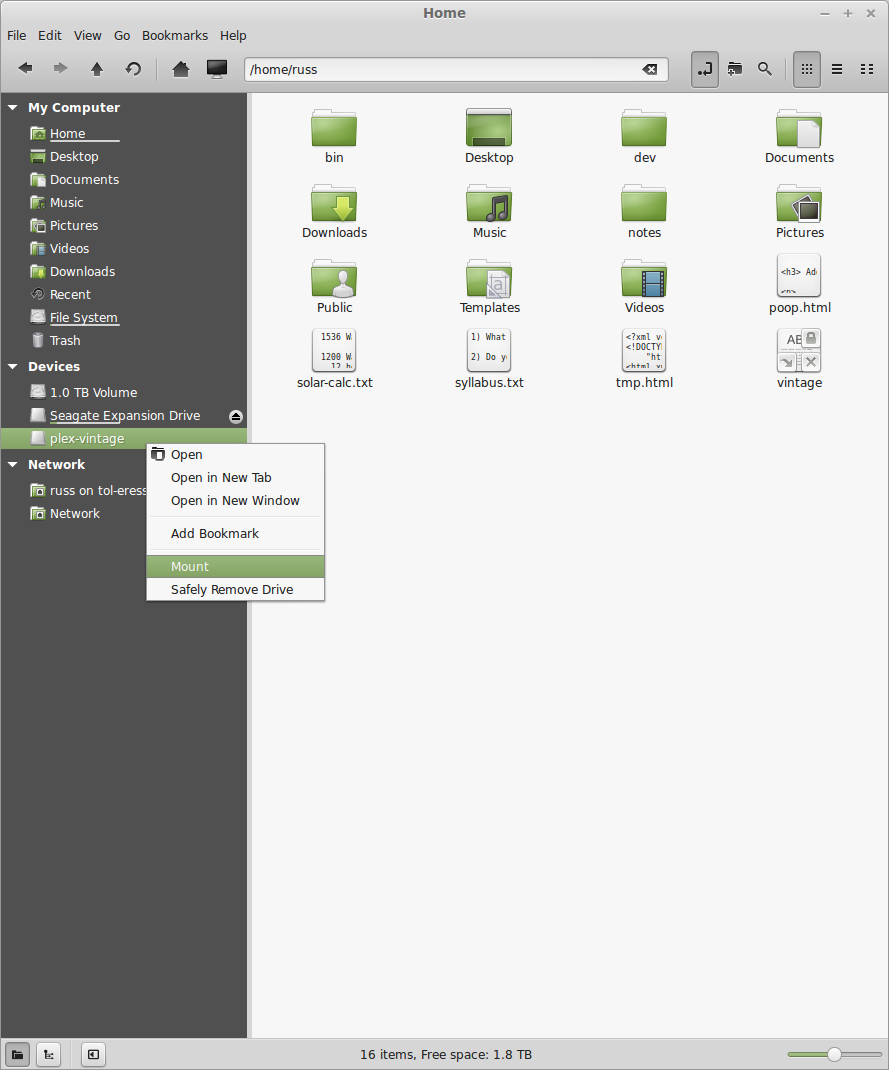
~/Pictures # sudo bash
~/Pictures # cd /media/russ
/media/russ # blkid
/dev/sda1: UUID="04e3df3b-5d81-4142-9204-365ebc848f26" TYPE="swap"
/dev/sda2: UUID="47a2fc62-fd9c-4e2d-a129-df77c2409f08" TYPE="ext4"
/dev/sdb1: UUID="377aca06-832b-4778-aa00-6b6023ff1955" TYPE="ext4"
/dev/sdc1: UUID="41728a8a-6a6b-48dc-96d9-8d39d6287b0f" TYPE="ext4"
/dev/sdd1: LABEL="Seagate Expansion Drive" UUID="30525A2F5259FA54" TYPE="ntfs"
/dev/sde1: LABEL="plex-vintage" UUID="af8defec-2a88-4178-9744-f756b813a527" TYPE="ext4"
/media/russ # ll
total 12
drwxr-x---+ 4 root root 4096 Sep  3 19:03 .
drwxr-xr-x  3 root root 4096 Sep  3 19:08 ..
drwxr-xr-x  3 root root 4096 Sep  3 18:56 plex-vintage
drwx------  1 russ russ    0 Sep  1 18:44 Seagate Expansion Drive
/media/russ # chown -R russ:russ plex-vintage
/media/russ # ll plex-vintage
total 24
drwxr-xr-x  3 russ russ  4096 Sep  3 18:56 .
drwxr-x---+ 4 root root  4096 Sep  3 19:03 ..
drwx------  2 russ russ 16384 Sep  3 18:56 lost+found
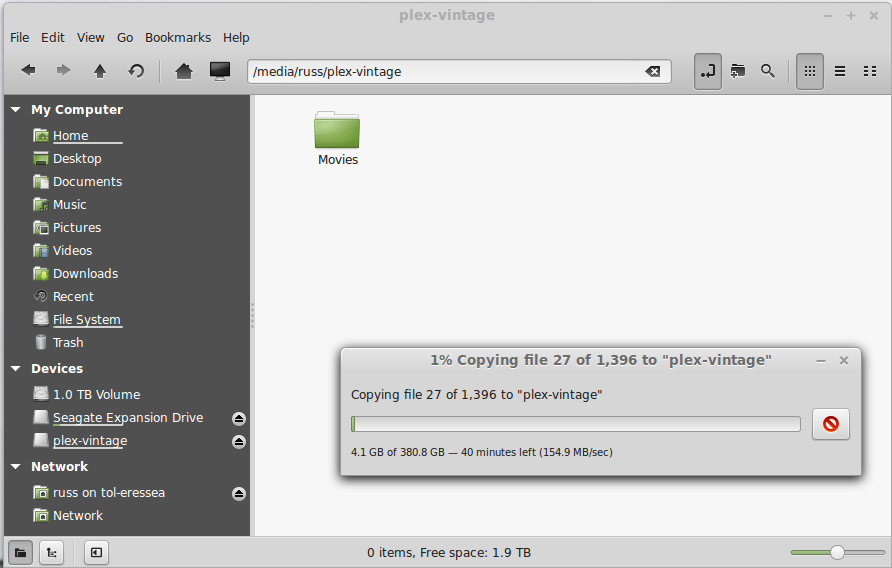
Change the priority of a running process. Note that priority 0 is the default. Smaller numbers are higher.
Use top to find what processes are running and their activity respective to each other. Use renice on the one whose activity you wish to boost respective to the others. For example, conceptual and actual examples below show how to change the attention HandBrake gets from the OS (even though it appears to be getting the most when seen in top as it is.)
$ sudo renice -n priority -p process-id
$ top
.
.
.
  PID USER      PR  NI    VIRT    RES    SHR S  %CPU %MEM     TIME+ COMMAND
27488 russ      20   0 5600188 1.766g  50864 S 682.8 11.4   3507:08 ghb
 4777 russ      20   0 1801016 1.187g  26832 S  84.4  7.6  13583:17 plugin-containe
 1644 root      20   0  540052 243240  96048 S   2.0  1.5  73:46.63 Xorg
 2487 russ      20   0 1589676 209780  63704 S   1.3  1.3 117:14.70 cinnamon
30242 russ      20   0  603072  20304  12372 S   1.0  0.1   0:00.45 gnome-terminal
 2503 russ      20   0 1096624  78164  19388 S   0.7  0.5   1:40.09 nemo
 2237 russ       9 -11  582980   8068   5480 S   0.3  0.0  64:19.45 pulseaudio
.
.
.
^C
$ sudo renice -n -15 -p 27488
$ top
.
.
.
  PID USER      PR  NI    VIRT    RES    SHR S  %CPU %MEM     TIME+ COMMAND
27488 russ       5 -15 5600188 1.957g  50864 S 700.4 12.6   3557:21 ghb
 4777 russ      20   0 1801016 1.187g  26832 S  83.4  7.6  13589:56 plugin-containe
30275 russ      20   0 1355972 312144  55208 S   2.0  1.9   0:30.02 firefox
 2487 russ      20   0 1589804 209852  63704 S   1.0  1.3 117:23.87 cinnamon
 1644 root      20   0  540052 243260  96068 S   0.7  1.5  73:52.18 Xorg
 2237 russ       9 -11  582980   8068   5480 S   0.3  0.0  64:21.62 pulseaudio
13996 root      20   0       0      0      0 S   0.3  0.0   0:34.48 kworker/7:1
27025 root      20   0       0      0      0 S   0.3  0.0   0:24.31 kworker/0:0
.
.
.
This will tend to starve out most other activity on the machine until HandBrake finishes ripping what it's working on.
After better than 30 years in UNIX, I discovered chattr. I needed a way to make a file, /etc/apt/sources.list.d/google-chrome.list immutable because Google was still destroying it on update.
Changing it to read-only would not fix the problem, but there is apparently an ability in some filesystems, ext4 included, to mark a file as immutable.
# chattr +i filename
etckeeper is a utility that will monitor /etc changes and keep track of that subdirectory in your favorite version-control system like Git.
To install:
# apt-get install etckeeper # (assume you already have git)
Next, edit /etc/etckeeper/etckeep.conf. Uncomment VCS=git to get Git going for this utility.
To activate, do:
# etckeeper init # (reverse by doing etckeeper uninit)
For more practical information, see www.howtoforge.com/using-version-control-for-your-etc-directory-with-etckeeper-and-bazaar-on-debian-squeeze.
Investigate what's on a socket...
~ $ sudo ss -tpln
State    Recv-Q Send-Q     Local Address:Port     Peer Address:Port
LISTEN   0      3000           127.0.0.1:6942                *:*     users:(("java",pid=31766,fd=182))
LISTEN   0      1                      *:8000                *:*     users:(("java",pid=23325,fd=4))
LISTEN   0      50             127.0.0.1:33377               *:*     users:(("java",pid=23325,fd=30))
LISTEN   0      50                     *:42692               *:*     users:(("java",pid=31766,fd=483))
LISTEN   0      3000           127.0.0.1:35112               *:*     users:(("java",pid=31766,fd=109))
LISTEN   0      3000           127.0.0.1:63342               *:*     users:(("java",pid=31766,fd=454))
LISTEN   0      5              127.0.0.1:49679               *:*     users:(("GoogleTalkPlugi",pid=7015,fd=18))
LISTEN   0      50                     *:8080                *:*     users:(("java",pid=23325,fd=1823))
LISTEN   0      128            127.0.0.1:5939                *:*     users:(("teamviewerd",pid=1520,fd=15))
LISTEN   0      128                    *:22                  *:*     users:(("sshd",pid=1497,fd=3))
LISTEN   0      5              127.0.0.1:32823               *:*     users:(("GoogleTalkPlugi",pid=7015,fd=16))
LISTEN   0      5              127.0.0.1:631                 *:*     users:(("cupsd",pid=1997,fd=12))
LISTEN   0      50                    :::19432              :::*     users:(("java",pid=31843,fd=34))
LISTEN   0      50                    :::41134              :::*     users:(("java",pid=31843,fd=68))
LISTEN   0      511                   :::80                 :::*     users:(("httpd",pid=9719,fd=4),\
    ("httpd",pid=9718,fd=4),("httpd",pid=9716,fd=4),("httpd",pid=9713,fd=4),("httpd",pid=9232,fd=4),\
    ("httpd",pid=8965,fd=4),("httpd",pid=8964,fd=4),("httpd",pid=8962,fd=4),("httpd",pid=8959,fd=4),\
    ("httpd",pid=2211,fd=4),("httpd",pid=2173,fd=4))
LISTEN   0      128                   :::22                 :::*     users:(("sshd",pid=1497,fd=4))
LISTEN   0      50      ::ffff:127.0.0.1:39959              :::*     users:(("java",pid=23302,fd=31))
LISTEN   0      5                    ::1:631                :::*     users:(("cupsd",pid=1997,fd=11))
What does it mean to have 300% or 400% CPU noted on a process in top? It means that of all the CUP cores running the process, their utilizations add up to that much.)
This is especially interesting and elucidating in the case of a process running Java.
$ pmap process-id
[ -d /usr/share/fonts/opentype ] || sudo mkdir /usr/share/fonts/opentype
sudo git clone --depth 1 --branch release https://github.com/adobe-fonts/source-code-pro.git /usr/share/fonts/opentype/scp
sudo fc-cache -f -v
$ mount | column -t
$ cat /etc/passwd | column -t -s: # (tab on the ':' character)
Given:
/tmp $ tree this that
this
├── CCD_Sample1.xml
└── CDA_Sample1.xml   # (2,3 below)
that
├── CCD_Sample1.xml
├── CDA_Sample1.xml   # (2,3 below)
└── poop              # (1 below)
If I want to determine...
...between two filesystems, I can do this:
/tmp $ diff -bur this that
diff -bur this/CDA_Sample1.xml that/CDA_Sample1.xml
--- this/CDA_Sample1.xml	2017-02-01 13:00:18.493323387 -0700
+++ that/CDA_Sample1.xml	2017-02-01 13:02:32.204098506 -0700
@@ -7,7 +7,7 @@
 -->
 	<id extension="c266" root="2.16.840.1.113883.3.933"/>
 	<code code="11488-4" codeSystem="2.16.840.1.113883.6.1" displayName="Consultation note"/>
-	<title>Good Health Clinic Consultation Note</title>
+	<title>Bad Health Clinic Consultation Note</title>
 	<effectiveTime value="20000407"/>
 	<confidentialityCode code="N" codeSystem="2.16.840.1.113883.5.25"/>
 	<setId extension="BB35" root="2.16.840.1.113883.3.933"/>
Only in that: poop
# cat /etc/passwd | column -t -s :
# mount | column -t
# ps -ef | sort -rnk 4
# ps -ef | sort -nk 3
# apt-get install multitail
I'm going to pretend some problems along the way here just to illustrate how I solved them. For example, if I were setting up Kibana as a service, it does not come that way, I would use kibana in place of my below.
[Unit]
Description=my service

[Service]
ExecStart=/opt/my/bin/my
StandardOutput=null

[Install]
Alias=my.service
root@scylla:~# systemctl start my.service
root@scylla:~# systemctl status my.service
• my.service - My Service
   Loaded: loaded (/lib/systemd/system/my.service; disabled; vendor preset: enabled)
   Active: failed (Result: exit-code) since Tue 2018-01-02 09:32:47 MST; 8s ago
  Process: 1395 ExecStart=/opt/my/bin/my (code=exited, status=253)
 Main PID: 1395 (code=exited, status=253)

Jan 02 09:32:47 scylla My[1395]:    Proprietary and confidential.
Jan 02 09:32:47 scylla My[1395]:  Config file open error 2 for conf/my.conf; configsys.cpp 145
Jan 02 09:32:47 scylla My[1395]: Begin Server shutdown
Jan 02 09:32:47 scylla My[1395]: Server shutdown completed
Jan 02 09:32:47 scylla My[1395]: My Exiting, ExitCode=-3
Jan 02 09:32:47 scylla systemd[1]: my.service: Main process exited, code=exited, status=253/n/a
Jan 02 09:32:47 scylla systemd[1]: my.service: Unit entered failed state.
Jan 02 09:32:47 scylla systemd[1]: my.service: Failed with result 'exit-code'.
#!/bin/sh
APPLIANCE="/opt/my"
MY_SERVER="./bin/my"
( cd ${APPLIANCE} ; ${MY_SERVER} &> /dev/null &disown )
root@scylla:~# pu ${APPLIANCE}
root@scylla:/opt/my# ${MY_SERVER}
   ***   Etretat Logiciels My, 10.11.16. localhost.localdomain  ***
   Copyright (c) 2005-2017 Etretat Logiciels, LLC.
   All rights reserved.
   Proprietary and confidential.

Logging to logs/
Shutting down server port 33333
 Socket Error 98, cannot bind socket, 0.0.0.0:33333; connection.cpp 87
My Exiting, ExitCode=-3
I believe I have to saw a hole through the firewall for port 33333? No, that's not it. It's because my server is already running, probably because some earlier attempt succeeded:
root@scylla:/opt/my# netstat -tulpn | grep [3]0000
tcp        0      0 0.0.0.0:33333           0.0.0.0:*               LISTEN      1496/My
root@scylla:/opt/my# ps -ef | grep [S]earchServer
root      1496     1  0 10:11 pts/0    00:00:00 ./bin/my
root@scylla:/opt/my# kill -9 1496
root@scylla:/opt/my# ps -ef | grep [S]earchServer
root@scylla:/opt/my# ${MY_SERVER}
   ***   Etretat Logiciels My, 10.11.16. localhost.localdomain  ***
   Copyright (c) 2005-2017 Etretat Logiciels, LLC.
   All rights reserved.
   Proprietary and confidential.

Logging to logs/
Server listening on 0.0.0.0:33333
Physical Memory = 12301606912
Max Build Mem = 2048000000   Mem Pool Block Size = 64000000
Error loading library /opt/my/libSessionHandler.so: cannot open shared object file: No such file or directory
Error loading library /opt/my/lib/libSessionHandler.so: cannot open shared object file: No such file or directory
Error loading library /opt/my/extensions/libSessionHandler.so: cannot open shared object file: No such file or directory
 Failed to load shared library, SessionHandler; systemloader.cpp 526
  Loaded /opt/my/cache/store/tombstones.btm (Checksum:0)
IndexLive had 0 integrity faults
My Initialization Complete
[Unit]
Description=My Service

[Service]
WorkingDirectory=/opt/my
ExecStart=/opt/my/bin/my
StandardOuput=null

[Install]
Alias=my.service
Let's try this again:
root@scylla:/lib/systemd/system# systemctl start my.service
Warning: my.service changed on disk. Run 'systemctl daemon-reload' to reload units.
root@scylla:/lib/systemd/system# systemctl daemon-reload
root@scylla:/lib/systemd/system# systemctl start my.service
root@scylla:/lib/systemd/system# systemctl status my.service
• my.service - My Service
   Loaded: loaded (/lib/systemd/system/my.service; disabled; vendor preset: enabled)
   Active: active (running) since Tue 2018-01-02 10:36:08 MST; 5s ago
 Main PID: 1693 (My)
    Tasks: 57
   Memory: 3.6M
      CPU: 27ms
   CGroup: /system.slice/my.service
           └─1693 /opt/my/bin/my

Jan 02 10:36:08 scylla My[1693]: Max Build Mem = 2048000000   Mem Pool Block Size = 64000000
Jan 02 10:36:08 scylla My[1693]:   Loaded /opt/my/CacheRoot/DefaultStore.0/tombstones.btm (Ch
Jan 02 10:36:08 scylla My[1693]: IndexLive had 0 integrity faults
Jan 02 10:36:08 scylla My[1693]: Server Initialization Complete
root@scylla:/lib/systemd/system# ps -ef | grep [S]earchServer
root      1693     1  0 10:36 ?        00:00:00 /opt/my/bin/My
root@scylla:# systemctl enable my.service
As noted (when you execute this), a symbolic link is created from
/etc/systemd/system to your service script. This is how the
system understands to launch it after reboot.
root@scylla:# systemctl reenable my.service
I like to alias git status by gs, which I type very frequently. All I have to do is create my alias, then ghostscript's binary gs becomes invisible.
# adduser username
This simple command will:
If you have a path that looks like this:
\\cab.acme.com\shared\Testing\Cases\VISA Test.notes
...and you need access to it, particularly on a long-term and useful basis, you can mount it using Common Internet File System (CIFS), which is a Microsoft invention. You do this by mounting it in the filesystem which Linux supports. You start by creating a mount point—a subdirectory in the filesystem under whatever place seems useful to you. Here, we're choosing media, but we'll add a couple of more subdirectories inspired by the name to make the final result more recognizable:
$ sudo mkdir -p /media/cab/shared
$ sudo sudo mount -t cifs //cab.acme.com/shared /media/cab/shared -o user=russell.bateman,vers=1.0
Password for rbateman@//cab.acme.com/shared:  ******************
$ ll /media/cab/shared/
total 1026202
drwxr-xr-x 2 root root         0 Jan 17 17:40  ./
drwxr-xr-x 3 root root      4096 Feb 11 14:17  ../
-rwxr-xr-x 1 root root    273024 Jan 28  2015  README.txt*
drwxr-xr-x 2 root root         0 Dec 20 16:30  Testing/
I found that Timeshift was taking it all up (and I know why*). Here's my experience. To figure it out, I started at the root of the filesystem and cast around mostly using du -h --max-depth 1 to identify the culprit. The --max-depth 1 option limits both the depth of du's search to just the directory I'm in, but also takes no time at all to execute. If you just do du -h to get the whole view, which isn't that useful anyway, it can take a long time. On a system with a 100% full system disk, that can be frustrating as system performance with a 100% full disk is already in the toilet.
As I freed up space, I kept checking with df.
root@nargothrond:/timeshift/snapshots# df
Filesystem      1K-blocks       Used  Available Use% Mounted on
...
/dev/sda1      1921802432 1913986488          0 100% /
...
root@nargothrond:/timeshift/snapshots# du -h --max-depth 1
6.7G    ./2018-10-07_12-20-54
1.8T    ./2019-09-05_14-00-01
57G     ./2019-09-05_20-00-01
1.8T    .
root@nargothrond:/timeshift/snapshots# rm -rf 2019-09-05_14-00-01/
After:
root@nargothrond:/timeshift/snapshots# df
Filesystem      1K-blocks       Used  Available Use% Mounted on
...
/dev/sda1      1921802432   24944284 1799166092   2% /
...
* To see how to exclude content from Timeshift, see Filtering non-obvious stuff to hide it from Timeshift below.
Timeshift is a system-restoration tool for Linux to protect your host by making incremental snapshots of the filesystem at regular intervals you can set. However, it will mistake much content, like audio and video for your Plex Media Server, unless underneath your /home/username subdirectory.
Timeshift provides the ability to filter what's caught in the back-up. To configure it, launch Timeshift, authenticate and...
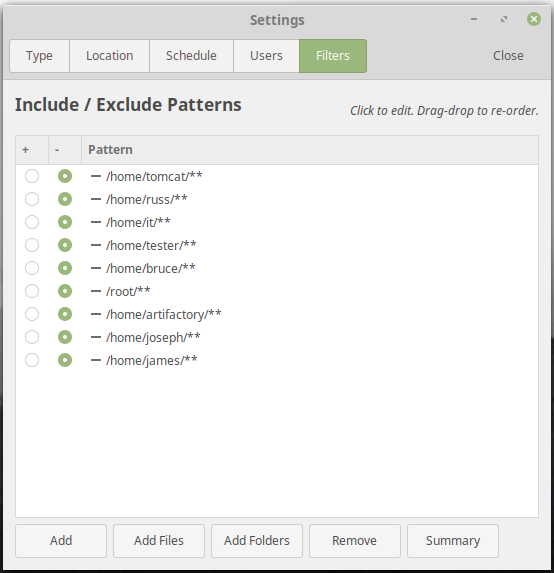
I stumbled upon sshfs, a much easier way to share files between two Linux hosts. Here's my experience:
root@tirion:~# apt-get install sshfs
Reading package lists... Done
Building dependency tree
Reading state information... Done
The following packages were automatically installed and are no longer required:
  alien at debugedit librpmbuild8 librpmsign8 lsb-core lsb-security ncurses-term pax rpm
Use 'apt autoremove' to remove them.
The following NEW packages will be installed:
  sshfs
0 upgraded, 1 newly installed, 0 to remove and 0 not upgraded.
Need to get 41.3 kB of archives.
After this operation, 114 kB of additional disk space will be used.
Get:1 http://archive.ubuntu.com/ubuntu bionic/universe amd64 sshfs amd64 2.8-1 [41.3 kB]
Fetched 41.3 kB in 1s (79.1 kB/s)
Selecting previously unselected package sshfs.
(Reading database ... 337360 files and directories currently installed.)
Preparing to unpack .../archives/sshfs_2.8-1_amd64.deb ...
Unpacking sshfs (2.8-1) ...
Setting up sshfs (2.8-1) ...
Processing triggers for man-db (2.8.3-2ubuntu0.1) ...
russ@tirion:~/Documents$ which sshfs
/usr/bin/sshfs
root@tirion:~# exit
russ@tirion:~$ cd Documents
russ@tirion:~/Documents$ mkdir qrda-i
russ@tirion:~/Documents$ sshfs russ@nargothrond:/home/russ/Documents/qrda-i /home/russ/Documents/qrda-i
russ@nargothrond's password:
russ@tirion:~/Documents$ ll qrda-i/
total 20
drwxrwxr-x 1 russ russ 4096 Sep  4 10:41 ./
drwxr-xr-x 4 russ russ 4096 Sep  4 10:38 ../
-rw-rw-r-- 1 russ russ 9798 Sep  4 10:41 qrda-i-test.xml
This allowed me to access /home/russ/Documents/qrda-i on my development host, nargothrond, as if they were (immediately and already) there on tirion.
...is a controlling interface for the init system and service manager systemd. It initializes userspace components that run after kernel boot as well as manages them on a continual basis. The underlying units or services are represented by files in either /lib/systemd/system (for system-provided) or /etc/systemd/system (for user-provided).
# systemctl start   service                # start            service
# systemctl stop    service                # halt             service
# systemctl status  service                # get status about service
# systemctl enable  service                # enable           service to run at boot
# systemctl disable service                # disable          service from running automatically at boot
# systemctl list-unit-files                # get list of managed services
# systemctl list-unit-files | grep enabled # get list of enabled services1
1 Enabled doesn't mean the service is running, it only means it will run automatically on the next boot. A running service isn't necessarily enabled to run on the next boot.
How to zip up a subdirectory on Linux:
$ zip directory.zip -r directory-name
How to zip up separate files of a subdirectory:
$ zip directory.zip -r filenames
russ@gondolin ~ $ sudo bash
gondolin ~ # apt-get install gdebi-core libxml2:i386 libcanberra-gtk-module:i386 gtk2-engines-murrine:i386 libatk-adaptor:i386
Reading package lists... Done
Building dependency tree
Reading state information... Done
gdebi-core is already the newest version (0.9.5.7xmint4).
libcanberra-gtk-module:i386 is already the newest version (0.30-2.1ubuntu1).
libcanberra-gtk-module:i386 set to manually installed.
gtk2-engines-murrine:i386 is already the newest version (0.98.2-0ubuntu2.2).
gtk2-engines-murrine:i386 set to manually installed.
libxml2:i386 is already the newest version (2.9.3+dfsg1-1ubuntu0.7).
libxml2:i386 set to manually installed.
The following packages were automatically installed and are no longer required:
  bzr libevent-core-2.0-5 libjson-c2:i386 python-bzrlib python3-argcomplete python3-jsonschema
.
.
.
Preparing to unpack .../libatk-adaptor_2.18.1-2ubuntu1_i386.deb ...
Unpacking libatk-adaptor:i386 (2.18.1-2ubuntu1) ...
Processing triggers for libc-bin (2.23-0ubuntu11.2) ...
Setting up libatspi2.0-0:i386 (2.18.3-4ubuntu1) ...
Setting up libatk-bridge2.0-0:i386 (2.18.1-2ubuntu1) ...
Setting up libatk-adaptor:i386 (2.18.1-2ubuntu1) ...
Processing triggers for libc-bin (2.23-0ubuntu11.2) ...
gondolin ~ # wget ftp://ftp.adobe.com/pub/adobe/reader/unix/9.x/9.5.5/enu/AdbeRdr9.5.5-1_i386linux_enu.deb
--2020-09-26 07:40:55--  ftp://ftp.adobe.com/pub/adobe/reader/unix/9.x/9.5.5/enu/AdbeRdr9.5.5-1_i386linux_enu.deb
           => ‘AdbeRdr9.5.5-1_i386linux_enu.deb’
Resolving ftp.adobe.com (ftp.adobe.com)... 193.104.215.67
Connecting to ftp.adobe.com (ftp.adobe.com)|193.104.215.67|:21... connected.
Logging in as anonymous ... Logged in!
==> SYST ... done.    ==> PWD ... done.
==> TYPE I ... done.  ==> CWD (1) /pub/adobe/reader/unix/9.x/9.5.5/enu ... done.
==> SIZE AdbeRdr9.5.5-1_i386linux_enu.deb ... 60085406
==> PASV ... done.    ==> RETR AdbeRdr9.5.5-1_i386linux_enu.deb ... done.
Length: 60085406 (57M) (unauthoritative)

AdbeRdr9.5.5-1_i386linux_enu.deb
100%[====================================================================================>]  57.30M   427KB/s    in 2m 19s

2020-09-26 07:43:16 (422 KB/s) - ‘AdbeRdr9.5.5-1_i386linux_enu.deb’ saved [60085406]
gondolin ~ # gdebi AdbeRdr9.5.5-1_i386linux_enu.deb
Reading package lists... Done
Building dependency tree
Reading state information... Done
Reading state information... Done

Adobe Reader allows you to view navigate and print PDF files. This version adds advanced forms support (save),
    better integration with Adobe Acrobat workflows, customizable toolbars and better overall performance.
Do you want to install the software package? [y/N]:y
Selecting previously unselected package adobereader-enu:i386.
(Reading database ... 426434 files and directories currently installed.)
Preparing to unpack AdbeRdr9.5.5-1_i386linux_enu.deb ...
Unpacking adobereader-enu:i386 (9.5.5) ...
Setting up adobereader-enu:i386 (9.5.5) ...
Processing triggers for man-db (2.7.5-1) ...
gondolin ~ # exit
exit
russ@gondolin ~ $ acroread name-of-file.pdf
...or, launch from desktop Menu (I'm running Cinnamon on Linux Mint). There will be initially a dialog to accept a license agreement (click Accept). If your filesystem explorer doesn't already recognize and do this, it should not be too hard to tell it to prefer Adobe Reader when you double-click or otherwise open a PDF file in the course of working.
Once you have saved the webpage as a PDF file, you can find the result and open it using the Adobe Acrobat Reader application (or any other PDF reader you have installed) to see it. It's usually displayed very pristinely.
russ@gondolin ~/Downloads $ acroread html-file.pdf
Objective: get a list of the latest files to have been modified under the current subdirectory and all subdirectories under it. Here are a couple of attempts.
~/sandboxes/etl/code/windofkeltia $ find . -type f -print0 | xargs -0 stat --format '%Y :%y %n' | sort -nr | cut -d: -f2- | head
2020-11-03 16:07:54.422328595 -0700 ./.idea/workspace.xml
2020-11-03 14:00:46.859548355 -0700 ./hl7v4/src/main/java/com/windofkeltia/fhir/FhirResourceAnalyzer.java
2020-11-03 11:42:10.153379581 -0700 ./hl7v4/src/main/java/com/windofkeltia/processor/ExtractHl7v4.java
2020-11-03 10:31:05.520076781 -0700 ./hl7v4/target/classes/com/windofkeltia/processor/ExtractHl7v4.class
2020-11-03 10:31:05.508076948 -0700 ./hl7v4/target/classes/com/windofkeltia/processor/ExtractHl7v4$2.class
2020-11-03 10:31:05.508076948 -0700 ./hl7v4/target/classes/com/windofkeltia/processor/ExtractHl7v4$1.class
2020-11-03 10:28:57.909853992 -0700 ./hl7v4/target/test-classes/com/windofkeltia/processor/ExtractHl7v4Test.class
2020-11-03 10:28:57.549859006 -0700 ./hl7v4/target/classes/com/windofkeltia/fhir/FhirResourceAnalyzer.class
2020-11-03 10:28:56.217877556 -0700 ./hl7v4/src/test/java/com/windofkeltia/processor/ExtractHl7v4Test.java
2020-11-02 16:27:13.815458133 -0700 ./hl7v4/target/classes/com/windofkeltia/fhir/FhirPeriod.class
~/sandboxes/etl/code/windofkeltia $ find -ctime -1
./.idea
./.idea/workspace.xml
./hl7v4/src/main/java/com/windofkeltia/fhir
./hl7v4/src/main/java/com/windofkeltia/fhir/FhirResourceAnalyzer.java
./hl7v4/src/main/java/com/windofkeltia/processor
./hl7v4/src/main/java/com/windofkeltia/processor/ExtractHl7v4.java
./hl7v4/src/test/java/com/windofkeltia/processor
./hl7v4/src/test/java/com/windofkeltia/processor/ExtractHl7v4Test.java
./hl7v4/target/classes/com/windofkeltia
./hl7v4/target/classes/com/windofkeltia/fhir
./hl7v4/target/classes/com/windofkeltia/fhir/FhirResourceAnalyzer.class
./hl7v4/target/classes/com/windofkeltia/processor
./hl7v4/target/classes/com/windofkeltia/processor/ExtractHl7v4.class
./hl7v4/target/classes/com/windofkeltia/processor/ExtractHl7v4$2.class
./hl7v4/target/classes/com/windofkeltia/processor/ExtractHl7v4$1.class
./hl7v4/target/test-classes/com/windofkeltia/processor
./hl7v4/target/test-classes/com/windofkeltia/processor/ExtractHl7v4Test.class
Good for seeing stuff that's going on...
$ curl -X POST \                             # override default HTTP method GET for POST
       -H 'Content-Type: application/xml' \  # specify XML payload in HTTP header
       --data "@natasha-fatale.xml" \        # send a file as payload; fixes up XML characters
       http://localhost:8080/simple-webapp
~/Downloads/ $ sudo apt-get install p7zip-full
Reading package lists... Done
Building dependency tree
Reading state information... Done
Suggested packages:
  p7zip-rar
The following NEW packages will be installed:
  p7zip-full
0 upgraded, 1 newly installed, 0 to remove and 0 not upgraded.
Need to get 1,187 kB of archives.
After this operation, 4,887 kB of additional disk space will be used.
Get:1 http://archive.ubuntu.com/ubuntu focal/universe amd64 p7zip-full amd64 16.02+dfsg-7build1 [1,187 kB]
Fetched 1,187 kB in 1s (1,577 kB/s)
Selecting previously unselected package p7zip-full.
(Reading database ... 410563 files and directories currently installed.)
Preparing to unpack .../p7zip-full_16.02+dfsg-7build1_amd64.deb ...
Unpacking p7zip-full (16.02+dfsg-7build1) ...
Setting up p7zip-full (16.02+dfsg-7build1) ...
Processing triggers for doc-base (0.10.9) ...
Processing 1 added doc-base file...
Processing triggers for man-db (2.9.1-1) ...
~/Downloads/ $ which 7z
/usr/bin/7z
~/Downloads/ $ 7z x dogfood.7z

7-Zip [64] 16.02 : Copyright (c) 1999-2016 Igor Pavlov : 2016-05-21
p7zip Version 16.02 (locale=en_US.UTF-8,Utf16=on,HugeFiles=on,64 bits,16 CPUs Intel(R) Core(TM) i7-10700K CPU @ 3.80GHz (A0655),ASM,AES-NI)

Scanning the drive for archives:
1 file, 67519 bytes (66 KiB)

Extracting archive: dogfood.7z
--
Path = dogfood.7z
Type = 7z
Physical Size = 67519
Headers Size = 560
Method = LZMA2:1536k
Solid = +
Blocks = 1

Everything is Ok

Folders: 1
Files: 12
Size:       1523539
Compressed: 67519
$ sudo bash
#
root@tirion:/home/russ# fdisk -l
Disk /dev/nvme0n1: 931.53 GiB, 1000204886016 bytes, 1953525168 sectors
Disk model: Samsung SSD 970 EVO Plus 1TB
Units: sectors of 1 * 512 = 512 bytes
Sector size (logical/physical): 512 bytes / 512 bytes
I/O size (minimum/optimal): 512 bytes / 512 bytes
Disklabel type: dos
Disk identifier: 0xc81dd677

Device         Boot   Start        End    Sectors  Size Id Type
/dev/nvme0n1p1 *       2048    1050623    1048576  512M  b W95 FAT32
/dev/nvme0n1p2      1052670 1953523711 1952471042  931G  5 Extended
/dev/nvme0n1p5      1052672 1953523711 1952471040  931G 83 Linux


Disk /dev/sda: 3.65 TiB, 4000787030016 bytes, 7814037168 sectors
Disk model: WDC WD40EZRZ-22G
Units: sectors of 1 * 512 = 512 bytes
Sector size (logical/physical): 512 bytes / 4096 bytes
I/O size (minimum/optimal): 4096 bytes / 4096 bytes


Disk /dev/sdb: 57.72 GiB, 61958258688 bytes, 121012224 sectors
Disk model: Patriot Memory
Units: sectors of 1 * 512 = 512 bytes
Sector size (logical/physical): 512 bytes / 512 bytes
I/O size (minimum/optimal): 512 bytes / 512 bytes
Disklabel type: dos
Disk identifier: 0x1dda4ac4

Device     Boot Start     End Sectors  Size Id Type
/dev/sdb1  *        0 3978175 3978176  1.9G  0 Empty
/dev/sdb2         680    5607    4928  2.4M ef EFI (FAT-12/16/32)
root@tirion:/home/russ# dd bs=4M                                 \\
    if=/home/russ/Downloads/ubuntu-24.04.1-live-server-amd64.iso \\
    of=/dev/sdb                                               \\
    status=progress oflag=sync
2772434944 bytes (2.8 GB, 2.6 GiB) copied, 145 s, 19.1 MB/s
661+1 records in
661+1 records out
2773874688 bytes (2.8 GB, 2.6 GiB) copied, 145.222 s, 19.1 MB/s