
How to Set Up Core JavaServer Faces
Example Code in Eclipse
Russell Bateman
last update: 5 May 2010
|
|
How to Set Up Core JavaServer Faces
|
In celebration of Cinco de mayo, 2010, I thought I'd throw this little how-to together for anyone who cares. It shows you the steps to setting up Geary's and Horstmann's sample code for use in Eclipse (Galileo). It would also be useful as a guide to making Eclipse projects of most any other sample source code. For example, I happen to own the Second Edition of this book, not the Third which covers JSF 2.0 and is already out. (I just haven't yet decided whether it's going to be relevant to me.)
Download the sample code for Core JavaServer Faces, Second Edition from their web site. I'm assuming you have the book, which is available on Safari and elsewhere, and that this exercise is relevant to you. The examples are pretty dang good, often in excruciating and enlightening detail.
Depending on which exercises you undertake, you might want to keep a thumb in this page since there is an errata link containing corrections to some of the code. Don't scratch your head before visiting this link for sample code that doesn't seem to work.
Some examples simply will not work as is. Many of these are discussed in the FAQ at the web site. In addition to those listed, the database-consuming examples will not work because you don't have a database set up, e.g.: for chapter 5's database project. See Appendix A: Setting up a database for these examples.
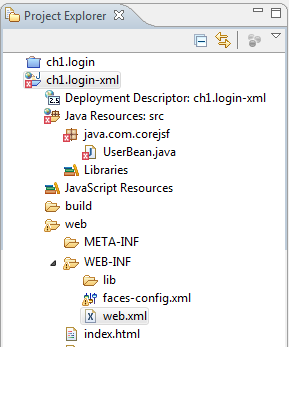
Refactor -> Rename..., then
delete java. from the beginning of the name to leave just
com.corejsf. This action will correct a) the red error box on
UserBean.java and the warning on faces-config.xml where the
package name is wrong and the bean specification inaccurate.
Project -> Clean... and click
OK to rebuild the project.
Run As -> Run on Server (or the debug equivalent).
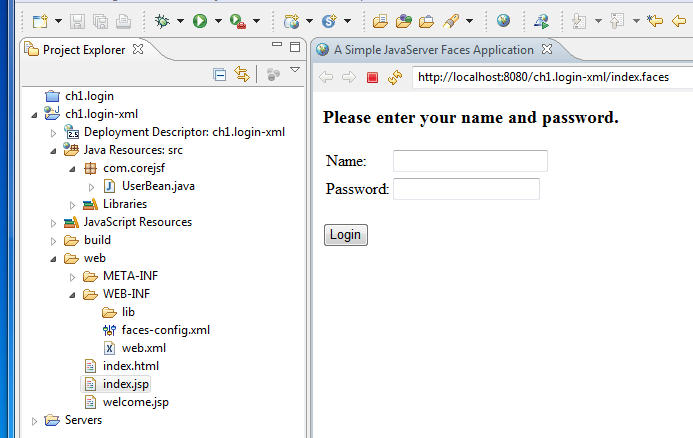
Here's how to run the newly created project:
Run As -> Run on Server.
On page 192 you see a dump of the database contents expected for chapter 5's database example. In this project is a file, web/misc/customers.sql, that can be used to create a table in your favorite database. If you have Eclipse Data Tools Platform plug-ins installed, this is fairly easily set up (see illustration below). Otherwise, you'll have to do it more or less by hand. Obviously, you'll not go to the trouble to do this unless that example interests you particularly.
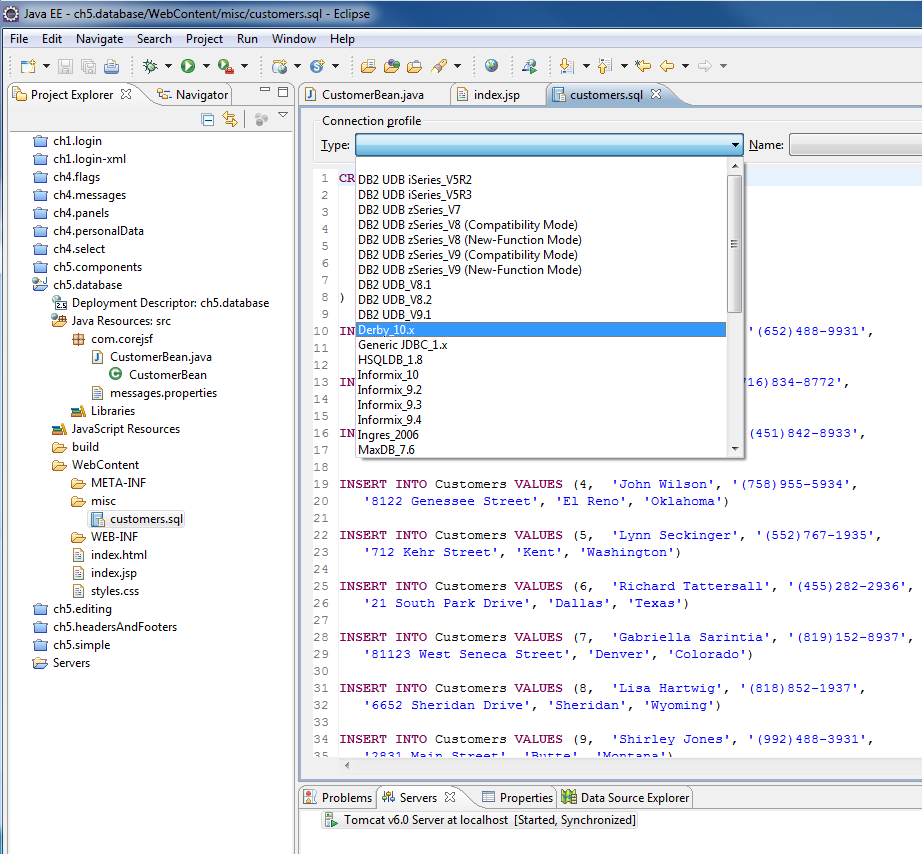
To see how to do this, following the tutorial commented on at Companion Notes on Setting Up and Using Eclipse Data Tools Platform. Transfer those skills over to ch5.database. If you leave the de.vogella.dtp.example project in your Core JSF workspace, you'll be able to modify the SQL controls illustrated above as well as right-click on customers.sql and choose Execute SQL Files to set up the table. You will also have to modify CustomerBean.java to change the database URL to (if using Derby): jdbc:derby://localhost/C:/Users/russ/MyDB (or your equivalent path).
The file web/WEB-INF/web.xml for most projects should appear thus. I
have removed the <description> elements for brevity and
enhanced the <welcome-file-list> over what Eclipse
generated.
<web-app xmlns:xsi="http://www.w3.org/2001/XMLSchema-instance" xmlns="http://java.sun.com/xml/ns/javaee" xmlns:web="http://java.sun.com/xml/ns/javaee/web-app_2_5.xsd" xsi:schemaLocation="http://java.sun.com/xml/ns/javaee http://java.sun.com/xml/ns/javaee/web-app_2_5.xsd" version="2.5">Faces Servlet javax.faces.webapp.FacesServlet 1 Faces Servlet *.faces /faces/* index.html index.htm index.jsp default.html default.htm default.jsp javax.servlet.jsp.jstl.fmt.localizationContext resources.application javax.faces.STATE_SAVING_METHOD client org.apache.myfaces.ALLOW_JAVASCRIPT true org.apache.myfaces.PRETTY_HTML true org.apache.myfaces.DETECT_JAVASCRIPT false org.apache.myfaces.AUTO_SCROLL true faces org.apache.myfaces.webapp.MyFacesServlet 1 faces *.jsf faces *.faces </web-app> org.apache.myfaces.webapp.StartupServletContextListener
The file web/WEB-INF/faces-config.xml for most projects should appear' thus, usually with a different managed-bean name, a different to-view-id name, etc.
<faces-config xmlns="http://java.sun.com/xml/ns/javaee"
	xmlns:xsi="http://www.w3.org/2001/XMLSchema-instance"
	xsi:schemaLocation="http://java.sun.com/xml/ns/javaee
        http://java.sun.com/xml/ns/javaee/web-facesconfig_1_2.xsd"
	version="1.2">


      /index.jsp

         login
         /welcome.jsp


      user
      com.corejsf.UserBean
      session

</faces-config>