Using Subversion and Subclipse
in Windows and Linux Development in Eclipse
Russell Bateman
26 January 2010
last update:
|
|
Using Subversion and Subclipse
|
Table of Contents |
IntroductionThis article explains how to set up and use Subversion on Windows and Linux, and set up and use Subclipse inside the Eclipse IDE to manage source code control. If you're developing on Windows, you'll want to set up the TortoiseSVN software, a Windows client for Subversion access anthat works with the Windows File Explorer. You probably want to set up TortoiseSVN first before continuing. For that, please see Using TortoiseSVN and Subversion before coming back here. On Linux, you should install (if you do not find already installed) an executable named svn and learn to use its command line, which is fairly simple for most operations, to handle Subversion operations on that platform. |
Subclipse is a plug-in for Eclipse that executes Subversion commands from within Eclipse so that you do not need to go out to the filesystem. In my work, I find that I use both svn (or TortoiseSVN) and Subclipse to get my work done. Once my project is set up and I'm actively developing it in Eclipse, I don't use the more formal Subversion clients so much thereafter.
To consume repository files through Eclipse (instead of going to Windows File Explorer), you must set up the Subclipse plug-in software. This tutorial was done on Eclipse Galileo, but I've also done it on Helios whence some of the Linux illustrations.
I've long worked on Linux using Eclipse Europa and Polarion Subversive (and not Subclipse) there. However, I have recently found that I can't seem to make Subversive work; it's too complicated. Subversive works fine although the Linux set-up is more work than the Windows.
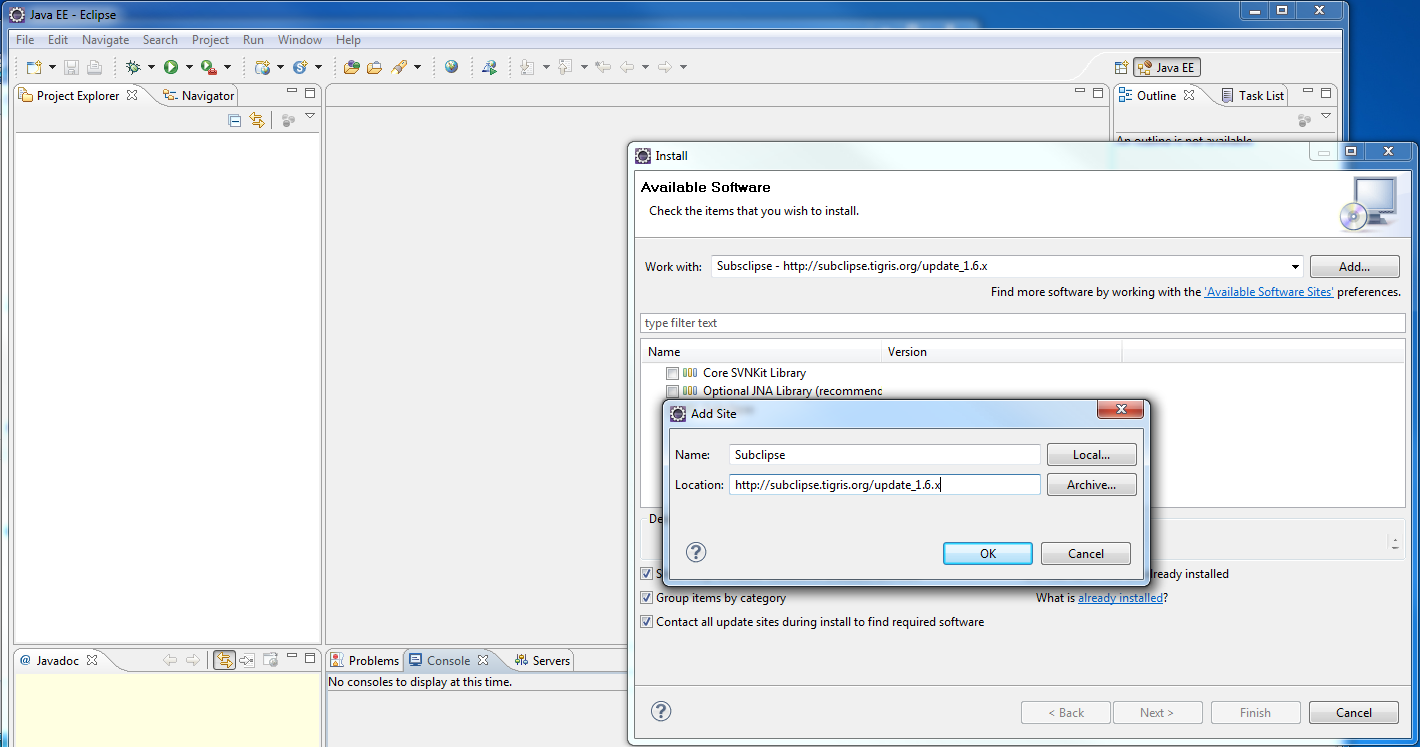
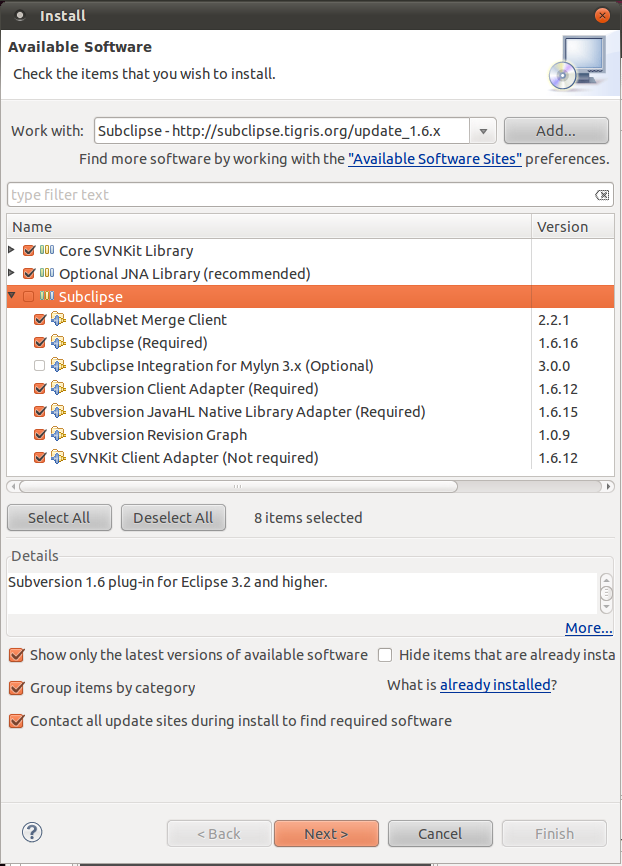
Help -> Install New Software... http://subclipse.tigris.org/update_1.6.x
—the latest for Galileo as of this date of writing. Click OK.
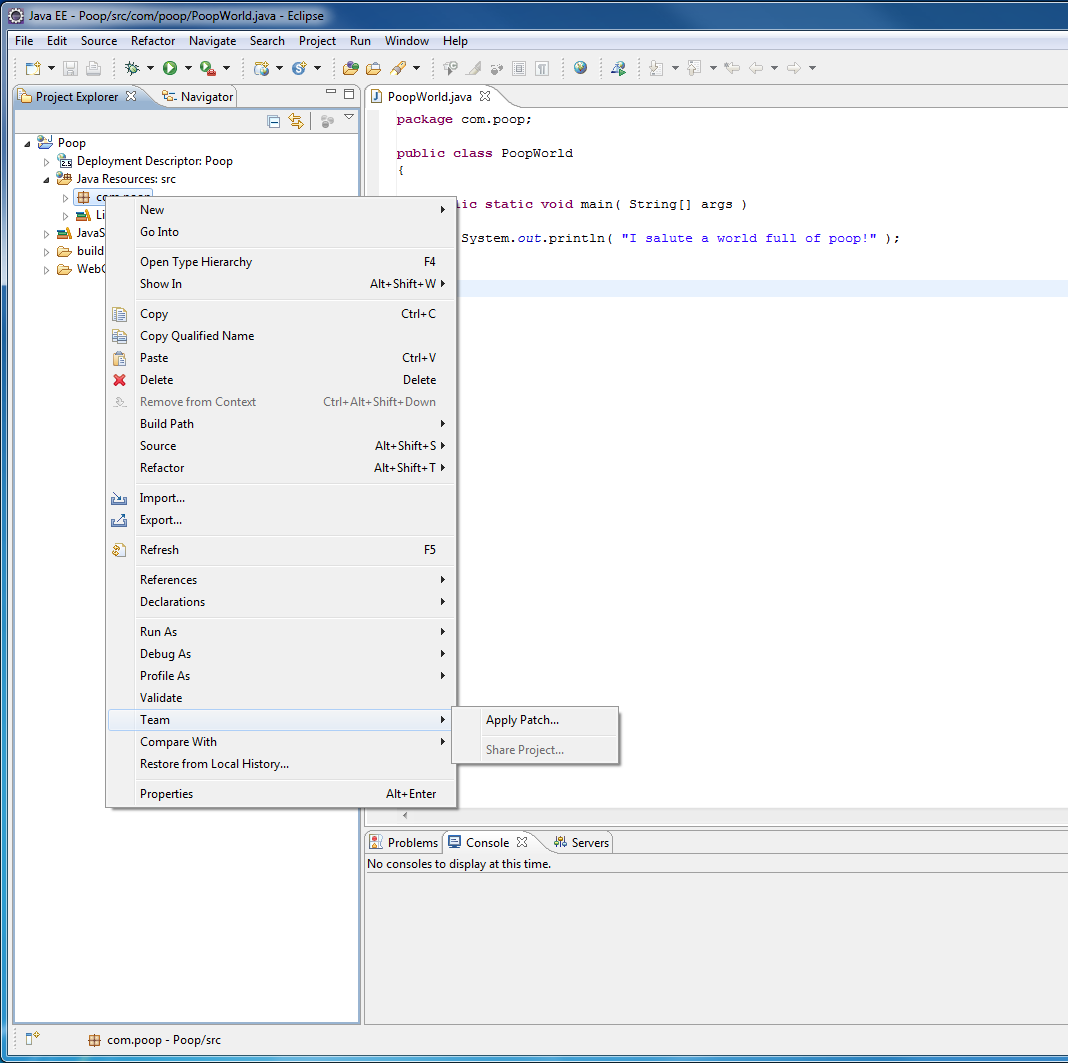
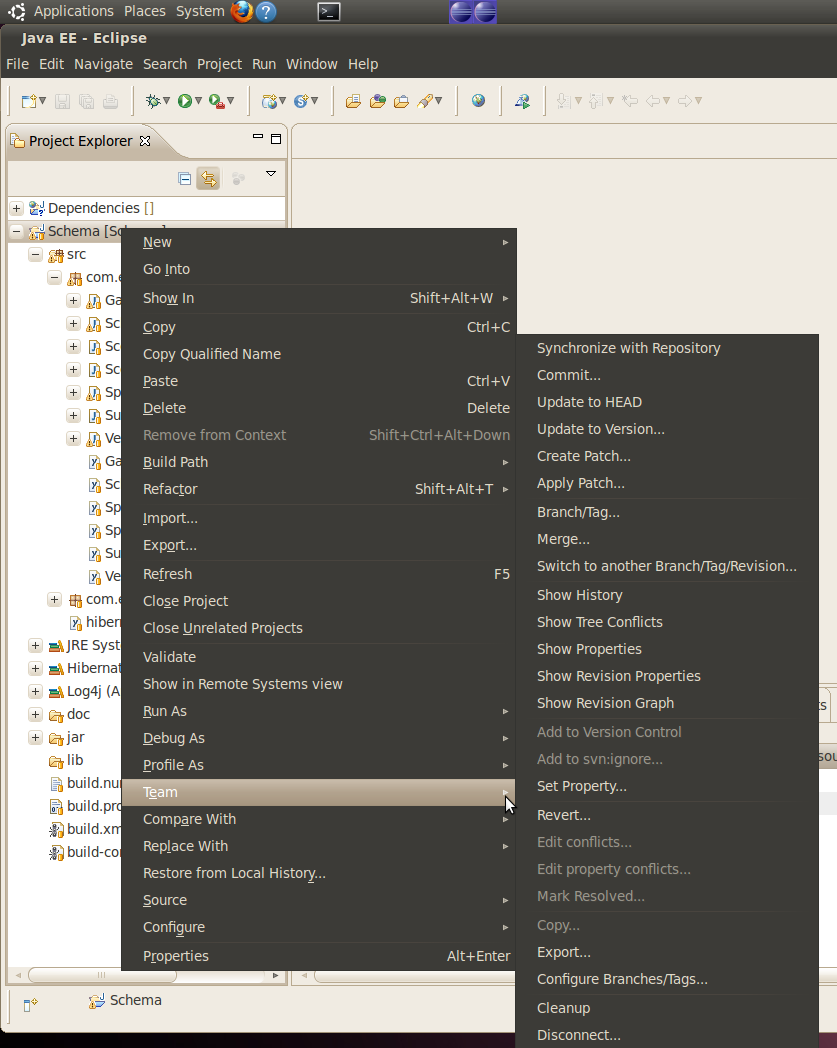
Here, I've created a quick "Hello world" project whose sources I don't yet have in Subversion. The Team menu option is in place, but will not yet allow me to commit, update, etc.
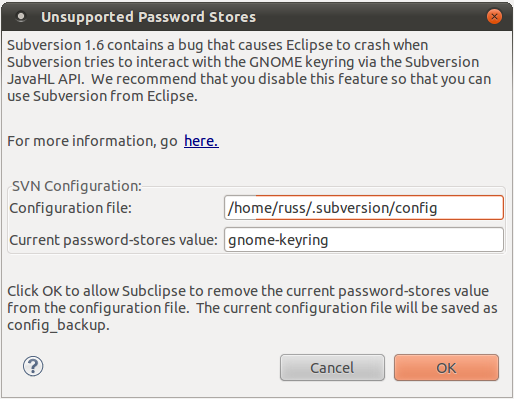
First, understand that if you experience troubles setting up Subclipse on Linux, you might need to spend some time at http://subclipse.tigris.org/wiki/JavaHL. I'm going to try to help you avoid that by what follows.
My success came on Ubuntu (Lucid) after trying trivially to set up Subclipse (just for Windows, which was very trivial), then trying Subversive (which I expected to work), then abandoning Subversive for a second try at Subclipse, which then succeeded. I have decided therefore that Subversive, which I once used on Linux years ago, no longer works and is no longer best practice for Eclipse development on Linux.
# sudo apt-get install libsvn-java
because that installs /usr/lib/jni and a JNI underneath that you need to solve the JavaHL issue. When you've finish, you should see something like:
russ@russ-elite-book:~> ll /usr/lib/jni
total 244
lrwxrwxrwx 1 root root     23 2011-01-12 09:02 libsvnjavahl-1.so -> libsvnjavahl-1.so.0.0.0
lrwxrwxrwx 1 root root     23 2011-01-12 09:02 libsvnjavahl-1.so.0 -> libsvnjavahl-1.so.0.0.0
-rw-r--r-- 1 root root 249560 2010-07-08 09:53 libsvnjavahl-1.so.0.0.0
-Djava.library.path=/usr/lib/jni
to eclipse.ini after the -vmargs line.
http://subclipse.tigris.org/update_1.6.x
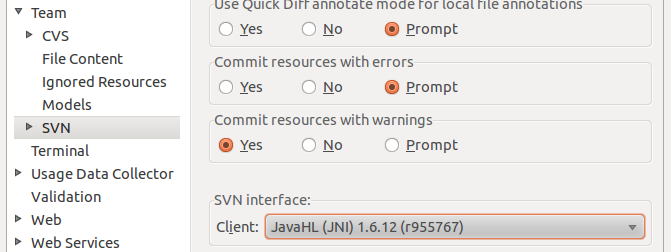
Window -> Preferences -> Team -> SVN. If the
library from the earlier step has not been added to eclipse.ini,
then this step will initially yield an alert to the effect that the
Subversion library doesn't exist. Thereafter, the alert will not appear,
but SVN interface -> Client: will not show that JavaHL (JNI) is
available.
Once everything is copacetic, you should see (in Window -> Preferences):
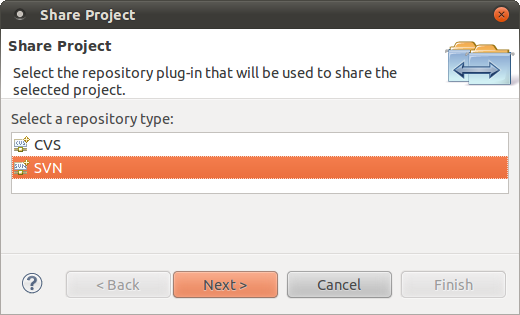
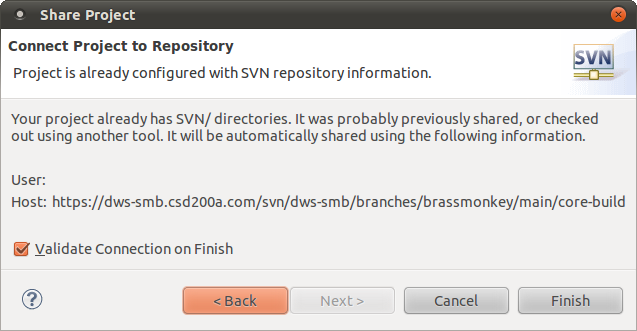
When you right-click on a project (under source control), you'll probably find that the Team menu item has only the items in the Windows illustration above (last step or two). You'll have to choose Share Project... before then seeing the usual, well populated Team menu.
That's all. See the wiki link at the top of these instructions if you can't sort it out. Read carefully. In particular, do Help -> About Eclipse -> Installation Details -> Configuration to see if the -Djava.library.path is set right. If not, it just ain't gonna work.
In my experience, the best way to set up a new project in Eclipse that will be under source code control is at creation. However, my discussion here presupposes that your project exists already (and not that you're creating it from scratch).
This discussion holds completely for Eclipse work on Linux.
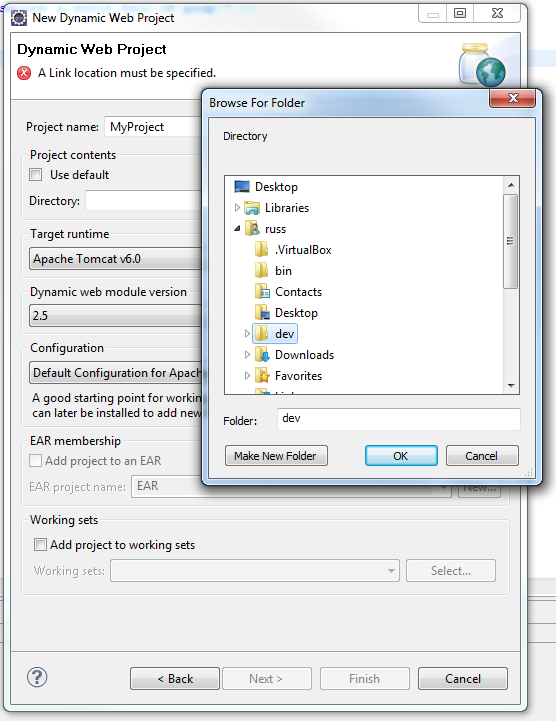
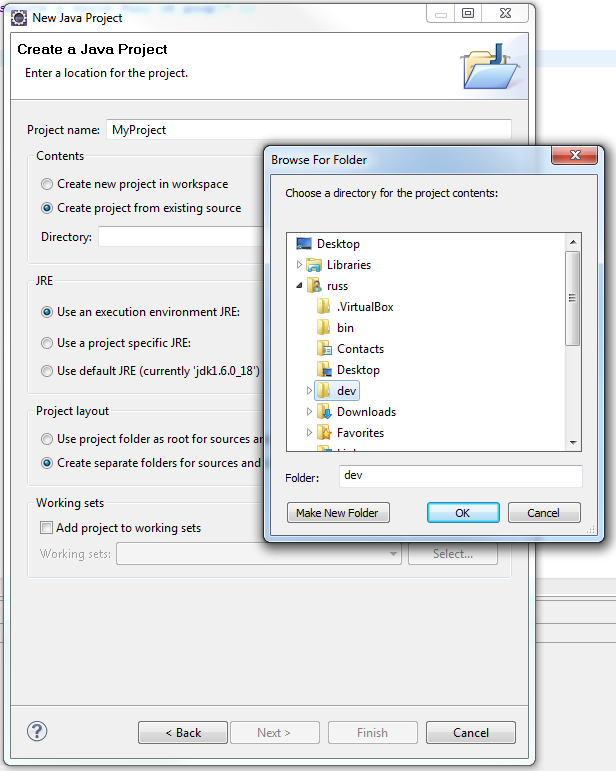
Creating a simple Java (not Dynamic Web) project happens similarly, but the dialog box is slightly different; otherwise, it works identically:
- You will find that you can update your copy of what's in the Subversion
repository using TortoiseSVN or other Windows approaches (on Windows) or
svn on Linux and Macintosh independently of Subclipse (i.e. not using
Team -> Update from inside Eclipse). All you must do in Eclipse
afterward is right-click on the project affected (by the independent filesystem
operation) and choose Refresh.
- You will find Eclipse decoration of files and folders under repository control confusing. When you modify a file, its icon in Package Explorer will be decorated with a black box in the lower right-hand corner. However, other entities you have not (at least not intentionally) modified will begin to sport this decoration too. There are reasons for this, but some you must commit and others you must not if you are collaborating on source-code development with other team members. It's hard to explain this; experience will dictate which ones.
- There are often files in your Eclipse project that you do not want to come under Subversion control. To exclude these, right-click on one, choose Team, then Add to svn:ignore.
- What to add to your Subversion project? Add everything Eclipse creates in your Java Project except the bin subdirectory where generated class files are put. In the Dynamic Web Project, this subdirectory is named build, though you can change that name. You do not need to make these subdirectories for ignore in Subversion, you just don't mark them at all for anything. The files under these subdirectories are (re) generated each and every time you build.
- When collaborating in the team environment, there are two distinct processes including updating to new versions committed by teammates and committing new changes you've made. Obviously, these can conflict. You want to update before modifying and committing. Team -> Synchronize with Respository doesn't solve this, but it does provide a sophisiticated solution to seeing the state of your code respective to the repository. (It also borks any perspective you attempt it in—in my humble opinion.)
Plug-in installation on MyEclipse works a little differently than described
above. Instead of using Eclipse's Help ->
Install New Software, you use Help -> MyEclipse Configuration
Center and wait (a long time) for this feature to load and display.
Once you see that MyEclipse Configuration Center is us, click on the Software tab. You should see, in the left pane, software already in a list, one of which will almost surely be "Subclipse 1.6.x (w/related)".
Right-click on Subclipse and choose Add to Profile.... Just as illustrated above, you'll find you can select which components to include. In my case, I'm not interested in Mylyn and so I don't select it.
At this point, look at the right pane (My Software) and then to the bottom for an Apply button. Click that and, if all goes well, you'll soon have Subversion functionality.
I struggled to solve an error alert:
Validating MyEclipse 8.6 Profile Contains Errors Pulse has been unable to create a plan for MyEclipse 8.6. Please check the details below to diagnose the \ issue. If problems persist, contact Pulse support via the forums at www.poweredbypulse.com. Bad update sites Missing requirement: MyEclipse 8.6 (Profile) 2.0.0.0000000003 \ (com.poweredbypuse.profile-0-rb-578452-1292261416527 2.0.0.0000000003) \ requires 'org.tigris.subversion.clientadapter.feature.feature.group 0.0.0' but it could not be foundThis was solved by ensuring a connection with Pulse. The reason I didn't have one is because MyEclipse does not make use of the Linux host-wide proxy settings. You have to set up the proxy explicitly inside MyEclipse. To get to this, I think I clicked around in the interface on places like the Sync now button for About This Profile.
The other thing I did was to increase myeclipse.ini memory settings as shown below in my -vmargs settings:
before: after: -vmargs -vmargs -Djava.library.path=/usr/lib/jni -Djava.library.path=/usr/lib/jni -Xms256M -Xmx512m -Xmx1024M -XXLMaxPermSize=256m -XXLMaxPermSize=512M -XX:ReservedCodeCacheSize=64m -XX:ReservedCodeCacheSize=64mI can't say that the -Djava.library.path setting was really necessary. It is for Eclipse proper; MyEclipse didn't ask me to put it in, but it's not complaining either and this library is needed.
After setting everything up in MyEclipse, do this for all projects imported out of Subversion:
- In the Project- Package Explorer, select all projects.
- Right-click and choose Team -> Share Project.
- Click SVN.
There's an alert to the effect that you can't share all projects with each other, but a list is provided that you can process one at a time by selecting, then clicking Next or Finish. Each treated project then disappears from the list which diminishes until you've done them all.
Appendix: Some useful links
- http://subclipse.tigris.org/, where you find Subclipse.
- http://subclipse.tigris.org/wiki/JavaHL, where to read about how to set Subclipse up on every platform including specific obstacles for each.
- To attempt Subversive on Linux, see Raymond's blog. Raymond is (probably now) wrong about saying that Subversive has won the battle for the default Eclipse SVN plug-in, but this is the approach I used successfully for 18 months under Europa on openSuSE Linux 10.3. I just don't use it now (Galileo/Helios and Ubuntu).
- A pretty good tutorial on setting up Subclipse in Ganymede... http://www.youtube.com/watch?v=15jItreEX1M&feature=related. One section above is based partly on this tutorial.
- Not so great a tutorial, but... http://www.youtube.com/watch?v=FtDv4OvKt8E